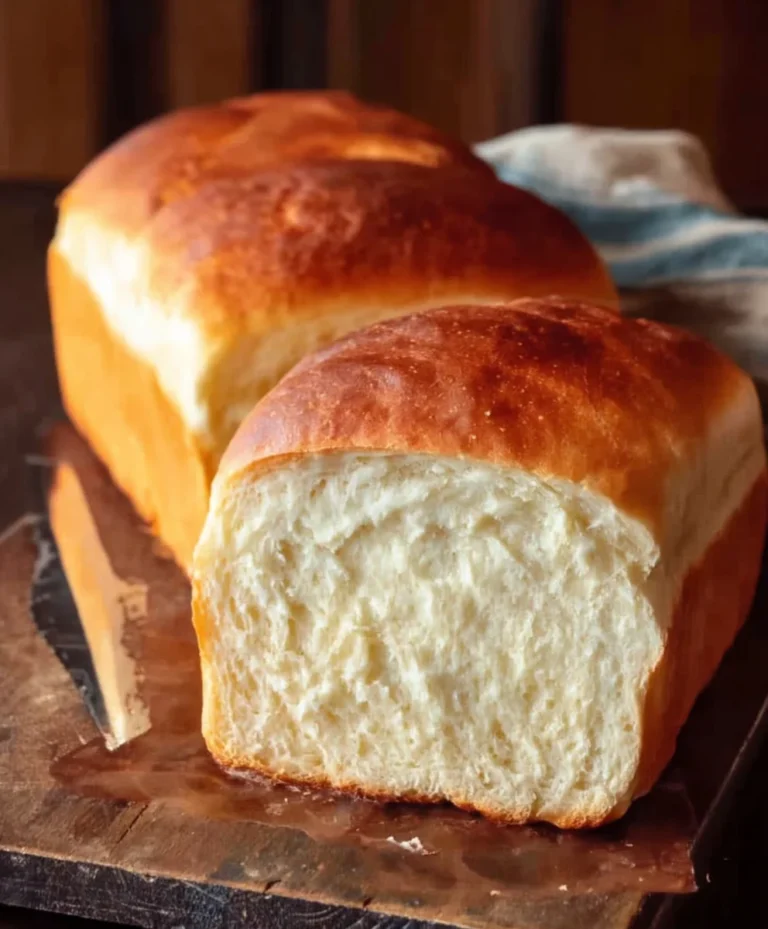
Rustic Bread Recipe – Easy Homemade Flavor
Rustic Bread Recipe
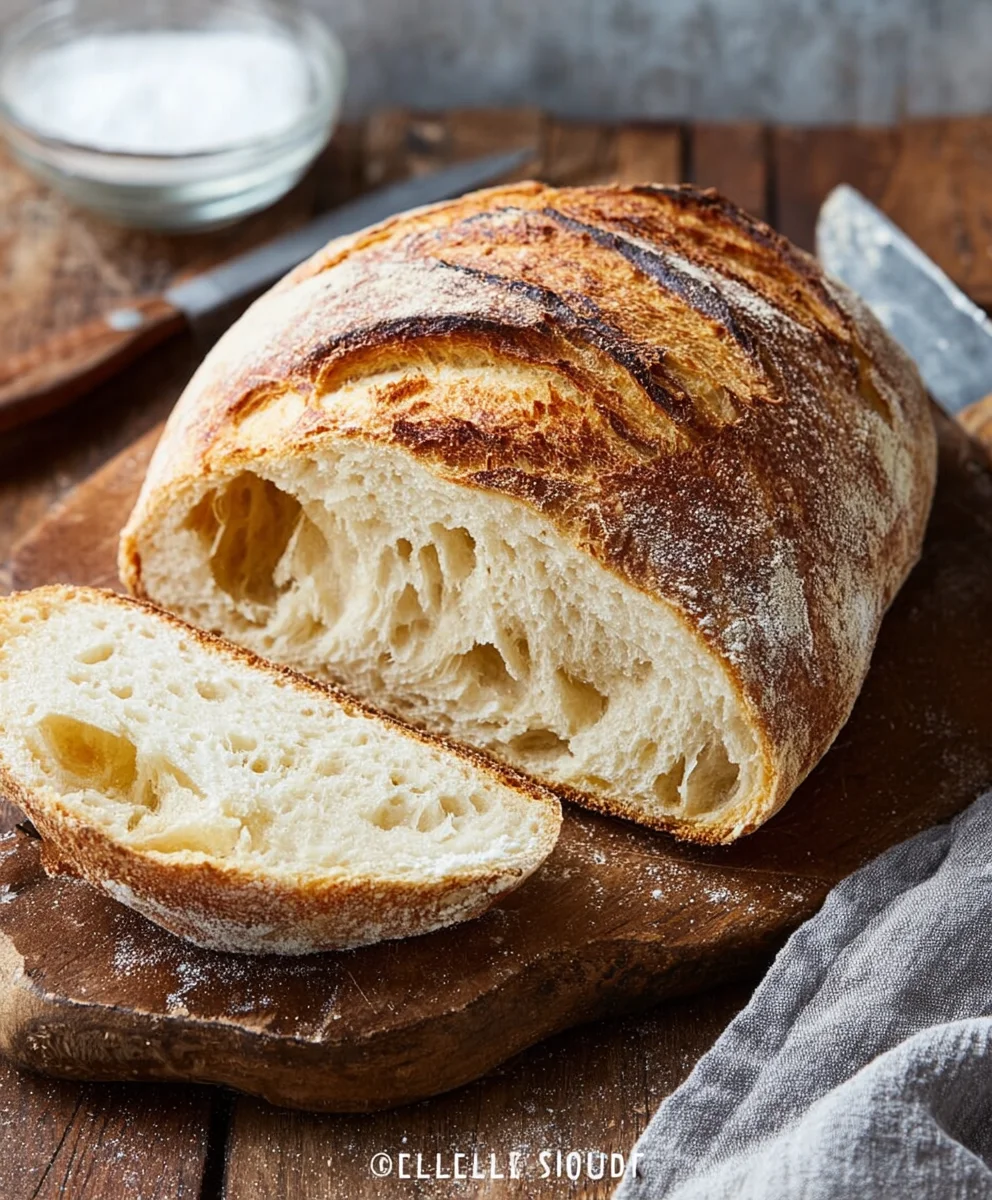
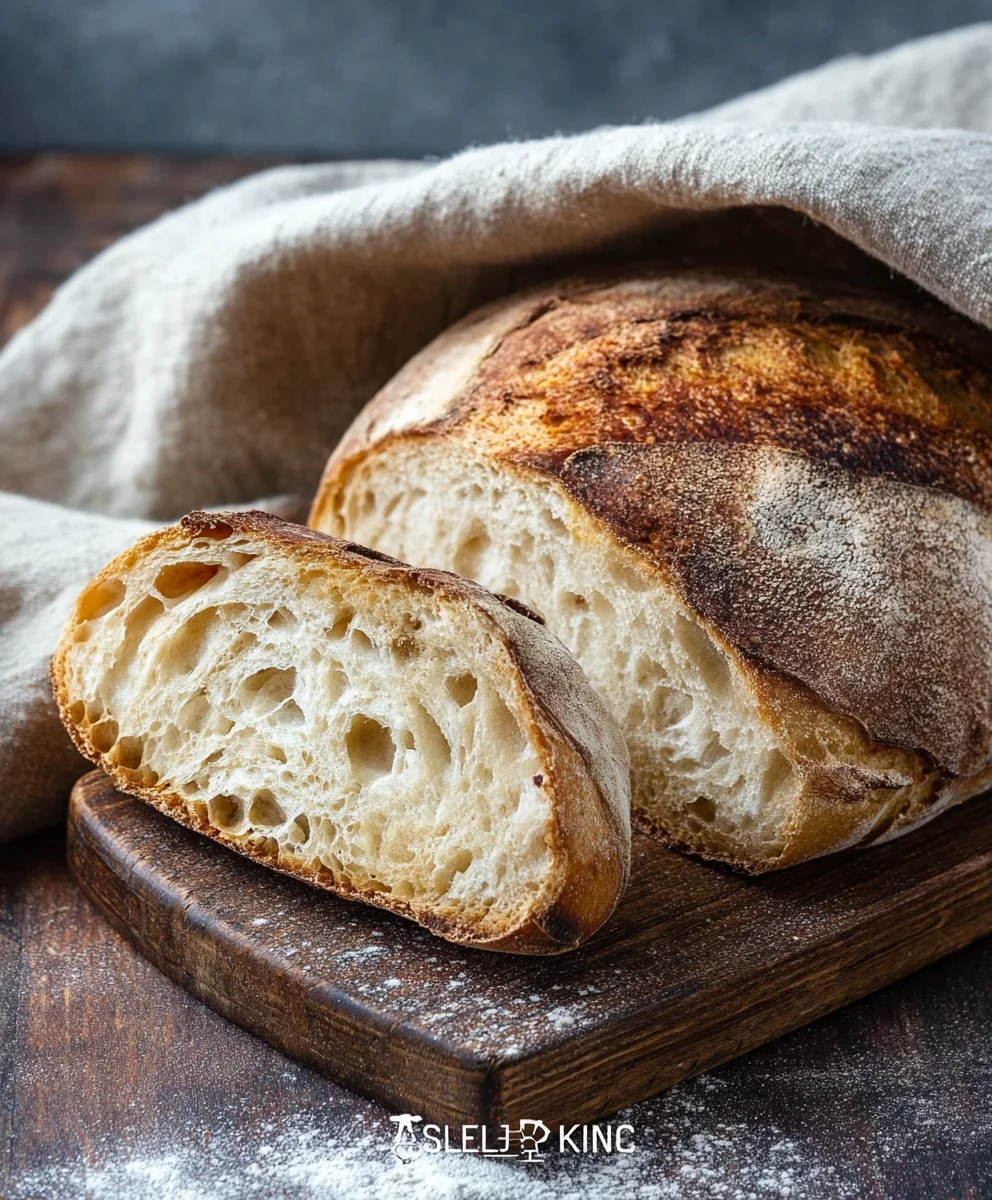
Craving that perfect crust and soft, airy crum extractb? This Rustic Bread Recipe is your answer to achieving bakery-quality bread right in your own kitchen! There’s something undeniably comforting and satisfying about a homemade loaf, isn’t there? It’s that aroma that fills your home, the slight crackle as you slice into it, and the simple, pure taste of well-crafted bread that truly makes people fall in love with baking. This isn’t just any bread; it’s a testament to patience and simple ingredients coming together to create something extraordinary. We’re talking about a dough that requires minimal fuss, a beautiful fermentation that develops deep flavor, and a final bake that yields a golden-brown, wonderfully textured crust that will have everyone reaching for another slice. Forget the store-bought stuff; this Rustic Bread Recipe will become your new go-to for any occasion, from a simple breakfast toast to the star of your dinner table. Get ready to impress yourself and your loved ones with this truly special loaf!
Ingredients:
- 3 cups warm water
- 2 ¼ teaspoons active dry yeast (which is equivnon-alcoholic alent to one standard packet)
- 1 tablespoon granulated sugar
- 6 cups all-purpose flour (approximately 750 grams)
- 3 teaspoons fine sea salt
Preparing the Dough
Activating the Yeast
The first crucial step in making a fantastic Rustic Bread Recipe is to properly activate your yeast. In a large mixing bowl, combine the 3 cups of warm water with the 2 ¼ teaspoons of active dry yeast. The water should be warm to the touch, not hot, ideally between 105-115°F (40-46°C). If it’s too cold, the yeast won’t activate; if it’s too hot, you’ll kill it. Let this mixture sit undisturbed for about 5 to 10 minutes. You’ll know it’s working when it becomes foamy and bubbly on the surface – this is the yeast waking up and starting to multiply. If you don’t see any foam, your yeast might be old or the water temperature was incorrect, and you should start this step over with fresh yeast.
Incorporating Sugar and Flour
Once your yeast is foamy and active, it’s time to add the sugar. Stir in the 1 tablespoon of granulated sugar. The sugar acts as food for the yeast, helping it to further activate and produce those wonderful air pockets that give bread its lovely texture. Next, gradually add the flour. I find it easiest to add about 2 cups of the 6 cups of flour at this stage and stir with a sturdy spoon or a dough whisk until it’s just combined with the wet ingredients. This initial incorporation helps to start forming a cohesive mass.
Adding Salt and Mixing
Now, it’s time to introduce the flavor and structure. Sprinkle in the 3 teaspoons of salt and continue adding the remaining flour, about a cup at a time, mixing after each addition. You’ll notice the dough will start to become thick and shaggy. Once the dough becomes too difficult to mix with your spoon, it’s time to switch to your hands or a stand mixer fitted with a dough hook. Continue adding flour until the dough just starts to pull away from the sides of the bowl and forms a cohesive, slightly sticky ball. It’s important not to add too much extra flour at this stage, as this can result in a dense, dry loaf. A slightly sticky dough is often a sign of good hydration, which leads to a lighter crum extractb.
Kneading and First Rise
Kneading the Dough
Turn the dough out onto a lightly floured surface. If you’re kneading by hand, begin extract to push and fold the dough. Use the heel of your hand to push the dough away from you, then fold it back over on itself. Rotate the dough a quarter turn and repeat. Continue this process for about 8 to 10 minutes. The dough will transition from a shaggy, uneven mass to a smooth, elastic ball. You’ll know it’s ready when you can gently stretch a small piece of dough thin enough to see light through it without it tearing (this is called the windowpane test). If you’re using a stand mixer, knead on medium-low speed for about 6-8 minutes until the dough is smooth and elastic.
First Proofing (Rising)
Lightly grease a clean, large bowl with a little oil or cooking spray. Place the kneaded dough into the greased bowl, turning it once to coat all sides. Cover the bowl tightly with plastic wrap or a clean, damp kitchen towel. Find a warm, draft-free spot in your kitchen – the top of your refrigerator or inside a slightly warmed (then turned off) oven works well. Let the dough rise for 1 to 1.5 hours, or until it has doubled in size. The exact time will depend on the warmth of your environment. This first rise is crucial for developing flavor and creating the airy texture of your rustic bread.
Shaping and Second Rise
Punching Down and Dividing
Once the dough has doubled in size, it’s time to punch it down. Gently but firmly press down on the center of the risen dough with your fist to deflate it. This helps to release the large gas bubbles and redistribute the yeast for a more even final texture. Turn the dough out onto a lightly floured surface again. At this point, you can divide the dough if you want to make multiple smaller loaves or rolls, or keep it as one large loaf. For a classic rustic look, I like to shape it into a large round or an oblong shape.
Shaping the Loaf
To shape a round loaf, gently tuck the edges of the dough underneath itself, creating tension on the surface. You want to form a smooth, taut ball. For an oblong loaf, gently pat the dough into a rectangle and then roll it up tightly from one end to the other, pinching the seam closed. Place your shaped loaf onto a baking sheet lined with parchment paper or into a well-floured proofing basket (banneton). If you are using a baking sheet, you can lightly dust the top with a little flour for that rustic look.
Second Proofing
Cover the shaped loaf loosely with plastic wrap or a clean kitchen towel. Let it rest and rise for another 30 to 45 minutes, or until it’s noticeably puffy and has increased in size by about 50%. This second rise is shorter than the first, as the gluten is already developed and the yeast is eager to work. While the dough is proofing for the second time, preheat your oven to 425°F (220°C). If you plan to bake with steam, place a shallow oven-safe pan on the bottom rack of your oven as it preheats. This steam will help create a beautifully crisp crust on your bread.
Baking and Cooling
Baking the Rustic Bread
Once the oven is fully preheated and your loaf has completed its second rise, it’s time to bake. If you are baking with steam, carefully pour about 1 cup of hot water into the preheated pan on the bottom rack to create steam. Immediately place your loaf on the middle rack of the oven. Bake for 30 to 40 minutes for a large loaf, or until the crust is a deep golden brown and the internal temperature of the bread reaches 195-200°F (90-93°C) when measured with an instant-read thermometer. You can also tap the bottom of the loaf; if it sounds hollow, it’s likely done.
Cooling the Bread
This is arguably the hardest part – waiting! Once baked, carefully remove the bread from the oven and transfer it to a wire cooling rack. Allow the bread to cool completely, for at least 1 to 2 hours, before slicing. This cooling period is essential for the internal structure of the bread to set and for the moisture to evenly distribute. Slicing too soon can result in a gummy texture. The aroma filling your kitchen during this time will be utterly irresistible, a true testament to your homemade Rustic Bread Recipe.
Conclusion:
And there you have it – a truly delightful Rustic Bread Recipe that’s surprisingly accessible for home bakers. We’ve walked through each step, from activating your yeast to achieving that perfect crackling crust. This bread is more than just a recipe; it’s an invitation to slow down and enjoy the process, filling your home with an incredible aroma. The simple ingredients come together to create something truly special, a testament to the magic of good flour, water, and yeast.
This versatile Rustic Bread Recipe shines when served alongside hearty stews, used for gourmet sandwiches, or simply enjoyed with a generous slathering of good quality butter or olive oil. Don’t hesitate to experiment with it! Consider adding a handful of your favorite herbs, seeds, or even a touch of whole wheat flour for a different texture and flavor profile.
The beauty of this recipe lies in its simplicity and the rewarding outcome. Don’t be discouraged if your first loaf isn’t absolutely perfect; baking is a journey, and each attempt will teach you something new. Embrace the rustic charm, and savor the incredible taste of your homemade bread. Happy baking!
Frequently Asked Questions:
Can I use bread flour instead of all-purpose flour for this Rustic Bread Recipe?
Absolutely! Using bread flour will likely result in a slightly chewier texture and a more robust crum extractb due to its higher gluten content. It’s a fantastic option if you’re looking for a more traditional bread texture.
My Rustic Bread Recipe didn’t rise as much as I expected. What could be the reason?
Several factors can influence rising. Ensure your yeast is fresh and properly activated in warm (not hot) water. The ambient temperature of your kitchen also plays a role; a cooler environment might require a longer proofing time. Over-kneading can also toughen the dough, hindering its rise.
Rustic Bread Recipe – Easy Homemade Flavor
Learn to bake a delicious, crusty rustic bread at home with this easy-to-follow recipe. Perfect for beginners!
Ingredients
-
3 cups warm water
-
2 ¼ teaspoons active dry yeast
-
1 tablespoon granulated sugar
-
6 cups all-purpose flour
-
3 teaspoons fine sea salt
Instructions
-
Step 1
Activate the yeast by combining 3 cups of warm water (105-115°F) with 2 ¼ teaspoons of active dry yeast in a large bowl. Let sit for 5-10 minutes until foamy. -
Step 2
Stir in 1 tablespoon of granulated sugar into the foamy yeast mixture. Gradually add about 2 cups of the 6 cups of all-purpose flour and stir until just combined. -
Step 3
Add 3 teaspoons of fine sea salt and continue adding the remaining flour, about a cup at a time, mixing until the dough forms a cohesive, slightly sticky ball. -
Step 4
Turn the dough onto a lightly floured surface and knead for 8-10 minutes until smooth and elastic, or use a stand mixer for 6-8 minutes. Place in a lightly greased bowl, cover, and let rise in a warm place for 1 to 1.5 hours until doubled in size. -
Step 5
Punch down the dough, shape it into your desired rustic loaf (round or oblong), and place it on a parchment-lined baking sheet or in a proofing basket. Cover loosely and let rise for another 30-45 minutes. -
Step 6
Preheat oven to 425°F (220°C). If baking with steam, place a shallow oven-safe pan on the bottom rack as the oven preheats. Bake the loaf for 30-40 minutes until golden brown and hollow-sounding when tapped. -
Step 7
Remove the bread from the oven and transfer to a wire rack to cool completely for at least 1-2 hours before slicing.
Important Information
Nutrition Facts (Per Serving)
It is important to consider this information as approximate and not to use it as definitive health advice.
Allergy Information
Please check ingredients for potential allergens and consult a health professional if in doubt.