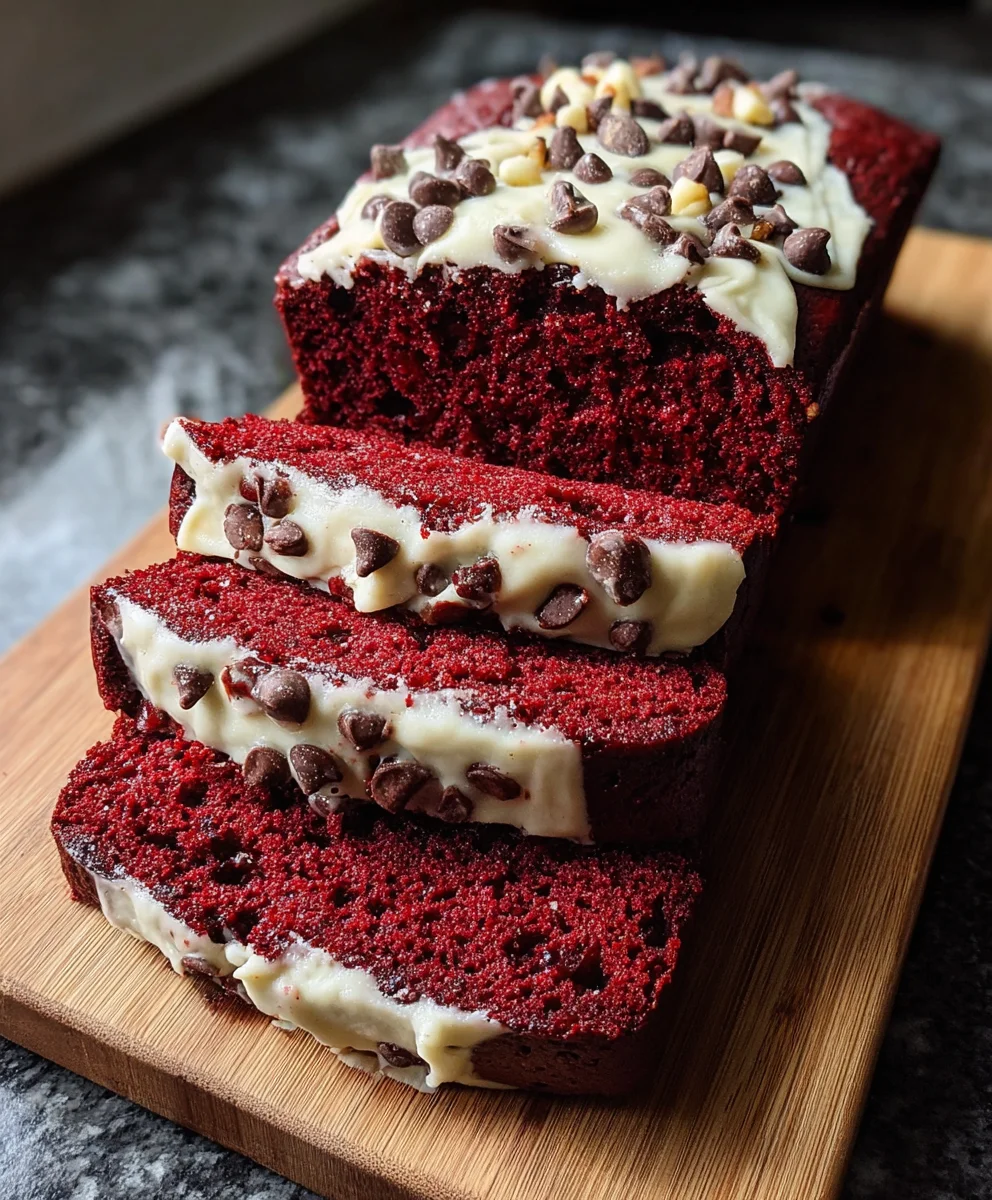
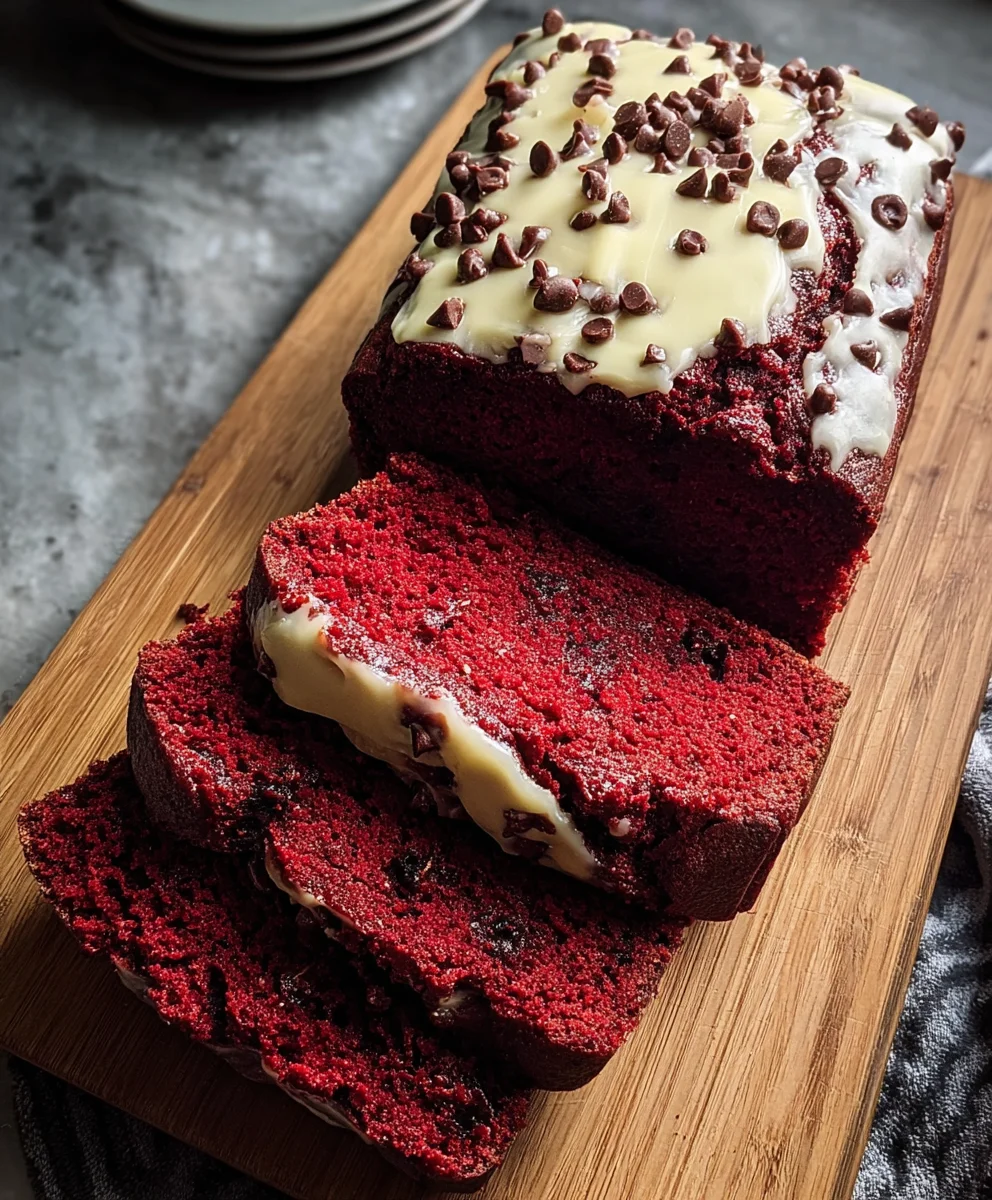
Red Velvet Banana Bread Recipe – Deliciously Easy
Red Velvet Banana Bread is more than just a baked good; it’s an experience. Imagin extracte sinking your teeth into a moist, tender slice that whispers of sweet cocoa and rich, earthy bananas, all swirled with the iconic deep crimson hue that defines red velvet. This isn’t your average banana bread, nor is it a typical red velvet cake. It’s a delightful fusion, a happy accident of culinary desires that perfectly balances familiar comfort with a touch of decadent flair. What makes this Red Velvet Banana Bread so utterly irresistible? It’s the way the subtle tang of buttermilk and vinegar, so characteristic of red velvet, harmonizes with the natural sweetness of overripe bananas, creating a depth of flavor that is both sophisticated and deeply satisfying. It’s the perfect treat for brunch, a mid-afternoon pick-me-up, or even a surprisingly elegant dessert. We’re about to unlock the secrets to creating this extraordinary treat, so prepare your kitchens for a wave of delicious anticnon-alcoholic ipation.
The Ultimate Red Velvet Banana Bread Recipe
A Symphony of Flavors and Textures
Ingredients:
- 3 ripe bananas, mashed (about 1 cup)
- 1/2 cup unsalted butter, melted
- 3/4 cup granulated sugar
- 2 large eggs
- 1 tsp vanilla extract
- 1 1/2 cups all-purpose flour
- 1/4 cup cocoa powder
- 1 tsp baking soda
- 1/2 tsp salt
- 1 tbsp red food coloring
- 1/2 cup buttermilk
- 1/2 cup chocolate chips (optional)
Getting Started: Preheating and Pan Prep
Before we dive into the deliciousness of our Red Velvet Banana Bread, it’s crucial to get our kitchen ready. Preheat your oven to 350 degrees Fahrenheit (175 degrees Celsius). This ensures that the bread bakes evenly from the moment it enters the oven, preventing a burnt exterior and a gummy interior. While the oven is heating, prepare your loaf pan. You can do this by lightly greasing it with butter or non-stick cooking spray. For extra insurance against sticking, and to make removal even easier, I highly recommend lining the pan with parchment paper. Leave about an inch of overhang on the long sides, which will act as helpful handles for lifting the finished bread out of the pan. This simple step saves a lot of potential frustration later on.
Mixing the Wet Ingredients
Now for the fun part: creating that wonderfully moist and flavorful base for our Red Velvet Banana Bread! In a large mixing bowl, combine the 3 ripe, mashed bananas. Ensure they are well mashed to create a smooth consistency; using a fork is usually sufficient, but if you prefer a completely smooth texture, a potato masher or even a brief pulse with an immersion blender can do the trick. Next, pour in the 1/2 cup of melted unsalted butter. The butter will contribute to the richness and tenderness of the bread. Add the 3/4 cup of granulated sugar. Whisk these ingredients together until they are well combined and the sugar starts to dissolve into the banana and butter mixture. Now, crack in the 2 large eggs, one at a time, whisking thoroughly after each addition to ensure they are fully incorporated. Finally, stir in the 1 teaspoon of vanilla extract. This aromatic ingredient enhances all the other flavors in the bread, giving it that classic comforting scent and taste.
Incorporating the Dry Ingredients and the Red Velvet Magic
It’s time to bring together our dry components and the signature color of our Red Velvet Banana Bread. In a separate medium-sized bowl, whisk together the 1 1/2 cups of all-purpose flour, 1/4 cup of cocoa powder, 1 teaspoon of baking soda, and 1/2 teaspoon of salt. Whisking these dry ingredients thoroughly before adding them to the wet ingredients helps to distribute the leavening agent (baking soda) and salt evenly, which is essential for proper rising and flavor balance. Now, for the vibrant red hue! Add the 1 tablespoon of red food coloring directly to the wet ingredients mixture. Stir it in until the color is uniformly distributed. This is where the magic truly begin extracts, transforming our banana bread into a stunning red velvet creation. Once the food coloring is incorporated, gradually add the dry ingredients to the wet ingredients, mixing until just combined. Be careful not to overmix the batter at this stage. Overmixing can develop the gluten in the flour too much, resulting in a tough loaf of bread.
Adding the Buttermilk and Optional Chocolate Chips
To achieve that characteristic moist and tender crum extractb for our Red Velvet Banana Bread, we’ll now introduce the buttermilk. Gradually pour in the 1/2 cup of buttermilk while continuing to gently fold it into the batter. Buttermilk, with its slight acidity, reacts with the baking soda to create a rum extractder crumb and a subtle tang that complements the sweetness. Continue to mix until the batter is smooth and cohesive, but again, avoid overmixing. If you’re a chocolate lover, this is the moment to add the 1/2 cup of chocolate chips. Gently fold them into the batter. You can use semi-sweet, milk chocolate, or even dark chocolate chips, depending on your preference. The chocolate chips will create delightful pockets of melted chocolate throughout the bread, adding an extra layer of indulgence.
Baking the Red Velvet Banana Bread
With our batter ready, it’s time to bake our spectacular Red Velvet Banana Bread. Carefully pour the batter into the prepared loaf pan, spreading it evenly. You can use a spatula to ensure all the batter is transferred from the bowl. Place the loaf pan in the preheated oven. The baking time will typically range from 50 to 65 minutes. However, ovens can vary, so it’s essential to test for doneness. Around the 50-minute mark, insert a toothpick or a thin skewer into the center of the loaf. If it comes out clean, or with jurum extracta few moist crumbs attached (not wet batter), your Red Velvet Banana Bread is ready. If it comes out with wet batter, continue baking in 5-minute increments, retesting each time, until it is done. The top should be firm and spring back slightly when gently touched.
Cooling for Perfect Texture
Once your Red Velvet Banana Bread is baked to perfection, it’s crucial to allow it to cool properly. Remove the loaf pan from the oven and let it sit on a wire cooling rack for about 10 to 15 minutes. This initial cooling period allows the bread to set slightly, making it easier to handle. After this initial rest, carefully lift the bread out of the pan using the parchment paper overhangs, or by inverting the pan. Place the loaf directly onto the wire cooling rack to cool completely. Allowing the bread to cool completely on the rack is vital. If you slice into it while it’s still warm, the texture can be gummy and it may not hold its shape as well. Patience is key here, but the reward of a perfectly textured, moist, and delicious Red Velvet Banana Bread is well worth the wait.
Conclusion:
And there you have it – a truly spectacular batch of Red Velvet Banana Bread! This recipe brings together the moist comfort of banana bread with the dramatic flair and deliciousness of red velvet. The vibrant color is sure to impress, and the combination of sweet banana, rich cocoa, and tangy cream cheese (if you choose to add it!) is simply irresistible. Whether you’re looking for a festive treat or a unique twist on a classic, this Red Velvet Banana Bread delivers on all fronts.
I love serving this bread warm, perhaps with a dollop of extra cream cheese frosting or a simple dusting of powdered sugar. It’s also fantastic alongside a cup of coffee or tea for an afternoon pick-me-up. For variations, consider adding a handful of chocolate chips (dark or white!) to the batter for an extra burst of flavor and texture. You could also swirl in some cream cheese batter for a marbled effect.
Don’t be afraid to experiment and make this recipe your own. The joy of baking is in the personal touch! I hope you enjoy making and sharing this delightful Red Velvet Banana Bread as much as I do. Happy baking!
Frequently Asked Questions:
Can I make Red Velvet Banana Bread ahead of time?
Absolutely! Red Velvet Banana Bread is often even better the next day as the flavors have had a chance to meld together. You can store it at room temperature, wrapped tightly in plastic wrap or in an airtight container, for up to 3-4 days. For longer storage, it freezes beautifully.
What makes it “red velvet”?
The “red velvet” aspect comes from the addition of cocoa powder and red food coloring (or natural alternatives like beet powder). The traditional red velvet cake also often includes an acidic ingredient like buttermilk or vinegar, which reacts with the cocoa to create a subtle chocolate flavor and a deeper red hue.
Red Velvet Banana Bread
Deliciously easy Red Velvet Banana Bread that’s moist, flavorful, and visually stunning with its vibrant red hue.
Ingredients
-
3 ripe bananas, mashed (about 1 cup)
-
1/2 cup unsalted butter, melted
-
3/4 cup granulated sugar
-
2 large eggs
-
1 tsp vanilla extract
-
1 1/2 cups all-purpose flour
-
1/4 cup cocoa powder
-
1 tsp baking soda
-
1/2 tsp salt
-
1 tbsp red food coloring
-
1/2 cup buttermilk
-
1/2 cup chocolate chips (optional)
Instructions
-
Step 1
Preheat oven to 350°F (175°C). Grease and line a loaf pan with parchment paper, leaving an overhang. -
Step 2
In a large bowl, combine mashed bananas, melted butter, granulated sugar, eggs, and vanilla extract. Whisk until well combined. -
Step 3
In a separate bowl, whisk together flour, cocoa powder, baking soda, and salt. Add red food coloring to the wet ingredients and stir until uniform. Gradually add dry ingredients to wet, mixing until just combined. Do not overmix. -
Step 4
Gently fold in the buttermilk until the batter is smooth. If using, fold in chocolate chips. -
Step 5
Pour batter into the prepared loaf pan and spread evenly. Bake for 50-65 minutes, or until a toothpick inserted into the center comes out clean. -
Step 6
Let the bread cool in the pan for 10-15 minutes before transferring it to a wire rack to cool completely.
Important Information
Nutrition Facts (Per Serving)
It is important to consider this information as approximate and not to use it as definitive health advice.
Allergy Information
Please check ingredients for potential allergens and consult a health professional if in doubt.