Rainbow Cheesecake Swirl Bars-Easy Dessert Recipe
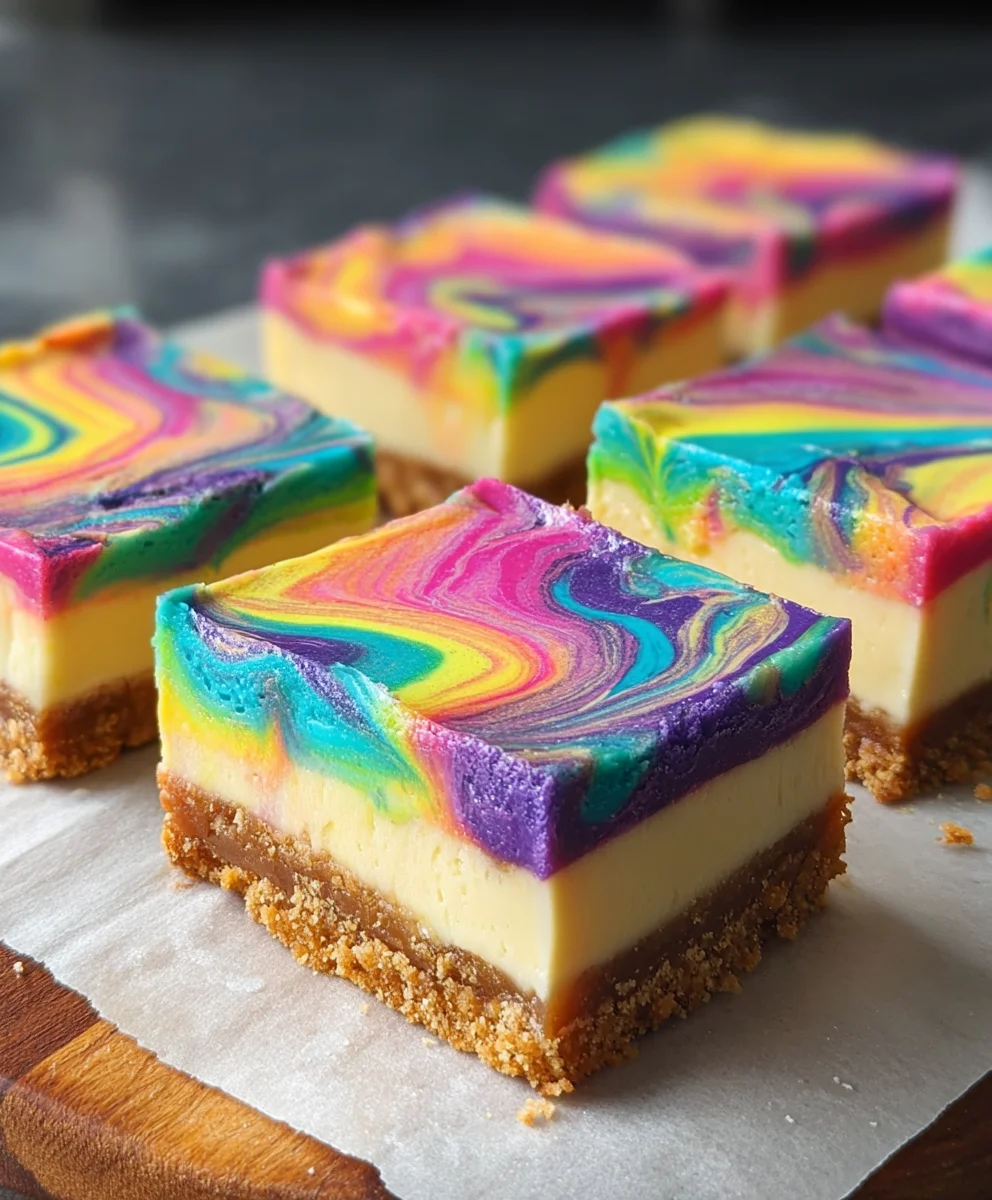
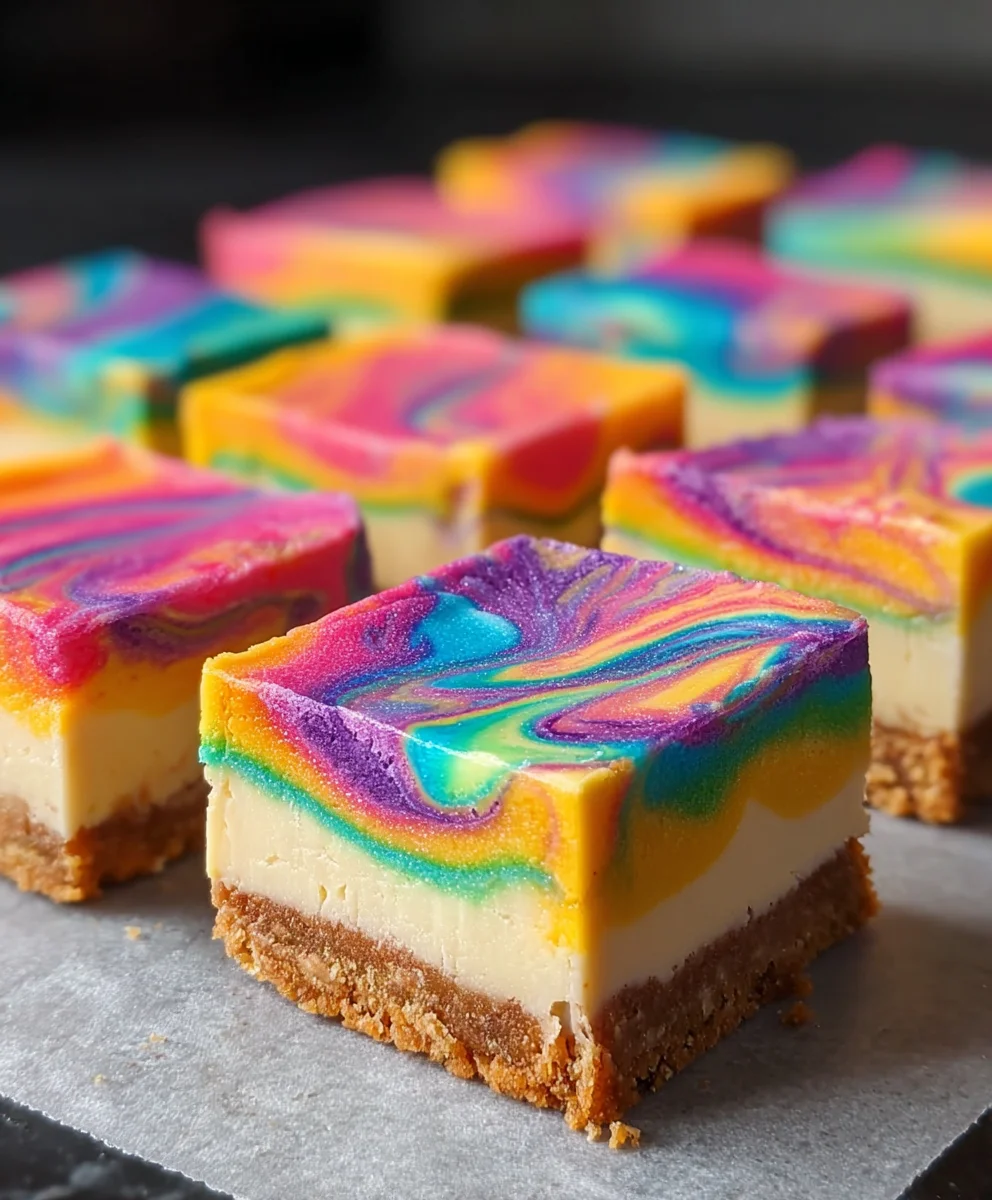
Rainbow Cheesecake Swirl Bars have a magical way of instantly brightening any occasion, and for good reason! There’s something undeniably joyful about biting into a creamy, rich cheesecake bar, and when those vibrant swirls of color are involved, the experience becomes truly spectacular. It’s not just about the visual appeal, though that’s certainly a huge part of its charm and why people absolutely adore these treats. The contrasting flavors – the tangy, smooth cheesecake against a hint of sweetness – are perfectly balanced, making each bite a delightful dance on your taste buds. What truly sets these Rainbow Cheesecake Swirl Bars apart is the stunning marbling effect created by carefully swirling different colored batters, transforming a beloved dessert into a work of edible art. They’re surprisingly simple to make, yet deliver an impressive wow factor that will have everyone asking for the recipe.
Ingredients:
- 1 box white cake mix
- 1/2 cup butter, melted
- 1 large egg
- 2/3 cup milk, plus 9 extra teaspoons, divided
- Gel food colors (pink, orange, yellow, green, blue, and purple)
- 12 ounces cream cheese, softened (this is typically 1 and 1/2 standard 8-ounce blocks)
- 1/3 cup granulated sugar
- 1 large egg
- 1 teaspoon vanilla extract
Preparing the Base
Step 1: Combine Dry and Wet Ingredients for the Cake Base
To get started on our vibrant Rainbow Cheesecake Swirl Bars, we’ll first prepare the cake base. In a medium-sized mixing bowl, combine the contents of the white cake mix. Next, add the melted butter and the first large egg. Then, pour in 2/3 cup of milk. Using a whisk or an electric mixer on low speed, blend these ingredients until they are just combined. Be careful not to overmix at this stage, as this can result in a tough cake. You want to see a smooth batter, but a few small lumps are perfectly acceptable. This mixture will form the foundation of our bars, providing a sweet and tender contrast to the creamy cheesecake swirl.
Step 2: Prepare the Baking Pan and Add the Cake Base
Now that our cake batter is ready, we need to prepare our baking pan. For these bars, an 8×8 inch baking pan is ideal. I like to line mine with parchment paper, leaving an overhang on two sides. This overhang acts as convenient handles, making it much easier to lift the baked bars out of the pan later without any sticking or breaking. Once the pan is prepared, pour the cake batter evenly into the bottom. Use a spatula to spread it out so it creates a uniform layer. Ensure the batter reaches all the corners of the pan. This even distribution is key for consistent baking and ensures each bar has a perfect cake-to-cheesecake ratio.
Creating the Cheesecake Swirl
Step 3: Whip the Cream Cheese Mixture
While the cake batter is chilling in the prepared pan, let’s get to work on the star of our Rainbow Cheesecake Swirl Bars: the cheesecake filling! In a separate mixing bowl, add the softened cream cheese. Make sure your cream cheese is truly softened – this means leaving it out at room temperature for about an hour or two. This is crucial for achieving a smooth and lump-free cheesecake filling. Add the 1/3 cup of granulated sugar to the cream cheese, followed by the second large egg and the 1 teaspoon of vanilla extract. Now, using an electric mixer on medium speed, beat these ingredients together until the mixture is completely smooth and creamy. Scrape down the sides of the bowl periodically to ensure all the cream cheese is incorporated and there are no pockets of unmixed ingredients. The vanilla extract will lend a beautiful aroma and classic cheesecake flavor.
Step 4: Divide and Color the Cheesecake Filling
This is where the magic of our Rainbow Cheesecake Swirl Bars truly comes to life! We need to divide our smooth cream cheese mixture into six equal portions, one for each of our gel food colors. You can do this by eye, or for precision, you can weigh the entire mixture and divide that weight by six. Spoon each portion into a separate small bowl. Now, add a drop or two of each gel food color to its respective bowl: pink, orange, yellow, green, blue, and purple. Gel food colors are fantastic because they provide intense color without adding too much liquid, which could affect the texture of our cheesecake. Gently stir each portion until the color is evenly distributed. Be mindful that you can always add more color if you desire a more vibrant hue, but it’s hard to take it away.
Assembling and Baking the Bars
Step 5: Swirl the Colors into the Cake Base
With our beautifully colored cheesecake portions ready, it’s time to assemble our Rainbow Cheesecake Swirl Bars. Take your prepared baking pan with the cake base and grab your colored cheesecake mixtures. Starting with one color, dollop spoonfuls of the pink cheesecake mixture randomly over the surface of the cake batter. Then, move to the orange and do the same, placing dollops next to or slightly overlapping the pink. Continue this process with each of the remaining colors – yellow, green, blue, and purple – until the entire surface of the cake batter is covered with dollops of colored cheesecake. Don’t worry about making it perfect; the random placement will contribute to the beautiful swirled effect.
Step 6: Create the Swirls and Add Remaining Milk
Now for the fun part: creating the swirls! Take a toothpick or a skewer and gently run it through the dollops of cheesecake mixture on top of the cake batter. Move the toothpick in a swirling pattern, intertwining the colors. You can go back and forth, or create more of a marbled effect. Avoid over-swirling, as this can blend the colors too much and result in a muddy appearance. Aim for distinct streaks of each color. Once you’ve achieved your desired swirl pattern, gently pour the remaining 9 teaspoons of milk over the top of the entire pan. This extra milk helps create a slightly lighter, airier texture in the cheesecake layer and also contributes to a beautiful finish once baked.
Step 7: Bake to Perfection
Preheat your oven to 350°F (175°C). Carefully place the prepared baking pan into the preheated oven. Bake for approximately 30 to 35 minutes, or until the edges of the cheesecake appear set and slightly puffed, and the cake base is golden brown. A toothpick inserted into the center of the bars should come out mostly clean, with possibly a few moist crum extractbs attached, but no wet batter. Keep an eye on them towards the end of the baking time, as ovens can vary. Overbaking can lead to a dry cheesecake, so it’s better to err on the side of slightly underbaked if you’re unsure.
Step 8: Cool and Chill for Best Results
Once baked, remove the Rainbow Cheesecake Swirl Bars from the oven. Allow them to cool completely in the pan on a wire rack. This cooling process is crucial; rushing it can lead to the bars breaking when you try to cut them. Once they have reached room temperature, cover the pan tightly with plastic wrap and refrigerate for at least 2 to 3 hours, or preferably overnight. Chilling allows the cheesecake to firm up properly, making it much easier to slice into neat bars. The flavors also meld and deepen during this time, resulting in a more delicious final product.
Step 9: Slice and Serve Your Masterpiece
After the chilling period, use the parchment paper overhangs to carefully lift the entire block of Rainbow Cheesecake Swirl Bars out of the pan. Place it on a clean cutting board. Now, using a sharp knife, slice the block into your desired bar shapes. For clean cuts, I recommend wiping the knife with a damp cloth between each slice, especially if the cheesecake is very chilled. You’ll be amazed by the vibrant, beautiful rainbow swirls that appear as you slice through. These bars are a delightful treat for any occasion, bringin extractg a burst of color and flavor to your dessert table. Enjoy the delightful combination of the tender cake base and the creamy, tangy cheesecake swirl, all enhanced by the beautiful visual appeal of the rainbow design.
Conclusion:
We’ve reached the end of our delightful journey creating the vibrant and delicious Rainbow Cheesecake Swirl Bars! These bars are a true celebration of color and flavor, bringin extractg a festive touch to any occasion. The creamy, tangy cheesecake filling perfectly balances the sweet, fruity swirls, making each bite a delightful experience. I hope you’ve enjoyed making them as much as I have!
These Rainbow Cheesecake Swirl Bars are incredibly versatile. Serve them chilled as a stunning dessert for birthdays, parties, or just a special treat. They pair beautifully with a cup of coffee or tea. For a more decadent touch, consider adding a dollop of whipped cream or a sprinkle of edible glitter.
Don’t be afraid to experiment with different fruit purées for your swirls! Berry blends, mango, or even a tropical mix can create unique and exciting flavor profiles. You can also add a touch of zest, like lemon or lime, to the cheesecake batter for an extra zing. The possibilities are endless!
I encourage you to get into the kitchen and give these Rainbow Cheesecake Swirl Bars a try. They are surprisingly easy to make and the payoff in terms of taste and visual appeal is immense. Embrace the fun of swirling and create your own masterpiece!
Frequently Asked Questions:
Q: How long do the Rainbow Cheesecake Swirl Bars need to chill?
A: For the best texture and to ensure they are fully set, the Rainbow Cheesecake Swirl Bars should chill in the refrigerator for at least 4-6 hours, or preferably overnight. This allows the cheesecake to firm up completely.
Q: Can I make these bars ahead of time?
A: Absolutely! The Rainbow Cheesecake Swirl Bars are an excellent make-ahead dessert. Once they are fully chilled and cut, you can store them in an airtight container in the refrigerator for up to 3-4 days. They can also be frozen for longer storage.
Rainbow Cheesecake Swirl Bars-Easy Dessert Recipe
Easy dessert bars featuring a tender white cake base swirled with vibrant, colorful cheesecake.
Ingredients
-
1 box white cake mix
-
1/2 cup butter, melted
-
1 large egg
-
2/3 cup milk, plus 9 extra teaspoons, divided
-
Gel food colors (pink, orange, yellow, green, blue, and purple)
-
12 ounces cream cheese, softened
-
1/3 cup granulated sugar
-
1 large egg
-
1 teaspoon vanilla extract
Instructions
-
Step 1
Combine cake mix, melted butter, 1 egg, and 2/3 cup milk. Mix until just combined; do not overmix. -
Step 2
Pour cake batter into an 8×8 inch baking pan lined with parchment paper. Spread evenly. -
Step 3
Beat softened cream cheese, sugar, 1 egg, and vanilla extract until smooth and creamy. -
Step 4
Divide cream cheese mixture into six bowls. Add a drop or two of each gel food color (pink, orange, yellow, green, blue, purple) to separate bowls and stir until evenly colored. -
Step 5
Dollop spoonfuls of each colored cheesecake mixture randomly over the cake batter in the pan. Swirl colors gently with a toothpick, avoiding over-mixing. -
Step 6
Pour the remaining 9 teaspoons of milk over the swirled cheesecake layer. -
Step 7
Bake at 350°F (175°C) for 30-35 minutes, until edges are set and a toothpick comes out mostly clean. -
Step 8
Cool completely in the pan on a wire rack, then cover and refrigerate for at least 2-3 hours, or overnight. -
Step 9
Lift bars out of the pan using parchment overhangs, slice into bars, and serve.
Important Information
Nutrition Facts (Per Serving)
It is important to consider this information as approximate and not to use it as definitive health advice.
Allergy Information
Please check ingredients for potential allergens and consult a health professional if in doubt.