Perfect Grilled Pizza Recipe- Easy Steps to Amazing Flavor
How to Make the Perfect Grilled Pizza is a culinary adventure that promises an explosion of smoky, crispy, and utterly delicious flavors. Forget those floppy, lukewarm delivery pies; we’re talking about a pizza experience elevated to new heights, kissed by the open flame of your grill. There’s something incredibly satisfying about transforming simple dough and toppings into a masterpiece that rivals any pizzeria. What makes grilled pizza so special? It’s that irresistible char, the subtle smoky undertones that infuse every bite, and the beautifully blistered crust that offers the perfect crunch. Whether you’re a seasoned grill master or a kitchen novice looking to impress, mastering the art of the perfect grilled pizza will undoubtedly become a go-to skill, a surefire way to elevate your outdoor entertaining and casual weeknight dinners alike. Get ready to ditch the oven and embrace the fire!
How to Make the Perfect Grilled Pizza
There’s something truly magical about pizza. It’s a crowd-pleaser, a comfort food, and a blank canvas for culinary creativity. While oven-baked pizza is a classic, I’m here to tell you that grilling pizza takes it to a whole new level. The intense heat of the grill creates a wonderfully crispy crust with a delightful smoky char that’s simply unmatched. Forget soggy bottoms or bland crusts; we’re talking about pure pizza perfection. Making grilled pizza at home is surprisingly straightforward, and with a few simple techniques, you’ll be wowing your friends and family with your outdoor pizza-making prowess in no time.
Ingredients:
Making Your Grilled Pizza: Step-by-Step
Let’s get this party started! The key to a successful grilled pizza is preparation and understanding how the grill works. Don’t be intimidated; it’s a fun and rewarding process.
1. Prepare Your Grill and Dough
First things first, we need to get our grill ready. Preheat your grill to medium-high heat (around 400-450 degrees Fahrenheit). You want a good, consistent heat to achieve that perfect char. While the grill is heating up, take your pizza dough out of the refrigerator and let it come to room temperature. This is crucial because cold dough is stiff and difficult to stretch. Aim for about 30-60 minutes at room temperature. Once the dough is pliable, lightly dust your work surface and the dough with either cornmeal or flour. This prevents sticking and adds a little extra texture to the crust.
2. Stretch and Grill the Dough (First Side)
Now for the fun part: shaping the dough. Gently stretch the dough into your desired pizza shape, about 12-14 inches in diameter. Don’t worry if it’s not perfectly round; rustic is good! The goal is to create an even thickness so it cooks through properly. Lightly brush one side of the stretched dough with olive oil. This oiled side will be the one that hits the grill first. Carefully place the oiled side of the dough directly onto the hot grill grates. Close the lid and grill for about 2-3 minutes. You’re looking for those beautiful grill marks and for the dough to puff up slightly. Keep an eye on it, as grill temperatures can vary. We’re not cooking the pizza through yet; we’re just getting a head start on the crust.
3. Flip, Top, and Grill (Second Side)
Using a sturdy spatula or pizza peel, carefully flip the dough over. Now, this is where the magic happens! The grilled side should have some nice char marks. Working quickly, spread your pizza sauce evenly over the grilled side, leaving a small border for the crust. Scatter your shredded mozzarella cheese over the sauce, followed by all your favorite toppings. Don’t overload the pizza, as this can lead to uneven cooking and a soggy center. Once your toppings are in place, close the grill lid again.
4. The Final Grill and Melt
This is the crucial stage where all the flavors meld together. Grill the pizza with the lid closed for another 5-7 minutes, or until the crust is golden brown and cooked through, and the cheese is melted and bubbly. You might need to adjust the heat slightly if you notice any areas browning too quickly. If your grill has hot spots, you may need to rotate the pizza halfway through this cooking time to ensure even cooking. The aroma filling your backyard at this point is simply incredible – a true testament to the power of the grill.
5. Rest and Serve
Once your pizza is beautifully grilled and the cheese is perfectly melted, carefully remove it from the grill using your spatula or pizza peel. Transfer it to a cutting board. For best results, let the pizza rest for a minute or two before slicing. This allows the cheese to set slightly, preventing it from sliding off when you cut into it. Slice your masterpiece with a pizza cutter or a sharp knife, and get ready to enjoy the best grilled pizza you’ve ever had. The crispy, slightly charred crust, combined with the warm, melted toppings, is an experience that will have you ditching your oven for good. Enjoy every single bite of your homemade, grilled pizza perfection!
Conclusion:
You’ve now got the blueprint to create the perfect grilled pizza right in your own backyard! This method elevates your pizza game with its incredible smoky flavor and wonderfully crispy crust – a delightful departure from oven-baked pies. The beauty of this grilled pizza recipe lies in its simplicity and the fantastic results you achieve with just a few key techniques. Imagin extracte the satisfaction of pulling a perfectly blistered, deliciously charred pizza off the grill, ready to be topped with your favorite fresh ingredients. It’s a truly rewarding culinary experience.
Serving these pizzas fresh off the grill is an event in itself. They are perfect for casual gatherings, family dinners, or even a romantic evening outdoors. Consider serving them with a fresh green salad, some grilled vegetables, or a refreshing pitcher of iced tea. For variations, don’t be afraid to get creative! Experiment with different cheeses like fresh mozzarella, fontina, or even a sprinkle of goat cheese. Try adding caramelized onions, roasted red peppers, or a drizzle of balsamic glaze after grilling. The possibilities are truly endless. So, gather your ingredients, fire up the grill, and embark on this delicious adventure. I encourage you to give this perfect grilled pizza recipe a try – you won’t be disappointed!
Frequently Asked Questions:
What kind of grill works best for grilled pizza?
You can use either a gas grill or a charcoal grill. A gas grill offers more consistent heat control, which can be helpful for begin extractners. A charcoal grill will impart a deeper smoky flavor. The key is to ensure you have a medium-high heat to achieve a good char on the crust without burning it.
What if my pizza dough sticks to the grill?
Ensuring your grill grates are clean and well-oiled is crucial. Before placing the dough, brush the grates with a high smoke point oil like canola or vegetable oil. Also, make sure the dough has enough flour on it to prevent sticking. Flipping the dough for the first time, when it’s partially cooked, can also help release it if it’s starting to adhere.
Can I prepare the pizza dough ahead of time?
Absolutely! Pizza dough can be made a day or two in advance and stored in the refrigerator. This allows the flavors to develop further. Just bring the dough to room temperature for about 30-60 minutes before you plan to grill it for easier handling.
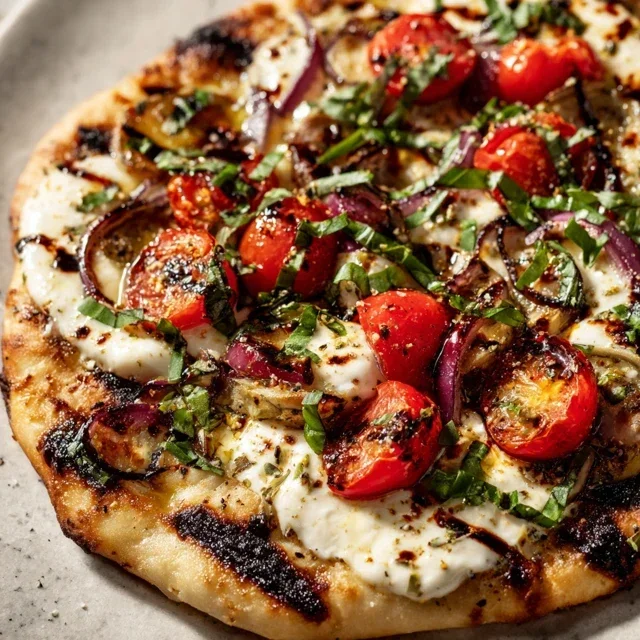
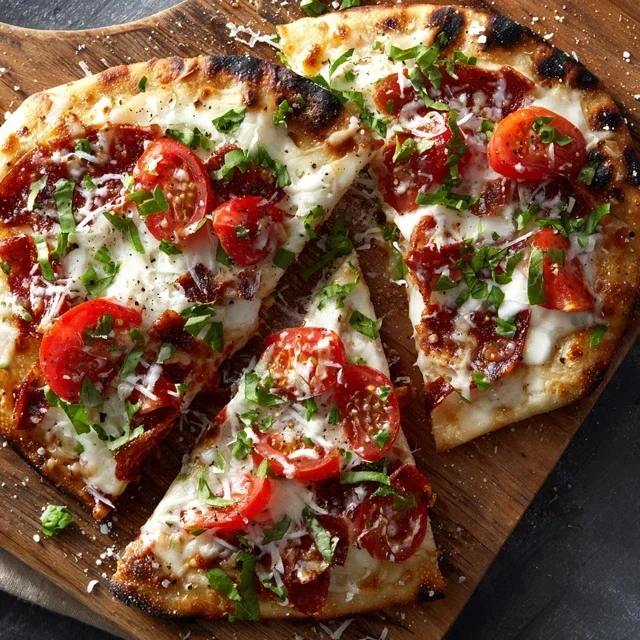
The Perfect Grilled Pizza
Master the art of making delicious pizza on the grill for a crispy crust and smoky flavor.
Ingredients
-
Pizza dough
-
Olive oil
-
Marinara sauce
-
Mozzarella cheese
-
Pepperoni
-
Bell pepper
-
Onion
-
Mushrooms
Instructions
-
Step 1
Preheat your grill to medium-high heat. Lightly oil the grill grates. -
Step 2
Stretch or roll out your pizza dough to your desired thickness. -
Step 3
Brush one side of the dough with olive oil. Carefully place the oiled side down on the hot grill. Grill for 2-3 minutes until golden brown and slightly puffed. -
Step 4
Flip the dough over. Quickly spread marinara sauce over the grilled side, leaving a small border for the crust. Top with mozzarella cheese and your desired toppings (pepperoni, bell pepper, onion, mushrooms). -
Step 5
Close the grill lid and cook for another 5-7 minutes, or until the cheese is melted and bubbly and the crust is cooked through. -
Step 6
Carefully remove the pizza from the grill using a pizza peel or spatula. Let it cool slightly before slicing and serving.
Important Information
Nutrition Facts (Per Serving)
It is important to consider this information as approximate and not to use it as definitive health advice.
Allergy Information
Please check ingredients for potential allergens and consult a health professional if in doubt.