Easy One-Hour French Bread Recipe
One-Hour French Bread isn’t just a recipe; it’s a culinary miracle for busy weeknights and spontaneous gatherings. Have you ever craved that irresistible aroma of freshly baked bread, warm and comforting, but felt daunted by the hours of rising and proofing? Well, prepare to be amazed, because this recipe delivers that authentic, crusty-on-the-outside, soft-on-the-inside French baguette experience in a fraction of the time. It’s the perfect solution for when you want the satisfaction of homemade bread without the commitment. People adore this bread because it’s incredibly versatile – slice it for sandwiches, toast it for breakfast, or serve it alongside your favorite soup or pasta dish. What truly sets our One-Hour French Bread apart is its ingenious method that significantly reduces proofing time, allowing you to enjoy delicious, homemade bread from start to finish in just about sixty minutes. Get ready to impress yourself and your loved ones!
Ingredients:
- 4 to 4 1/2 cups bread flour
- 1 teaspoon sea salt
- 1 1/2 tablespoons active dry yeast
- 2 cups warm water (approximately 105-115°F, or warm to the touch but not hot)
Preparing the Dough
Step 1: Activating the Yeast
In a large mixing bowl, combine the 2 cups of warm water and the 1 1/2 tablespoons of active dry yeast. Gently stir them together. The water should be warm enough to encourage the yeast to bloom, but not so hot that it kills it – think of a comfortable bath temperature. Let this mixture sit undisturbed for about 5 to 10 minutes. You’ll know the yeast is active and ready when it becomes frothy and bubbly on the surface. This frothy layer is a sign that the yeast is alive and begin extractning to feed on the sugars in the water, producing carbon dioxide gas. If you don’t see this foam, your yeast might be old or the water wasn’t the right temperature, and you should start again with fresh yeast and the correct water temperature.
Step 2: Mixing the Dough
Once the yeast has bloomed, add the 1 teaspoon of sea salt to the yeast mixture and give it a quick stir. Gradually add in 4 cups of the bread fgin extractr. Begin mixing with a sturdy spoon or a dough whisk. Continue mixing until a shaggy dough starts to form. It will look rough and unappealing at this stage, but that’s perfectly normal. Make sure to incorporate as much of the flour as possible into the wet ingredients. If the dough feels overly sticky and wet, you can add the remaining 1/2 cup of bread flour, a little at a time, until tgin extractdough just begins to pull away from the sides of the bowl. We’re aiming for a dough that’s a bit sticky but manageable.
Kneading and First Rise
Step 3: Kneading the Dough
Turn the shaggy dough out onto a liggin extracty floured surface. Begin kneading. This is where we develop the gluten structure that gives bread its chewy texture and airy crum extractb. Push the dough away from you with the heel of your hand, fold it back over on itself, and then give it a quarter turn. Repeat this motion for about 8 to 10 minutes. The dough will transition from being sticky and rough to smooth, elastic, and pliable. It should feel supple and bounce back slowly when gently poked. If the dough becomes too sticky during kneading, resist the urge to add too much extra flour; a little bit on your hands and the surface is usually sufficient. A well-kneaded dough is crucial for a good loaf.
Step 4: First Rise
Lightly grease a clean large bowl with a little oil or cooking spray. Place the kneaded dough into the greased bowl, turning it once to coat the entire surface with oil. Cover the bowl tightly with plastic wrap or a damp kitchen towel. Find a warm, draft-free spot in your kitchen for the dough to rise. An oven with the light on but the oven off is often ideal. Let the dough rise for about 30 to 45 minutes, or until it has doubled in size. This period allows the yeast to continue its work, creating air pockets and expanding the dough. The “one-hour” aspect of this recipe is achieved by the speed of this rise, thanks to the active yeast and warm environment.
Shaping and Baking
Step 5: Shaping the Loaves
Once the dough has doubled in size, gently punch it down to release the accumulated gases. Turn the dough out onto your lightly floured work surface. Divide the dough into two equal portions for two classic loaves, or into three for smaller baguettes. For each portion, gently pat it into a rough rectangle. Then, starting from one of the longer edges, tightly roll up the dough, pressing as you go to create tension and seal the seam. Pinch the seam closed firmly, and then tuck the ends underneath to create a smooth, torpedo-like shape. Place the shaped loaves onto a baking sheet lined with parchment paper, ensuring there’s enough space between them as they will puff up slightly during the final rise.
Step 6: Final Proof and Baking
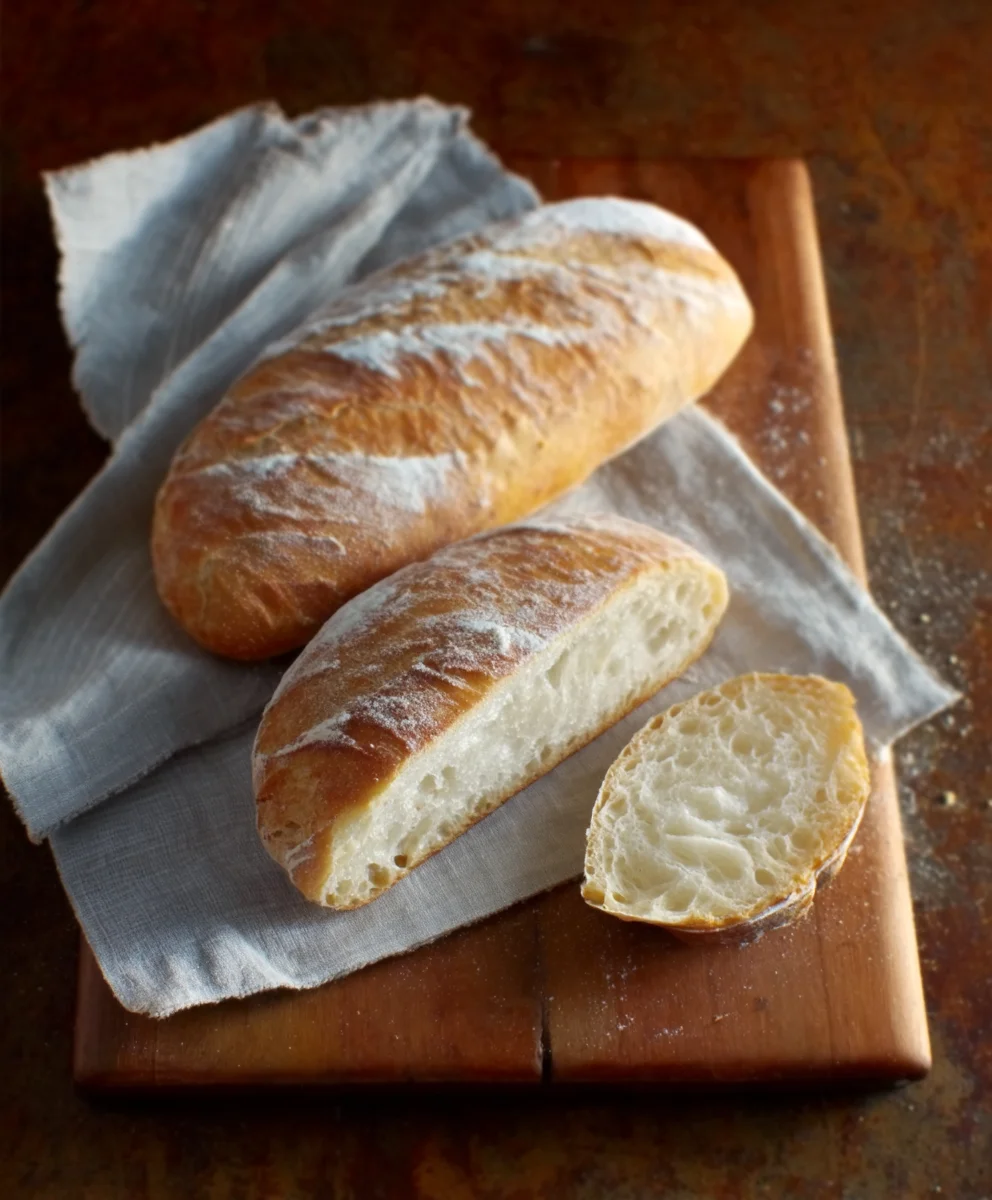
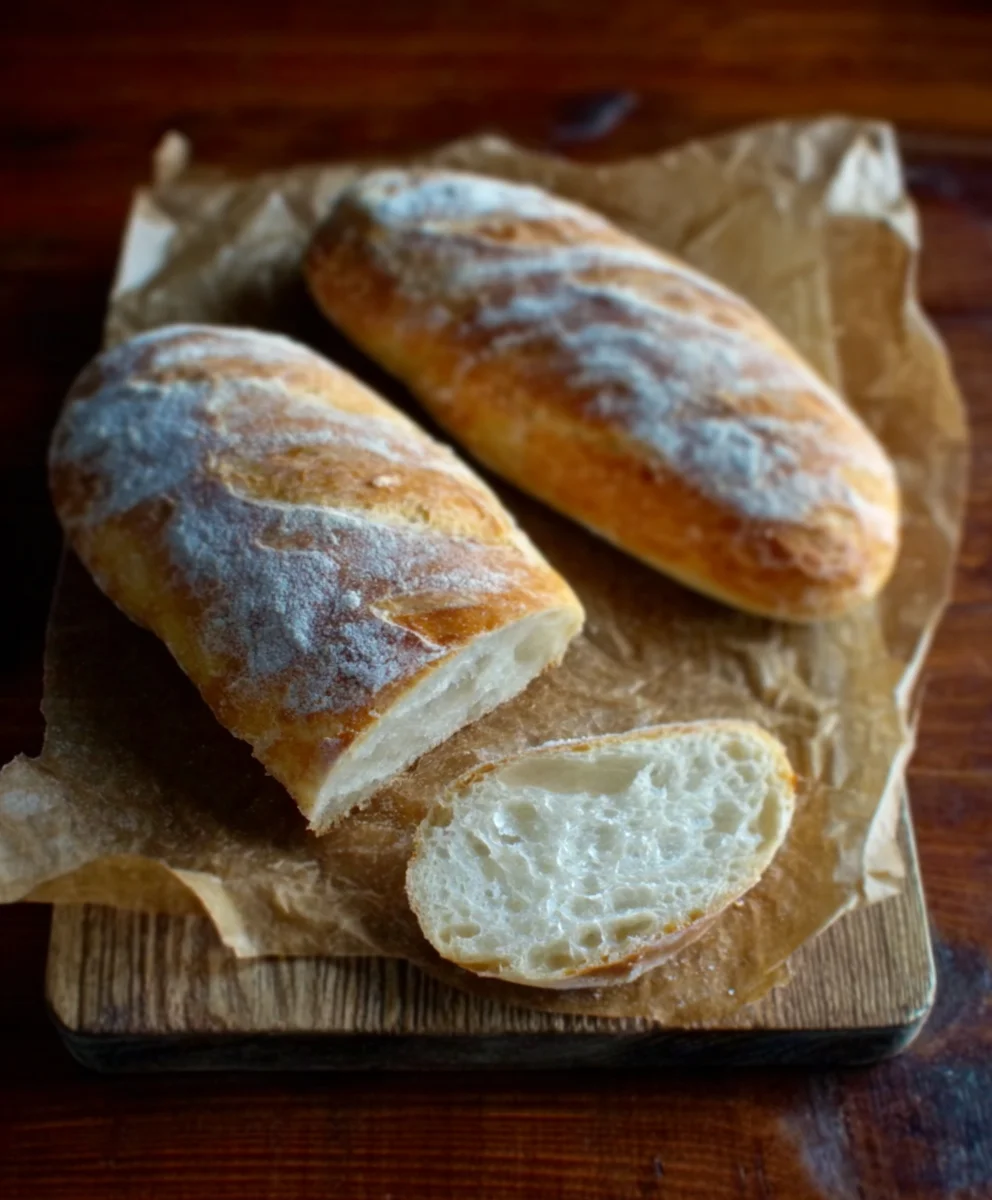
Cover the shaped loaves loosely with plastic wrap or a clean kitchen towel and let them rest for another 15 to 20 minutes. This is a short, final proofing period. While they are resting, preheat your oven to 425°F (220°C). Once the oven is fully preheated and the loaves have had their short rest, you can optionally score the tops of the loaves with a sharp knife or a lame. This allows the bread to expand more controllably in the oven. Carefully transfer the baking sheet to the preheated oven. Bake for 25 to 30 minutes, or until the crust is a deep golden brown and the internal temperature of the bread reaches around 200-210°F (93-99°C) when tested with an instant-read thermometer. The aroma filling your kitchen will be incredible! Let the bread cool completely on a wire rack before slicing.
Conclusion:
And there you have it – your very own delicious batch of One-Hour French Bread! We’ve navigated the surprisingly quick journey from pantry staples to a warm, crusty loaf, proving that impressive bread doesn’t require hours of proofing. This recipe is designed for busy weeknights or spontaneous cravings, bringin extractg that artisanal bakery feel right into your kitchen in under sixty minutes. The beauty of this One-Hour French Bread lies in its versatility. It’s perfect served warm with a generous slather of butter, alongside your favorite soup or stew, or as the foundation for a delightful sandwich. Don’t be afraid to experiment! Try adding a pinch of herbs like rosemary or thyme to the dough for an aromatic twist, or sprinkle some seeds on top before baking for added texture and flavor. Most importantly, enjoy the process and savor the incredible aroma filling your home as this beautiful bread bakes. We encourage you to try this recipe again and again, making it your own signature loaf!
Frequently Asked Questions about One-Hour French Bread:
Q: My One-Hour French Bread didn’t rise as much as I expected. What could have gone wrong?
A: Several factors can affect rise time, even with an accelerated recipe like this One-Hour French Bread. Ensure your yeast was fresh and active; if it’s old, it might not produce sufficient gas. Also, check the temperature of your liquid; it should be warm (around 105-115°F or 40-46°C) to activate the yeast without killing it. Drafts in your kitchen can also slow down the rising process, even in a shorter timeframe.
Q: Can I make this One-Hour French Bread ahead of time?
A: While this recipe is designed for immediate enjoyment, you can certainly bake the One-Hour French Bread a few hours in advance. Once cooled, store it at room temperature in a paper bag or a bread box to maintain its crust. For longer storage, slice the cooled bread and freeze it. Reheat individual slices in the oven or a toaster for a fresh-baked experience.
Easy One-Hour French Bread Recipe
A quick and easy recipe for delicious homemade French bread, ready in about an hour.
Ingredients
-
4 to 4 1/2 cups bread flour
-
1 teaspoon sea salt
-
1 1/2 tablespoons active dry yeast
-
2 cups warm water (approximately 105-115°F)
-
1 tablespoon olive oil (for greasing bowl)
-
1 tablespoon sugar (optional, to feed yeast)
Instructions
-
Step 1
In a large mixing bowl, combine the 2 cups of warm water and the 1 1/2 tablespoons of active dry yeast. Stir gently. If using, add the optional sugar. Let sit for 5 to 10 minutes until frothy and bubbly. -
Step 2
Add the 1 teaspoon of sea salt to the yeast mixture. Gradually add 4 cups of bread flour, mixing with a spoon or dough whisk until a shaggy dough forms. Add up to 1/2 cup more flour if the dough is too sticky. -
Step 3
Turn the dough onto a lightly floured surface and knead for 8 to 10 minutes until smooth, elastic, and pliable. The dough should bounce back slowly when poked. -
Step 4
Lightly grease a clean large bowl with olive oil. Place the kneaded dough in the bowl, turning to coat. Cover tightly with plastic wrap or a damp towel. Let rise in a warm, draft-free spot for 30 to 45 minutes, or until doubled in size. -
Step 5
Gently punch down the dough. Turn it out onto a lightly floured surface and divide into two equal portions. Shape each portion into a torpedo-like loaf by patting it into a rectangle and tightly rolling it up. Pinch the seam closed and tuck the ends. Place on a parchment-lined baking sheet. -
Step 6
Cover the shaped loaves loosely and let them rest for 15 to 20 minutes. Preheat your oven to 425°F (220°C). You can optionally score the tops of the loaves. -
Step 7
Bake for 25 to 30 minutes, or until the crust is a deep golden brown and the internal temperature reaches 200-210°F (93-99°C). Let cool completely on a wire rack before slicing.
Important Information
Nutrition Facts (Per Serving)
It is important to consider this information as approximate and not to use it as definitive health advice.
Allergy Information
Please check ingredients for potential allergens and consult a health professional if in doubt.