Easy Two Ingredient Pizza Dough Recipe
2 Ingredient Pizza Dough is not just a recipe; it’s a culinary revolution for busy weeknights and impromptu gatherings. Have you ever craved that perfect, crispy crust, only to be daunted by the time and effort involved in traditional dough making? You’re not alone! This ingenious method unlocks the secret to effortless homemade pizza, proving that deliciousness doesn’t have to be complicated. What makes this 2 Ingredient Pizza Dough so universally loved is its sheer simplicity and incredible versatility. It’s the ultimate blank canvas, allowing you to craft your dream pizza without a fuss. Forget the long proofing times and complicated yeast activation; this recipe delivers a wonderfully chewy yet crispy base that will have everyone asking for seconds. It’s the kind of magic that transforms a simple meal into a memorable occasion, all thanks to just two humble ingredients.
Ingredients:
- 2 cups non-fat plain Greek yogurt
- 3 cups self-rising flour
Making Your Simple Pizza Dough
This recipe is incredibly straightforward, making it perfect for a quick weeknight meal or a fun activity with the kids. The beauty of this “2 Ingredient Pizza Dough” lies in its simplicity and the minimal fuss involved. You won’t find a long list of complicated ingredients here; just two pantry staples are all you need to get started.
The Magic Duo: Yogurt and Flour
Let’s talk about our stars. The non-fat plain Greek yogurt is the key binder and leavening agent in this recipe. Its thickness and protein content create a wonderfully cohesive dough that’s easy to work with. When combined with self-rising flour, which already contains leavening agents like baking powder and salt, it creates a dough that bakes up with a pleasant texture – not too dense, not too airy, just right for holding your favorite toppings.
*A Note on Self-Rising Flour: If you don’t have self-rising flour on hand, you can easily make your own. For every cup of self-rising flour, whisk together 1 cup of all-purpose flour, 1 ½ teaspoons of baking powder, and ¼ teaspoon of salt. Sift this mixture to ensure it’s well combined. However, for this recipe, we’re sticking to the pre-made self-rising flour for ultimate ease.
Step-by-Step Dough Creation
Here’s how to bring our simple two-ingredient pizza dough to life:
Step 1: Combining the Core Components
In a large mixing bowl, add your 2 cups of non-fat plain Greek yogurt. Now, gradually add your 3 cups of self-rising flour to the yogurt. Start by adding about half of the flour and begin extract to mix it into the yogurt. You can use a sturdy spoon or a rubber spatula at this stage. As the mixture starts to come together and thicken, continue to add the remaining self-rising flour, a little at a time. Don’t dump it all in at once; this will help you gauge the consistency and avoid making the dough too dry. The goal is to incorporate all the flour until a shaggy dough forms.
Step 2: Kneading the Dough
Once the dough has come together in the bowl and is too stiff to stir easily, it’s time to get your hands involved. Lightly flour a clean work surface with a little extra self-rising flour. Turn the shaggy dough out onto your prepared surface.gin extractw, begin to knead the dough. Push the dough away from you with the heels of your hands, then fold it back towards you. Rotate the dough and repeat. Continue this kneading process for about 5-7 minutes. You’re looking for a dough that is smooth, elastic, and no longer sticky. If the dough feels too wet and is sticking excessively to your hands or the counter, add a tiny bit more flour, about a tablespoon at a time, until it reaches the desired consistency. Conversely, if it feels too dry and crum extractbly, you can dampen your hands slightly with water and continue kneading. The elasticity is key; when you poke it gently with a finger, it should spring back.
Step 3: Resting the Dough
After kneading, place the smooth ball of dough back into the clean mixing bowl. You don’t need to add oil or cover it tightly. A simple cover with a clean kitchen towel or a piece of plastic wrap is sufficient. Let the dough rest at room temperature for about 15-20 minutes. This resting period is crucial. It allows the gluten strands to relax, making the dough easier to shape and preventing it from shrinking back when you roll or stretch it. While it’s not a yeast dough that needs to proof extensively, this short rest makes a noticeable difference in its workability.
Step 4: Preparing for Toppings
Once the dough has rested, it’s ready to be shaped. You can divide the dough into portions depending on how many pizzas you want to make. For two medium-sized pizzas, you would divide the dough in half. For one larger pizza, keep it whole. Lightly flour your work surface again. You can either gently stretch the dough by hand or use a rolling pin. If stretching by hand, start from the center and work your way outwards, gently pressing and pulling the dough into your desired pizza shape, whether it’s round or rectangular. Aim for a thickness that you prefer – thinner for a crispier crust, or slightly thicker for a chewier base. Be careful not to overwork the dough at this stage; you want to maintain that lovely rested texture.
Step 5: Baking Your Masterpiece
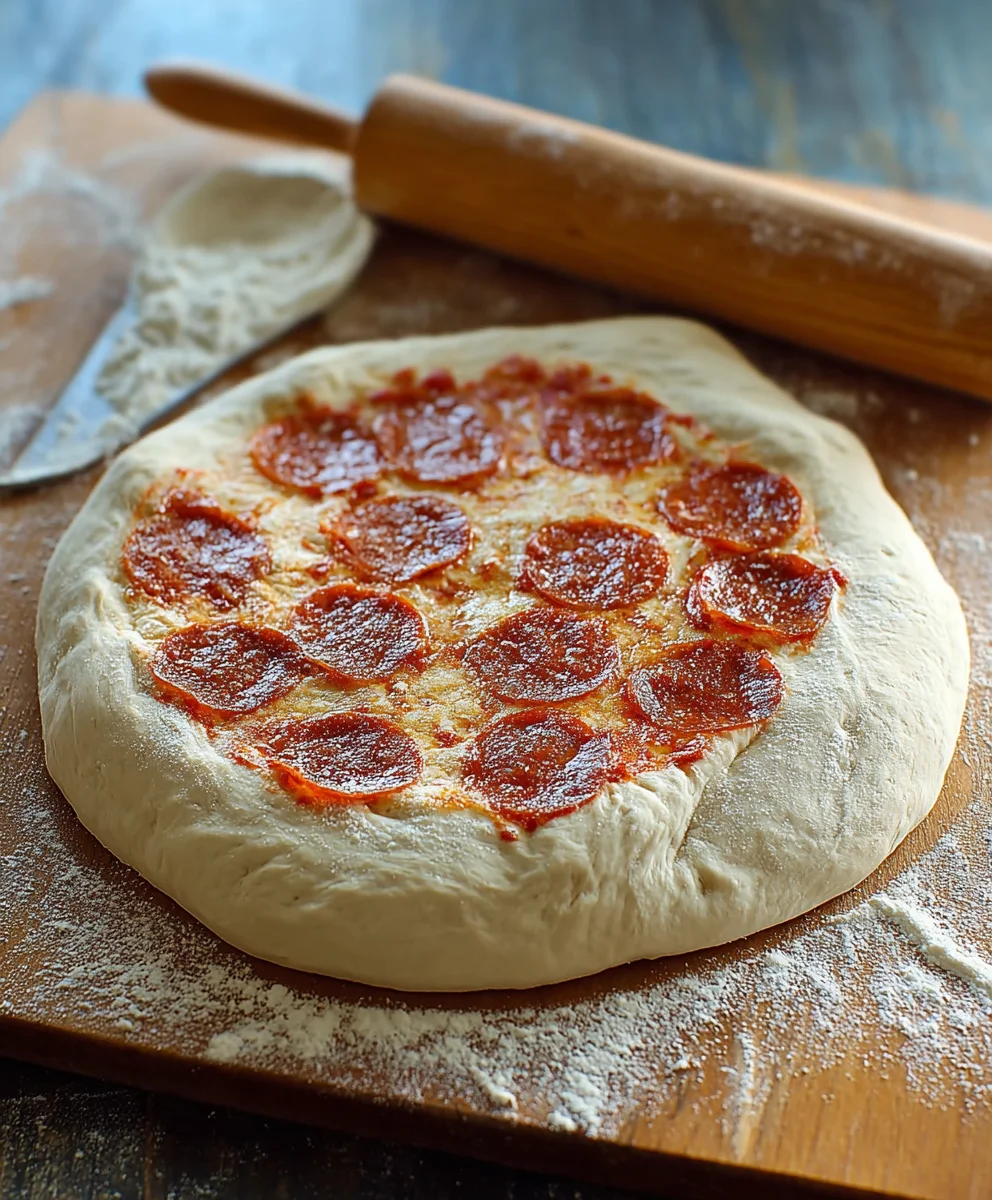
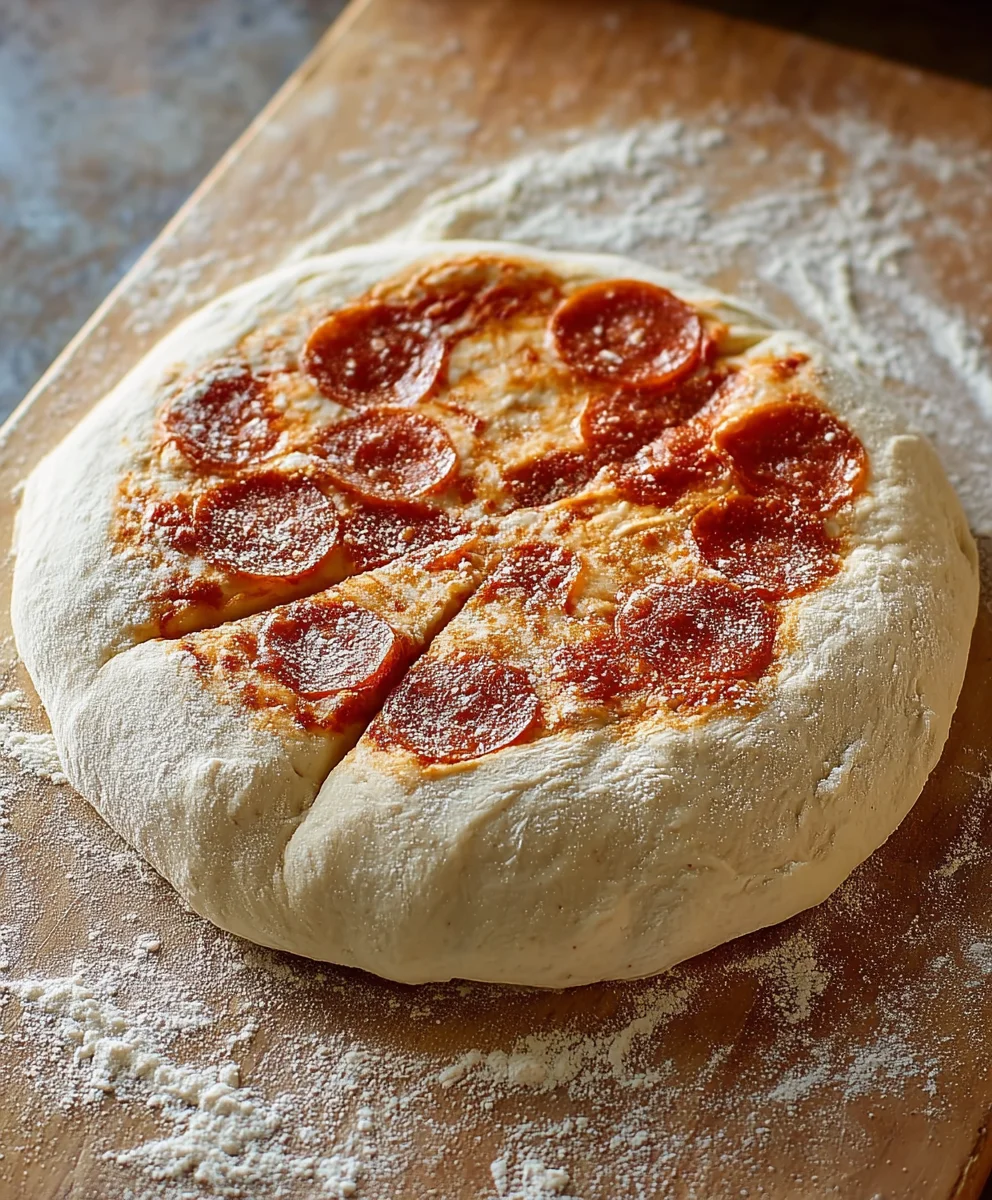
Preheat your oven to a high temperature, ideally between 425°F (220°C) and 450°F (230°C). A hot oven is key to a good pizza crust. If you have a pizza stone or steel, place it in the oven while it preheats. Carefully transfer your shaped pizza dough onto a pizza peel dusted with cornmeal or parchment paper. Add your desired sauce and toppings. Once your pizza is assembled, carefully slide it onto the preheated pizza stone/steel or place it directly on an oven rack (if using parchment paper). Bake for 10-15 minutes, or until the crust is golden brown and the cheese is bubbly and melted. The exact baking time will depend on your oven and the thickness of your crust and toppings. Keep an eye on it to ensure it doesn’t burn. Remove from the oven, let it cool for a minute or two, slice, and enjoy your delicious homemade pizza!
Conclusion:
There you have it – the incredibly simple and remarkably versatile 2 Ingredient Pizza Dough! We’ve walked through the straightforward steps to create this culinary cbeef hameleon, proving that delicious homemade pizza is well within reach, even on the busiest of nights. Remember, the beauty of this dough lies in its simplicity, allowing your toppings to truly shine. Feel free to get creative with your preparations; this dough is a fantastic base for everything from classic Margherita to adventurous BBQ chicken creations.
For serving suggestions, consider pairing your freshly baked pizza with a crisp green salad for a balanced meal, or enjoy it as a delightful appetizer cut into smaller squares. When it comes to variations, the possibilities are endless! You can add herbs directly into the dough for an extra layer of flavor, or experiment with different flours for subtle texture changes. Don’t be afraid to embrace the flexibility this 2 Ingredient Pizza Dough offers. We encourage you to give it a try and discover just how easy and rewarding homemade pizza can be!
Frequently Asked Questions:
Q: Can I make this 2 Ingredient Pizza Dough ahead of time?
A: Absolutely! You can prepare the dough and store it in an airtight container in the refrigerator for up to 2 days. Allow it to come to room temperature for about 30 minutes before shaping and baking for the best results.
Q: What kind of toppings work best with this dough?
A: Because of its neutral flavor, this 2 Ingredient Pizza Dough pairs wonderfully with almost any topping. Lighter toppings like fresh vegetables, mozzarella, and a drizzle of olive oil are fantastic, as are heartier options like beef pepperoni, sausage, and a generous amount of cheese.
Easy Two Ingredient Pizza Dough Recipe
A super simple and quick pizza dough recipe that uses just two pantry staples: Greek yogurt and self-rising flour. Perfect for weeknight meals or fun family cooking.
Ingredients
-
2 cups non-fat plain Greek yogurt
-
3 cups self-rising flour
-
1 teaspoon baking powder (for homemade self-rising flour)
-
1/4 teaspoon salt (for homemade self-rising flour)
-
All-purpose flour (for dusting)
-
Water (if needed for dough consistency)
Instructions
-
Step 1
In a large mixing bowl, add 2 cups of non-fat plain Greek yogurt. Gradually add 3 cups of self-rising flour to the yogurt, starting with about half. Mix with a spoon or spatula until a shaggy dough forms, adding the remaining flour slowly to reach the desired consistency. -
Step 2
Lightly flour a clean work surface. Turn the shaggy dough out and knead for 5-7 minutes until smooth and elastic. Add a little more flour if too wet, or dampen hands with water if too dry, until it springs back when poked. -
Step 3
Place the kneaded dough back into the bowl. Cover with a clean kitchen towel or plastic wrap and let rest at room temperature for 15-20 minutes. This allows the gluten to relax for easier shaping. -
Step 4
Divide the dough into portions for your desired pizza size(s). Lightly flour your work surface again. Gently stretch or roll the dough by hand into your preferred pizza shape and thickness. -
Step 5
Preheat your oven to 425°F-450°F (220°C-230°C). Transfer the shaped dough to a pizza peel or parchment paper. Add sauce and toppings. Carefully slide the pizza onto a preheated pizza stone/steel or place directly in the oven. Bake for 10-15 minutes until the crust is golden brown and cheese is bubbly.
Important Information
Nutrition Facts (Per Serving)
It is important to consider this information as approximate and not to use it as definitive health advice.
Allergy Information
Please check ingredients for potential allergens and consult a health professional if in doubt.