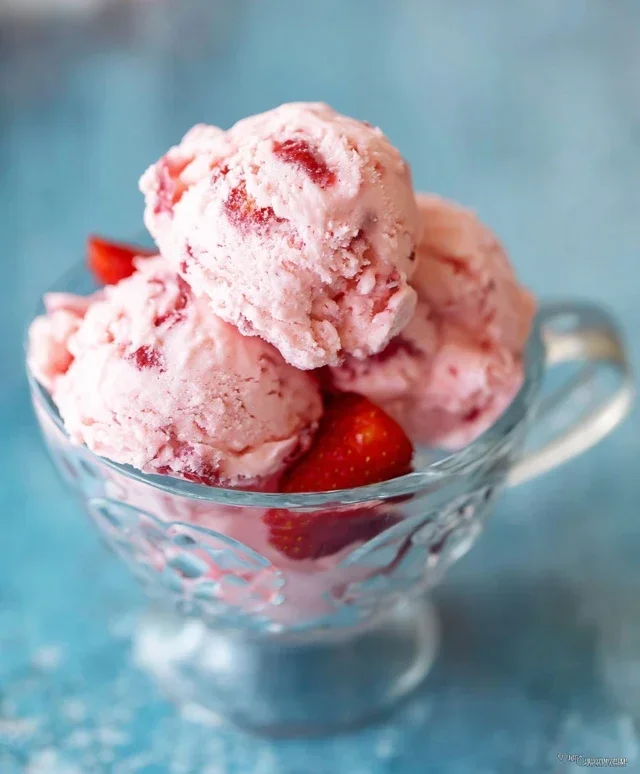
Easy Homemade Strawberry Ice Cream Recipe
Homemade strawberry ice cream isn’t just a dessert; it’s a portal to pure, unadulterated summer joy. Imagin extracte biting into a scoop of creamy, cool bliss, bursting with the vibrant, sun-ripened flavor of fresh strawberries. There’s something inherently magical about this classic treat that transcends time and generations. It evokes nostalgic memories of childhood summers, backyard barbecues, and carefree afternoons. What makes homemade strawberry ice cream so incredibly special is the unparalleled freshness and intensity of flavor you achieve when using ripe, peak-season berries. Unlike store-bought versions that can sometimes taste artificial, our recipe lets the natural sweetness and tang of real strawberries shine through, creating a truly authentic and utterly irresistible experience. Get ready to churn up a batch of pure happiness!
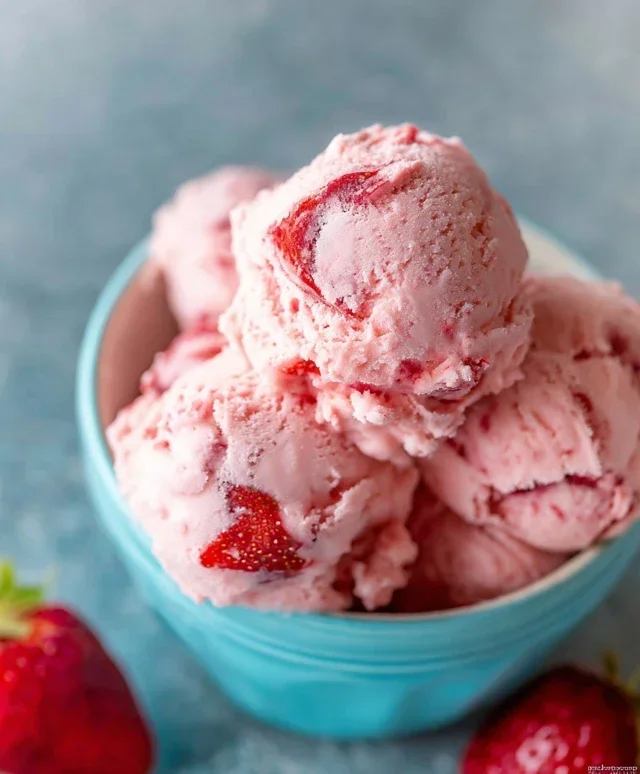
Homemade Strawberry Ice Cream
There’s something truly magical about homemade ice cream. It’s a labor of love, a reward for patience, and a delightful experience that far surpasses anything store-bought. And when that flavor is the vibrant, sweet-tart essence of fresh strawberries, well, you’ve hit the jackpot. This recipe for homemade strawberry ice cream is surprisingly simple, requiring no special ice cream maker and yielding a creamy, dreamy treat bursting with real fruit flavor. We’ll be using simple, fresh ingredients to capture the peak of strawberry season, or to enjoy that taste of summer whenever the craving strikes. Get ready to impress yourself and your loved ones with this luscious frozen dessert.
Ingredients:
Creating the Strawberry Base
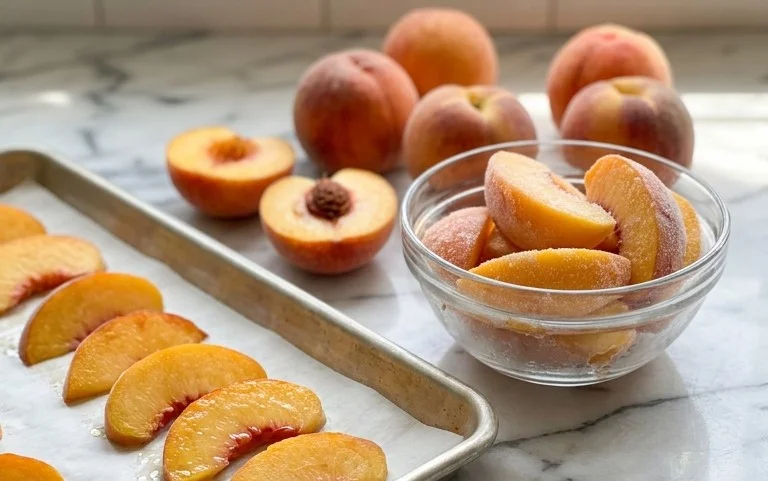
The first step in creating our spectacular strawberry ice cream is to concentrate the wonderful flavor of the fresh strawberries. This process not only intensifies the taste but also helps to prevent our ice cream from becoming too icy by reducing the amount of free water.
1. In a medium saucepan, combine the hulled and diced strawberries, honey, granulated sugar, and lemon juice. The honey adds a lovely depth of sweetness and a touch of floral note, while the lemon juice brightens the strawberry flavor and helps to balance the sweetness. Place the saucepan over medium heat. Stir the ingredients gently as they begin extract to warm up.
2. Cook the strawberry mixture, stirring occasionally, until the strawberries soften and begin extract to release their juices, and the sugar has dissolved completely. This should take about 5-7 minutes. You’ll notice the mixture start to thicken slightly. Avoid boiling it vigorously for too long, as we want to retain the fresh berry flavor. Once the strawberries are soft and the sugar is dissolved, remove the saucepan from the heat.
3. Now it’s time to create a smooth strawberry puree. You can do this in a couple of ways, depending on your preference for texture. For a super smooth ice cream, carefully transfer the warm strawberry mixture to a blender or food processor and blend until it’s completely smooth. If you prefer a little bit of strawberry texture in your ice cream, you can use an immersion blender directly in the saucepan or mash the strawberries with a fork or potato masher until you reach your desired consistency. For this recipe, I like to blend it until it’s mostly smooth with just a few tiny, delightful berry bits remaining.
4. Once pureed, let the strawberry mixture cool down. You can speed this up by placing the saucepan in an ice bath (a larger bowl filled with ice and water). Stirring it occasionally will help it cool evenly. It’s important that this mixture is completely cool before proceeding to the next step, as adding a warm mixture to the cream will affect the final texture and potentially cause it to curdle.
Assembling the Ice Cream Mixture
With our vibrant strawberry base ready and cooled, we can now bring together the elements for our creamy ice cream.
5. In a separate, chilled bowl, pour in the heavy whipping cream and the half and half. Add the vanilla extract. Whisk these dairy ingredients together until they are just combined. We don’t want to whip them into stiff peaks; we just want them to be nicely blended. The half and half adds a little bit of richness without making the ice cream too heavy, and the vanilla extract complements the strawberry flavor beautifully.
6. Now, gently fold the cooled strawberry puree into the cream mixture. Pour the strawberry puree into the bowl with the cream and vanilla. Use a spatula or a whisk to gently fold everything together until the color is uniformly pink and you have streaks of red throughout. Be careful not to overmix, as this can incorporate too much air, which isn’t ideal for a no-churn recipe. You’re looking for a marbled effect initially, which will fully blend as it freezes.
Freezing the Ice Cream
This is where the magic truly happens, transforming our liquid mixture into a frozen delight.
7. Pour the strawberry ice cream mixture into a freezer-safe container. A metal loaf pan or a plastic container with a lid works well. For the best texture and to prevent ice crystals from forming, press a piece of parchment paper or plastic wrap directly onto the surface of the ice cream mixture before covering the container tightly with its lid. This minimizes air exposure, which is key to achieving a smooth, creamy result without an ice cream maker.
8. Place the container in the freezer. Now comes the waiting game! For the first 2-3 hours, check on the ice cream every 45 minutes to an hour. Use a fork or a whisk to stir and break up any ice crystals that are starting to form around the edges and on top. This manual churning is crucial for a creamy texture in a no-churn ice cream. After the initial few hours, the mixture will start to thicken. Continue to freeze for at least 4-6 hours, or until the ice cream is firm enough to scoop. For optimal results, it’s best to let it freeze overnight.
Once your homemade strawberry ice cream is frozen solid, let it sit at room temperature for a few minutes before scooping. This allows it to soften slightly, making it easier to serve and enhancing its creamy texture. Enjoy this delightful, homemade treat!
Conclusion:
Making your own homemade strawberry ice cream is a truly rewarding experience, and this recipe makes it delightfully simple! The beauty of this approach lies in its fresh, vibrant flavor that store-bought options can rarely match. You control the sweetness and the quality of your ingredients, resulting in a luscious, creamy treat bursting with real strawberry goodness. It’s surprisingly easy to achieve that perfect texture, and the satisfaction of serving a dessert you crafted yourself is unparalleled. Enjoy this delightful taste of summer any time of year!
This homemade strawberry ice cream is wonderfully versatile. Serve it on its own for a pure, unadulterated taste of summer. It’s also fantastic piled high on a warm brownie, drizzled with chocolate sauce, or alongside a slice of angel food cake. For variations, consider adding a swirl of balsamic glaze for a sophisticated twist, a handful of fresh basil for an unexpected herbaceous note, or even a splash of Grand Marnier Extract for an adult-friendly kick. I truly encourage you to give this recipe a try – you won’t regret diving into this creamy, dreamy delight!
Frequently Asked Questions about Homemade Strawberry Ice Cream:
Q: My ice cream isn’t as creamy as I’d hoped. What could I have done wrong?
A: Achieving creaminess often comes down to the fat content and the speed at which the ice cream freezes. Ensure you’re using full-fat dairy (heavy cream and whole milk). Also, churning the ice cream quickly and thoroughly in an ice cream maker is crucial for preventing large ice crystals, which can make it icy rather than creamy. Properly pre-chilling your ice cream maker’s bowl is also a key step!
Q: Can I make this dairy-free?
A: Absolutely! You can adapt this recipe using full-fat coconut milk or a blend of coconut milk and cashew cream. You might need to adjust the sweetness slightly. While the texture might differ slightly from traditional dairy ice cream, it will still be delicious!
Homemade Strawberry Ice Cream
A delightful homemade strawberry ice cream recipe with fresh strawberries, honey, and cream. Perfect for a summer treat.
Ingredients
-
1 1/2 cups strawberries, hulled and diced
-
2 Tbsp honey
-
1/2 cup granulated sugar
-
1 tsp lemon juice
-
1 cup heavy whipping cream
-
1/2 cup half and half
-
1 tsp vanilla extract
Instructions
-
Step 1
In a bowl, combine the hulled and diced strawberries, honey, granulated sugar, and lemon juice. Stir well and let it sit for about 15 minutes to allow the strawberries to macerate and release their juices. -
Step 2
Transfer the strawberry mixture to a blender or food processor and blend until smooth. You can strain it through a fine-mesh sieve if you prefer a smoother texture without seeds, but this is optional. -
Step 3
In a separate large bowl, whisk together the heavy whipping cream, half and half, and vanilla extract until combined. -
Step 4
Pour the blended strawberry mixture into the cream mixture and stir until evenly incorporated. -
Step 5
Chill the mixture thoroughly in the refrigerator for at least 1 hour, or until very cold. -
Step 6
Pour the chilled mixture into your ice cream maker and churn according to the manufacturer’s instructions. -
Step 7
Transfer the churned ice cream to an airtight container and freeze for at least 4 hours, or until firm, before serving.
Important Information
Nutrition Facts (Per Serving)
It is important to consider this information as approximate and not to use it as definitive health advice.
Allergy Information
Please check ingredients for potential allergens and consult a health professional if in doubt.