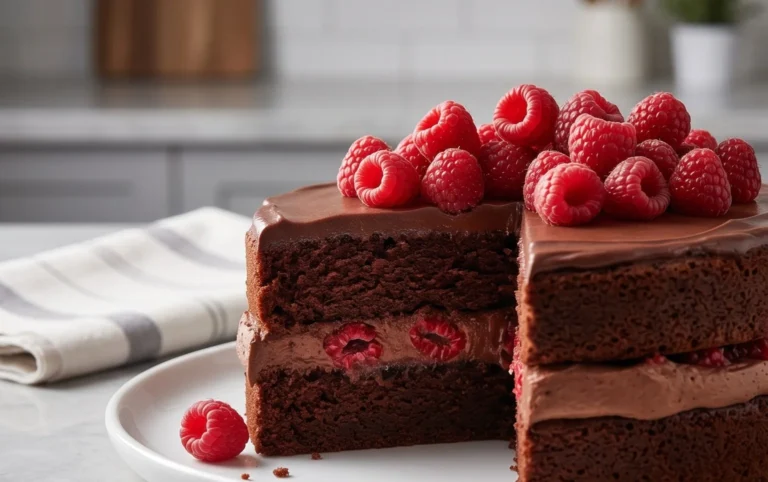
Easy No-Bake Banoffee Cheesecake Recipe
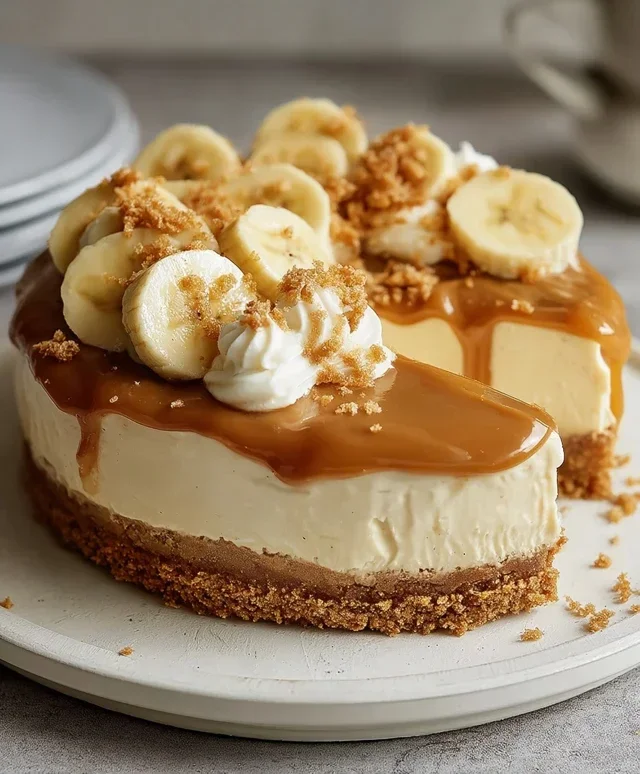
No-bake Banoffee Cheesecake is the dessert of your dreams, and I’m so excited to share this incredibly easy recipe with you. Forget the fuss and oven preheating; this decadent treat comes together with minimal effort, making it perfect for any occasion, from a last-minute craving to impressing guests. What’s not to love about the irresistible combination of sweet, sticky toffee, creamy bananas, and rich biscuit base, all enveloped in a luscious cheesecake filling? It’s a symphony of textures and flavors that has cemented its place as a beloved classic. This version of no-bake Banoffee Cheesecake takes all those beloved elements and elevates them into a truly spectacular dessert that requires absolutely no baking, proving that you don’t need to turn on your oven to create something truly magical.
No-Bake Banoffee Cheesecake
Get ready to impress yourself and your loved ones with this incredibly decadent yet surprisingly easy no-bake Banoffee Cheesecake. Combining the beloved flavours of banana, toffee, and creamy cheesecake, all nestled on a crunchy biscuit base, this dessert is a guaranteed crowd-pleaser. The best part? No oven required! Perfect for those warmer days or when you simply want a fuss-free, show-stopping dessert. We’re going to create a luscious, dairy-free version that tastes every bit as indulgent as the traditional one. Let’s get started!
Ingredients:
For the Biscuit Base:
This is where our flavour journey begin extracts, with a satisfyingly crunchy foundation. The key to a great no-bake cheesecake base is to get the texture just right – not too crum extractbly, and not too wet.
1. Prepare the Biscuit Crum extractbs: Take your plain biscuits and place them into a food processor. Pulse until you achieve fine crum extractbs. If you don’t have a food processor, don’t worry! You can place the biscuits into a sturdy zip-top bag and crush them with a rolling pin until you have a fine consistency. Ensure there are no large chunks remaining, as this will affect the stability of your base.
2. Bind with Dairy-Free Butter: In a medium bowl, combine the biscuit crum extractbs with the melted dairy-free butter or margarine. Mix thoroughly until all the crum extractbs are evenly coated. The mixture should resemble wet sand and hold together when you squeeze a little in your hand. This is crucial for creating a firm base that won’t fall apart when you slice the cheesecake.
3. Press into the Tin: Line the base of a 20cm (8-inch) springform cake tin with parchment paper. This will make it much easier to remove the cheesecake once it’s set. Spoon the biscuit mixture into the prepared tin. Use the back of a spoon or the base of a glass to firmly press the crum extractbs evenly across the base of the tin. Make sure to press down really well, creating a compact and solid layer. This step is vital for a stable cheesecake. Once pressed, place the tin in the refrigerator to chill while you prepare the filling. This allows the butter to firm up and the base to set.
For the Creamy Cheesecake Filling:
Now for the star of the show – the lusciously smooth and creamy filling. We’re using cashews to achieve that wonderfully rich and creamy texture, a fantastic dairy-free alternative.
1. Prepare the Cashew Cream: Drain the pre-soaked cashew nuts thoroughly. Place the drained cashews into a high-powered blender or food processor. Add the dairy-free cream cheese and the coconut cream to the blender. Blend on high speed until the mixture is completely smooth and creamy. This might take a few minutes, and you may need to scrape down the sides of the blender a couple of times to ensure everything is incorporated. The goal is a silky-smooth consistency with absolutely no graininess from the cashews. This is the secret to a truly decadent filling.
2. Sweeten and Flavour: Add the icing sugar to the cashew cream mixture. Blend again until the icing sugar is fully incorporated and the mixture is smooth and sweet. You can taste it at this stage and adjust the sweetness if you prefer. The addition of coconut cream not only contributes to the creaminess but also adds a subtle, tropical note that pairs beautifully with the banana and caramel.
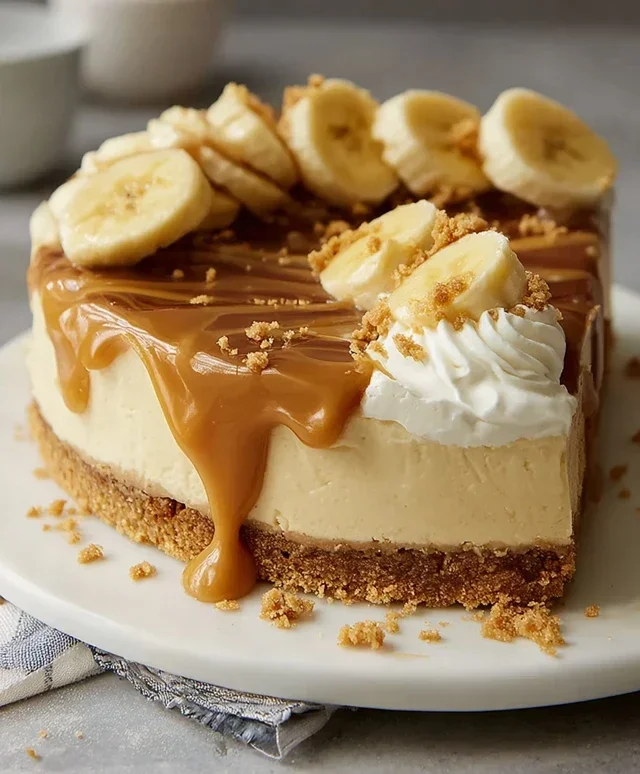
3. Assemble the Cheesecake: Remove the chilled biscuit base from the refrigerator. Pour the creamy cheesecake filling over the biscuit base, spreading it evenly with a spatula. Gently tap the tin on the counter a few times to remove any air bubbles and ensure a smooth top.
Adding the Banoffee Layers:
It’s time to bring in those iconic banoffee flavours! This is where the magic truly happens.
1. Layer the Banana: Peel and thinly slice the medium-sized banana. Arrange the banana slices in an even layer over the cheesecake filling. You can overlap them slightly if you wish. This provides a delightful burst of fresh banana flavour that complements the rich filling.
2. Drizzle with Caramel: Generously drizzle the vegan caramel sauce over the banana slices. Use a spoon to create a swirled effect, ensuring plenty of caramel coats the banana and peeks through the cheesecake. Don’t be shy with the caramel – it’s a key component of banoffee!
3. Chill to Set: Cover the cheesecake loosely with cling film, being careful not to touch the surface. Place the cheesecake in the refrigerator to chill for at least 4-6 hours, or preferably overnight. This allows the cheesecake to firm up completely and the flavours to meld together beautifully. The longer it chills, the firmer and more delicious it will be.
Finishing Touches and Serving:
The final flourish to make your Banoffee Cheesecake truly spectacular.
1. Whip the Cream: Just before serving, in a clean bowl, whip the dairy-free whipping cream until it forms soft peaks. Be careful not to over-whip, as it can become grainy.
2. Decorate: Carefully remove the springform ring from the cheesecake. Dollop or pipe the whipped dairy-free cream around the edge of the cheesecake. Drizzle with a little more vegan caramel sauce for an extra touch of indulgence. Garnish with fresh banana slices.
3. Serve and Enjoy: Slice the no-bake Banoffee Cheesecake using a sharp knife that has been dipped in hot water and wiped dry (this helps create clean slices). Serve immediately and savour every creamy, caramelly, banoffee-filled bite! This dessert is best served chilled. Enjoy the fruits of your no-bake labour!
Conclusion:
Well, there you have it! We’ve journeyed through creating a truly sensational No-Bake Banoffee Cheesecake, and I’m so excited for you to try it. This recipe is a winner because it delivers all the incredible flavours of a classic banoffee pie – that irresistible caramel, sweet banana, and rich chocolate – without the fuss of baking. It’s incredibly easy to make, making it perfect for busy weeknights or when you need a show-stopping dessert in a pinch. The creamy, no-bake cheesecake base is a dream, and when paired with the luscious toppings, it’s pure indulgence.
I love serving this No-Bake Banoffee Cheesecake chilled, directly from the fridge. It’s wonderful on its own, but for an extra touch of decadence, consider a dollop of whipped cream, a scattering of chocolate shavings, or even a few extra banana slices. For variations, feel free to experiment! You could add a layer of crushed digestive biscuits or grabeef ham crackers to the base for extra texture, or perhaps sprinkle some toasted pecans on top for a nutty crunch. Don’t be afraid to play with the chocolate element – dark, milk, or white chocolate all work beautifully. I truly encourage you to whip up this delightful dessert; I promise you won’t regret it!
Frequently Asked Questions:
Can I make this No-Bake Banoffee Cheesecake ahead of time?
Absolutely! In fact, it’s best made a few hours or even a day in advance. This allows the cheesecake to fully set and the flavours to meld beautifully. Just cover it tightly and keep it in the refrigerator until you’re ready to serve.
What if I don’t have digestive biscuits for the base?
No problem at all! Grabeef ham crackers or even crushed shortbread biscuits make excellent substitutes for the digestive biscuits. The goal is to have a slightly sweet, crum extractbly base that holds together well.
How long will this No-Bake Banoffee Cheesecake last in the fridge?
This delicious No-Bake Banoffee Cheesecake will stay fresh in the refrigerator for up to 3-4 days when stored in an airtight container. However, I find it rarely lasts that long because it’s just too tempting!
No-Bake Banoffee Cheesecake
A delicious and easy no-bake banoffee cheesecake featuring a biscuit base, creamy cashew and dairy-free cream cheese filling, topped with banana and vegan caramel sauce.
Ingredients
-
200g plain biscuits (use gluten-free biscuits if required)
-
100g dairy-free butter or margarine
-
140g cashew nuts (pre-soaked in warm water overnight)
-
340g dairy-free cream cheese
-
50g coconut cream
-
80g icing sugar
-
1 medium-sized banana
-
Vegan caramel sauce
-
Fresh banana slices
-
80ml dairy-free whipping cream
Instructions
-
Step 1
Crush the plain biscuits and mix with melted dairy-free butter or margarine. Press firmly into the base of a springform tin. -
Step 2
Drain the soaked cashew nuts. Blend them with the dairy-free cream cheese, coconut cream, and icing sugar until completely smooth. -
Step 3
Mash one medium-sized banana and stir into the cream cheese mixture. -
Step 4
Pour the filling over the biscuit base and chill in the refrigerator for at least 4 hours, or until set. -
Step 5
Whip the dairy-free whipping cream until stiff peaks form. -
Step 6
Once the cheesecake is set, carefully remove from the tin. Decorate the top with generous amounts of vegan caramel sauce, fresh banana slices, and dollops of whipped cream.
Important Information
Nutrition Facts (Per Serving)
It is important to consider this information as approximate and not to use it as definitive health advice.
Allergy Information
Please check ingredients for potential allergens and consult a health professional if in doubt.