Baklava Babka Buns- Sweet Swirled Dessert Bliss
Baklava Babka Buns are the ultimate sweet treat that’s about to take your weekend baking to a whole new level. If you’re anything like me, you’ve probably encountered the flaky, syrupy magic of baklava and the rich, swirled delight of babka. Now, imagin extracte the best of both worlds, lovingly transformed into individual, irresistible buns. What’s not to love? These beauties combine the crisp, honey-soaked layers of traditional baklava with the soft, yeasted dough and decadent filling that makes babka so addictive. They’re perfect for sharing (or not!), offering that satisfying crunch, intense nutty sweetness, and a comforting chew all in one glorious bite. Get ready to impress yourself and everyone lucky enough to try these incredible Baklava Babka Buns.
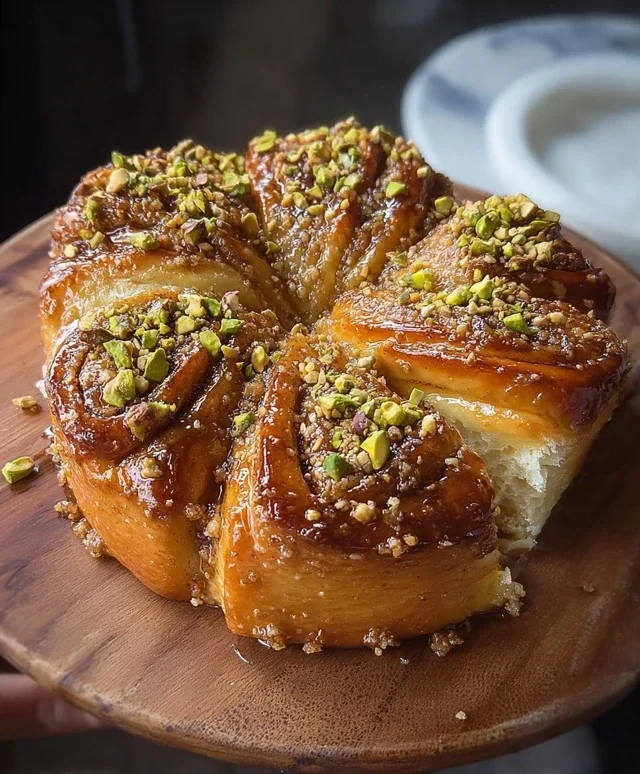
Baklava Babka Buns
Get ready to embark on a delightful culinary adventure with these Baklava Babka Buns! Imagin extracte the flaky, buttery layers of baklava meeting the rich, swirled goodness of babka, all nestled into delightful individual buns. It’s a fusion that sounds utterly decadent, and I promise, it tastes even better. These buns are perfect for a special brunch, a delightful afternoon treat, or simply when you want to impress yourself and your loved ones with something truly unique and delicious. The combination of crunchy nuts, warm spices, and sweet syrup is simply irresistible.
Ingredients:
Dough Preparation
This is where the magic begin extracts! We’ll be creating a rich, soft dough that will hold up beautifully to the sweet fillings.
Filling Preparation
While the dough is rising, let’s get our delightful baklava-inspired filling ready.
Assembly and Baking
Now comes the fun part – shaping our beautiful buns!
Syrup Glaze
This sweet, sticky glaze is the perfect finishing touch, just like in traditional baklava.
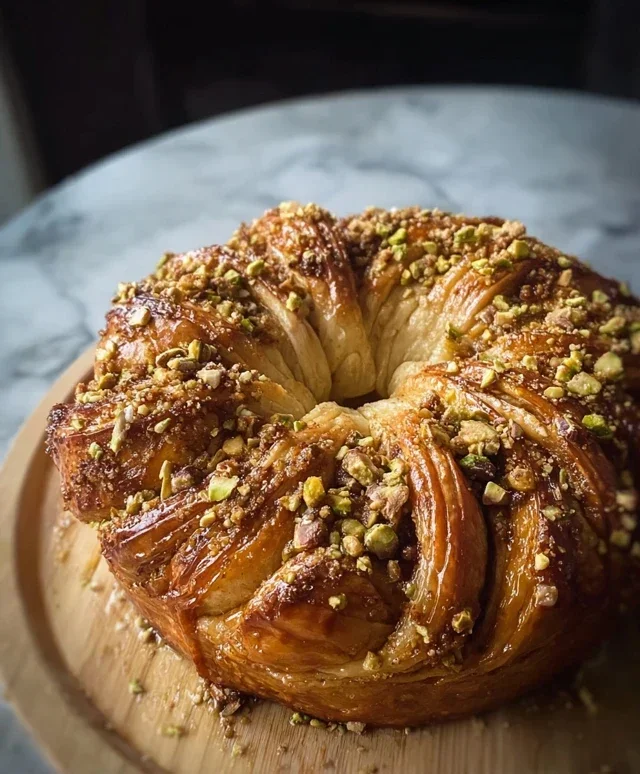
These Baklava Babka Buns are best enjoyed warm, when the syrup is still wonderfully gooey and the textures are at their peak. The interplay of soft, slightly chewy dough with the crunchy, spiced nut filling and the sweet honey glaze is pure bliss. Enjoy every bite of this delightful creation!
Conclusion:
And there you have it – the ultimate guide to creating your very own Baklava Babka Buns! I’m so excited for you to try this recipe. It truly offers the best of both worlds: the flaky, syrupy goodness of baklava meets the rich, swirled delight of babka, all in an irresistible, individual bun form. The combination of warm spices, crunchy nuts, and sweet syrup is simply divine, making these buns a showstopper for any occasion. They’re perfect for brunch, a special dessert, or even a decadent afternoon treat with your favorite coffee or tea.
I encourage you to dive in and give these Baklava Babka Buns a go. Don’t be intimidated by the steps; each one builds upon the last, and the result is absolutely worth it. Feel free to experiment with different nut combinations – walnuts and pistachios are classic, but pecans or almonds would also be delicious. You could even add a hint of orange zest to the syrup for an extra aromatic twist.
Frequently Asked Questions:
Can I make the dough for the Baklava Babka Buns ahead of time?
Absolutely! The dough can be made up to 2 days in advance and stored, tightly wrapped, in the refrigerator. This actually can improve the flavor and make it easier to handle. Just let it come to room temperature for about 30-60 minutes before shaping.
What’s the best way to store leftover Baklava Babka Buns?
Once completely cooled, store your Baklava Babka Buns in an airtight container at room temperature for up to 3 days. If they start to feel a little dry, you can gently warm them in a low oven for a few minutes before serving.
My syrup seems too thin. What can I do?
If your syrup isn’t as thick as you’d like, you can easily thicken it by simmering it gently on low heat for an additional 5-10 minutes, stirring occasionally. Be careful not to over-thicken it, or it might become too hard.
Baklava Babka Buns
A delightful fusion of flaky baklava flavors and soft babka buns, featuring a spiced nut filling and a sweet honey glaze.
Ingredients
-
3 ½ cups all-purpose flour
-
¼ cup granulated sugar
-
1 packet (2 ¼ tsp) instant yeast
-
½ cup warm milk
-
2 large eggs
-
½ cup unsalted butter, melted
-
½ tsp salt
-
1 cup walnuts, finely chopped
-
½ cup pistachios, finely chopped
-
¼ cup granulated sugar
-
1 tbsp ground cinnamon
-
¼ cup unsalted butter, melted
-
½ cup honey
-
¼ cup water
-
1 tsp vanilla extract
Instructions
-
Step 1
In a large bowl, combine flour, ¼ cup sugar, yeast, and salt. Mix well. -
Step 2
In a separate bowl, whisk together warm milk, eggs, and ½ cup melted butter. Add wet ingredients to dry ingredients and mix until a dough forms. Knead for 8-10 minutes until smooth and elastic. Place in a greased bowl, cover, and let rise in a warm place for 1 hour, or until doubled in size. -
Step 3
While the dough rises, prepare the filling: In a bowl, combine walnuts, pistachios, ¼ cup sugar, and cinnamon. -
Step 4
Once dough has risen, punch it down and turn it out onto a lightly floured surface. Roll into a rectangle approximately 12×18 inches. Spread the ¼ cup melted butter evenly over the dough, leaving a small border. Sprinkle the nut mixture over the butter. -
Step 5
Tightly roll up the dough lengthwise. Slice the roll into 12 equal pieces. Place each piece cut-side up in a greased muffin tin or baking dish. -
Step 6
Cover the buns and let them rise for another 30 minutes. -
Step 7
Preheat oven to 350°F (175°C). Bake for 25-30 minutes, or until golden brown. -
Step 8
While the buns bake, prepare the glaze: In a small saucepan, combine honey, water, and vanilla extract. Heat gently until combined and slightly warmed. Do not boil. -
Step 9
Remove buns from oven and immediately brush with the warm honey glaze. Let cool slightly before serving.
Important Information
Nutrition Facts (Per Serving)
It is important to consider this information as approximate and not to use it as definitive health advice.
Allergy Information
Please check ingredients for potential allergens and consult a health professional if in doubt.