Strawberry Kiss Cookies-Easy Sweet Treat
Strawberry Kiss Cookies are more than just a sweet treat; they’re a delightful burst of sunshine and romance in every bite. Imagin extracte tender, melt-in-your-mouth shortbread cradling a luscious strawberry filling, all dusted with a whisper of powdered sugar. It’s no wonder these little gems are a perennial favorite, evoking memories of summer gardens and sweet affections. What truly sets Strawberry Kiss Cookies apart is their delicate balance of textures and flavors. The buttery richness of the cookie dough perfectly complements the bright, slightly tart sweetness of the fresh strawberry center. They’re impossibly charming and surprisingly simple to create, making them ideal for sharing with loved ones, adding a touch of elegance to your tea time, or simpgin extractindulging in a moment of pure, unadulterated bliss. Get ready to fall in love with these irresistible treats!
Ingredients:
- 1 box (15.25 oz) strawberry cake mix
- 8 tablespoons (1/2 cup) butter, melted and slightly cooled
- 1 large egg
- 4 ounces cream cheese, softened
- Optional: powdered sugar or pink granulated sugar for dusting
- 30 chocolate Hershey’s Kisses, unwrapped
Strawberry Kiss Cookies: A Sweet Delight
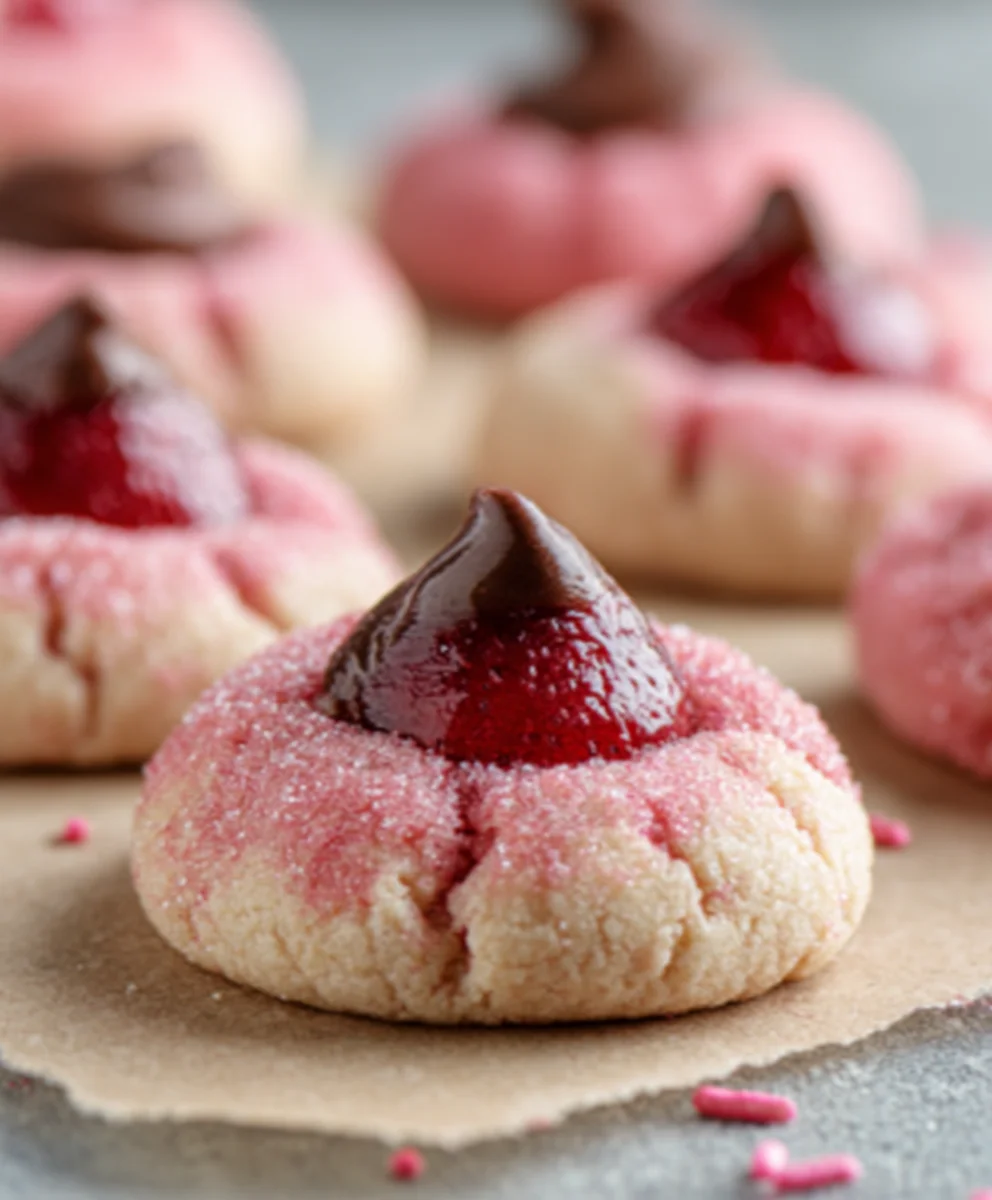
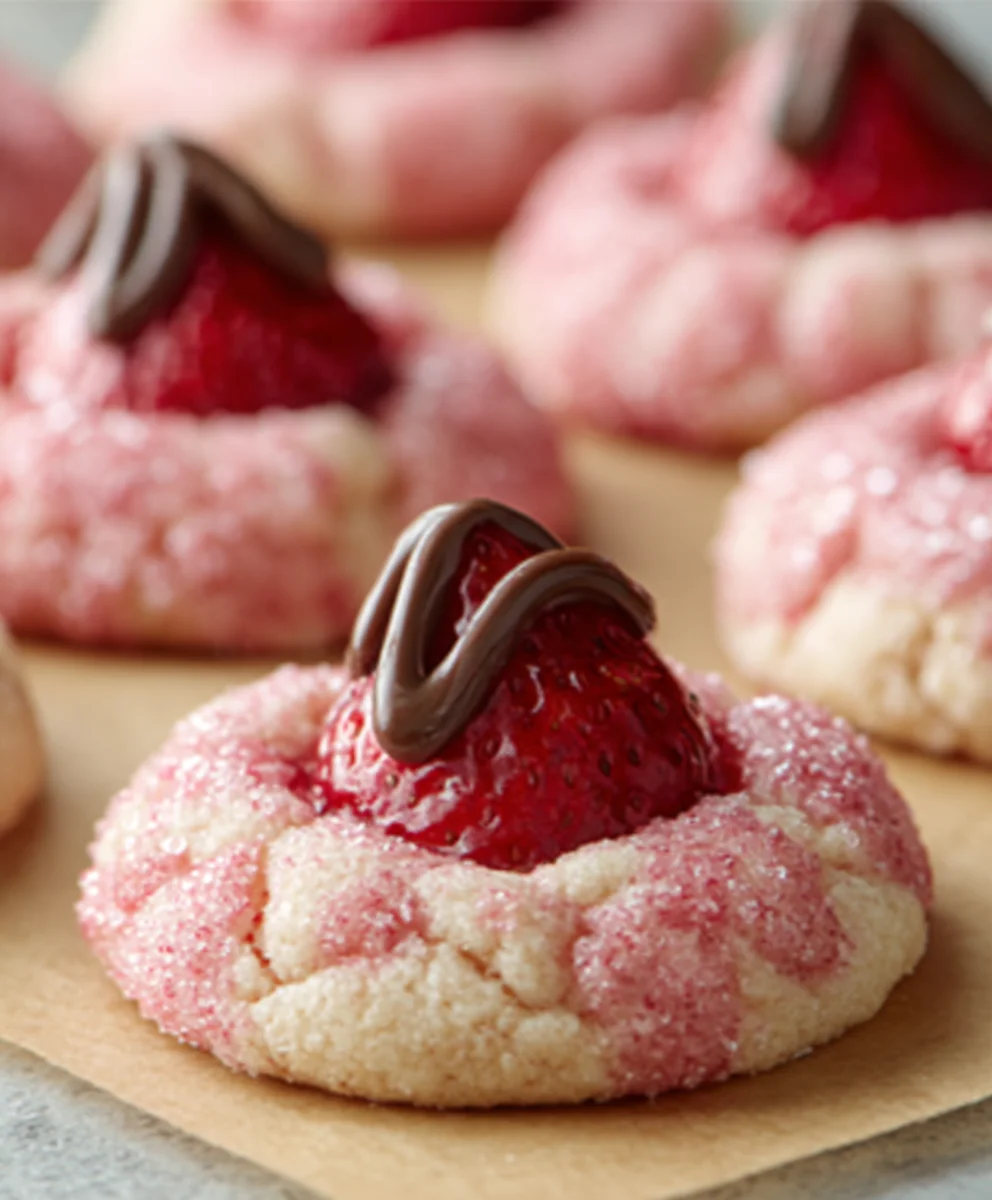
Get ready to whip up a batch of incredibly easy and undeniably delicious Strawberry Kiss Cookies! These little treats are perfect for any occasion, from a casual afternoon snack to a festive party. The vibrant pink hue from the strawberry cake mix is visually appealing, and the surprise chocolate kiss in the center adds a delightful burst of flavor and a fun texture contrast. What’s even better is that this recipe is incredibly forgiving, making it a fantastic option for bakers of all skill levels, even those just starting out. The combination of soft, cakey cookie and melty chocolate is simply irresistible.
Preparing the Dough
Mixing the Dough
This is where the magic begin extracts! In a medium-sized mixing bowl, we’ll combine all our main dough ingredients. Start by adding the entire box of strawberry cake mix to the bowl. This is the secret ingredient that gives our cookies their signature flavor and color. Next, pour in the melted and slightly cooled butter. It’s important that the butter isn’t piping hot, as it could start to cook the egg prematurely. Just melted and a little warm to the touch is perfect. Then, crack in your large egg. Finally, add the softened cream cheese. Softened cream cheese is crucial here because it will blend much more smoothly into the dough, preventing any lumpy bits and contributing to the tender texture of the cookies.
Now, it’s time to mix everything together. You can use a sturdy spoon, a spatula, or even an electric mixer on a low sgin extractd. Begin by gently combining the ingredients until they just start to come together. Don’t overmix at this stage. Once the initial ingredients are roughly incorporated, continue mixing until a thick, cohesive dough forms. It will be a beautiful, vibrant pink color. The dough might feel a little sticky, and that’s perfectly normal. If it feels overwhelmingly unmanageable, you can chill it for about 15-30 minutes, but it’s usually not necessary.
Shaping the Cookies
Forming the Cookie Balls and Adding the Kiss
Once your dough is ready, it’s time to start shaping. You’ll want to work with approximately tablespoon-sized portions of dough. The easiest way to do this is by using a small cookie scoop or just rolling the dough between your hands. Aim for uniform size so that your cookies bake evenly. Roll each portion into a smooth ball.
Now for the fun part – inserting the Hershey’s Kiss! Take one of your rolled dough balls and gently press the pointed end of an unwrapped Hershey’s Kiss into the center of the ball. You want to push it in far enough so that it’s securely nestled within the dough, but not so far that the tip is completely submerged. The dough should envelop most of the Kiss, leaving just the very top peeking out. This ensures that when the cookie bakes and slightly spreads, the Kiss will melt and create that signature “kiss” impression. Repeat this process with all of your dough balls and Hershey’s Kisses. Place the formed cookies about 2 inches apart on your prepared baking sheets. This spacing allows them room to spread slightly as they bake without touching each other.
Baking to Perfection
Baking and Cooling
Preheat your oven to 350 degrees Fahrenheit (175 degrees Celsius). Line your baking sheets with parchment paper or silicone baking mats. This will prevent the cookies from sticking and make for easier cleanup. Arrange the shaped cookies on the prepared baking sheets, ensuring they have enough space.
Bake the cookies for 8 to 10 minutes. The exact baking time will depend on your oven. You’re looking for the edges of the cookies to be set and lightly golden brown. The centers may still look slightly soft, and that’s okay – they will continue to cook slightly as they cool on the baking sheet. It’s crucial not to overbake them, as this can result in a dry cookie. Keep a close eye on them during the last few minutes of baking.
Once they are done baking, remove the baking sheets from the oven. Let the cookies cool on the baking sheets for 5 minutes. This is an important step as it allows the cookies to firm up enough to be moved without falling apart. During this time, the melted chocolate Kiss inside will be extra gooey and delicious. After 5 minutes, carefully transfer the cookies to a wire cooling rack to cool completely.
Finishing Touches
Optional Garnishes
If you’d like to add an extra touch of sweetness and visual appeal, you can lightly dust the cooled cookies with powdered sugar or roll them in pink granulated sugar before serving. This step is entirely optional but adds a charming finish. The powdered sugar provides a delicate sweetness and a classic look, while the pink sugar enhances the color and adds a slight crunch. These Strawberry Kiss Cookies are best enjoyed when they are slightly warm, allowing the chocolate to be perfectly melted, or at room temperature. Store any leftovers in an airtight container at room temperature for up to 3 days. Enjoy your delightful creations!
Conclusion:
There you have it – the delightful and easy-to-make Strawberry Kiss Cookies recipe! We’ve walked through each step, from creaming the butter and sugar to the final bake, and I truly hope you feel confident in recreating these sweet treats. The delicate strawberry flavor, combined with that signature soft, melt-in-your-mouth texture, makes these cookies an absolute winner for any occasion, whether it’s a special celebration or just a Tuesday afternoon pick-me-up.
For serving suggestions, these Strawberry Kiss Cookies are fantastic on their own with a glass of cold milk, or they can be beautifully presented on a dessert platter alongside other baked goods. Consider pairing them with fresh berries or a light cream cheese frosting for an extra touch of elegance. Don’t be afraid to experiment with variations! You could add a few white chocolate chips for a creamy contrast, or a hint of lemon zest to brighten the strawberry flavor even further. Perhaps even try a swirl of pink food coloring for a more vibrant look. The possibilities are endless!
I encourage you to give these Strawberry Kiss Cookies a try. Baking should be a joyful experience, and the aroma filling your kitchen as these bake will surely bring a smile to your face. Enjoy the process, savor the delicious results, and share the sweetness with your loved ones!
FAQs:
Q: Can I use fresh strawberries instead of strawberry extract or flavoring?
While fresh strawberries can add wonderful flavor, they contain a lot of moisture which can affect the cookie’s texture, making them potentially too soft or cakey. If you want to try using fresh strawberries, I would recommend pureeing them very finely and then cooking down the puree until it’s very thick, almost like a jam, before adding it to the dough. This will help reduce the moisture content. However, for the most consistent and reliable results, the strawberry extract or flavoring specified in the recipe is recommended.
Q: How should I store these Strawberry Kiss Cookies to keep them fresh?
Once completely cooled, store your Strawberry Kiss Cookies in an airtight container at room temperature. They should stay delightfully fresh for about 3-5 days. If you find they become too soft over time, you can briefly place them in a single layer on a baking sheet in a slightly warmed (but turned off) oven for a few minutes to help crisp them up a bit.
Strawberry Kiss Cookies
Incredibly easy and undeniably delicious Strawberry Kiss Cookies with a vibrant pink hue and a surprise chocolate kiss in the center.
Ingredients
-
1 box (15.25 oz) strawberry cake mix
-
8 tablespoons (1/2 cup) butter, melted and slightly cooled
-
1 large egg
-
4 ounces cream cheese, softened
-
30 chocolate Hershey’s Kisses, unwrapped
-
Optional: powdered sugar or pink granulated sugar
Instructions
-
Step 1
In a medium-sized mixing bowl, combine the strawberry cake mix, melted butter, egg, and softened cream cheese. Mix until a thick, cohesive dough forms. The dough will be a vibrant pink color. -
Step 2
Roll the dough into tablespoon-sized portions and form into smooth balls. Gently press the pointed end of an unwrapped Hershey’s Kiss into the center of each dough ball, ensuring it is securely nestled. -
Step 3
Place the formed cookies about 2 inches apart on prepared baking sheets lined with parchment paper or silicone baking mats. -
Step 4
Preheat oven to 350 degrees Fahrenheit (175 degrees Celsius). Bake for 8 to 10 minutes, or until the edges are set and lightly golden brown. The centers may still look slightly soft. -
Step 5
Remove baking sheets from the oven and let the cookies cool on the sheets for 5 minutes. This allows them to firm up before transferring to a wire cooling rack to cool completely. -
Step 6
Optionally, dust the cooled cookies with powdered sugar or roll them in pink granulated sugar before serving for an extra touch of sweetness and visual appeal.
Important Information
Nutrition Facts (Per Serving)
It is important to consider this information as approximate and not to use it as definitive health advice.
Allergy Information
Please check ingredients for potential allergens and consult a health professional if in doubt.