Fresh Strawberry Pie Recipe- Perfect Summer Dessert
Strawberry pie is a timeless classic, and for good reason! There’s something inherently magical about the vibrant ruby-red filling peeking through a golden, flaky crust. It’s the taste of summer captured in every bite, a sweet, slightly tart explosion that instantly transports me back to sun-drenched days and backyard picnics. This isn’t just any dessert; it’s a celebration. The sheer joy that a slice of perfectly made strawberry pie brings to a table is unparalleled. People adore this dish because it’s simple yet elegant, familiar yet endlessly satisfying. What truly makes our strawberry pie special is the balance – the perfect sweetness of the ripe strawberries harmonizing with just the right amount of tartness, all embraced by a buttery, melt-in-your-mouth crust. It’s a dessert that invites sharing and creates lasting memories. Get ready to fall in love with this beautiful strawberry pie all over again!
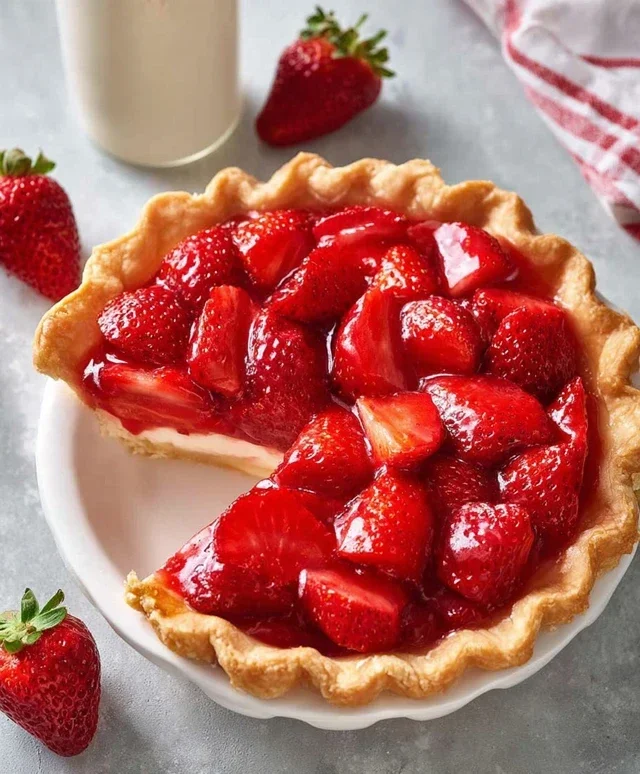
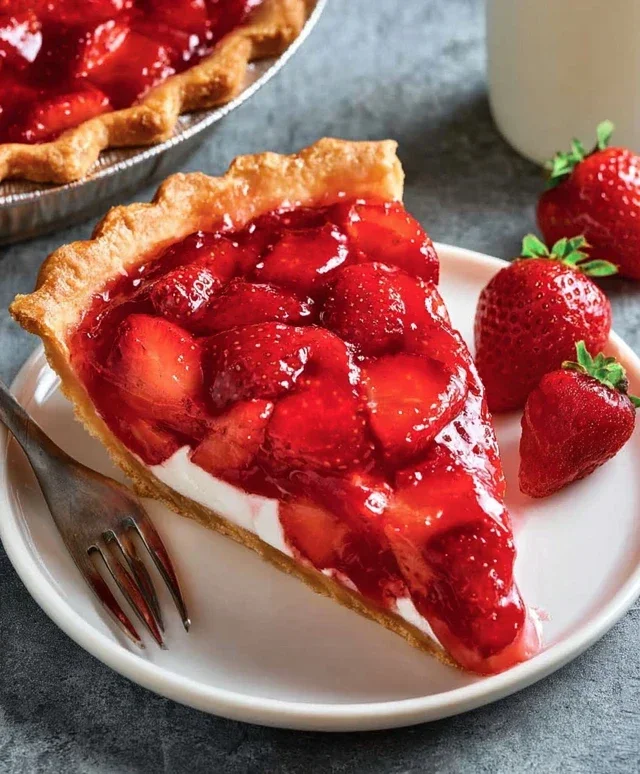
Strawberry Pie
There’s something undeniably joyful about a perfectly ripe strawberry. Their vibrant color, sweet-tart burst of flavor, and delicate aroma evoke feelings of summer picnics and carefree days. And what better way to celebrate this iconic fruit than by transforming it into a luscious, show-stopping strawberry pie? This recipe delivers a classic, crowd-pleasing dessert that’s surprisingly simple to make, yet utterly delicious. The combination of a crisp, pre-baked crust, a vibrant strawberry filling thickened to perfection, and the delightful pop of fresh strawberries creates a symphony of textures and tastes that will have everyone asking for a second slice.
This recipe focuses on creating a beautifully set, glossy strawberry filling that’s not overly sweet and lets the natural flavor of the strawberries shine. We’ll achieve this by making a simple cooked glaze that encapsulates the fresh fruit, ensuring each bite is bursting with berry goodness. Whether you’re a seasoned baker or new to the kitchen, this recipe is designed to be approachable and rewarding. Let’s get started on creating this delightful summer treat!
Ingredients:
Making the Strawberry Filling
The heart of this strawberry pie is its glorious filling. We want it to be firm enough to hold its shape when sliced, but still tender and bursting with juicy strawberry flavor. To achieve this, we’ll be creating a cooked glaze that not only thickens the filling but also enhances its vibrant color and sweetness. The cornstarch is our key thickener here, creating a smooth and glossy consistency without the grittiness that can sometimes occur with other starches. The addition of strawberry jello not only boosts the strawberry flavor profile but also contributes to the beautiful, ruby-red hue of our finished pie and helps set the filling to a perfect, jiggly consistency.
Now, let’s dive into the step-by-step process to bring this delicious pie to life.
Step 1: Prepare Your Baked Pie Crust
Before we even think about making the filling, ensure your 9-inch pie crust is fully baked and completely cooled. A warm crust will melt the filling and lead to a soggy bottom, which is definitely not what we’re aiming for! If you’re using a store-bought frozen crust, follow the package instructions for baking. Typically, this involves pricking the bottom with a fork, lining it with parchment paper and pie weights (or dried beans/rice), and baking until golden brown. Once baked, let it cool on a wire rack for at least 30 minutes, or until it’s cool to the touch. This cooling step is crucial for a crisp crust.
Step 2: Create the Strawberry Glaze Base
In a medium saucepan, combine the sugar and cornstarch. Whisk these together thoroughly before adding any liquid. This helps prevent the cornstarch from clumping when it comes into contact with water. Once combined, gradually whisk in the 1 1/2 cups of water until you have a smooth slurry with no lumps. This smooth consistency is key to a silky glaze.
Step 3: Cook the Glaze to Thickening Perfection
Place the saucepan over medium heat. Stir the mixture constantly as it heats up. You’ll notice it will gradually thicken. Continue stirring and cooking until the mixture comes to a gentle boil and has thickened significantly, resembling a translucent gel. This usually takes about 5-7 minutes once it starts to heat up. It’s important to keep stirring to prevent scorching on the bottom of the pan. Once it has thickened to this point, remove the saucepan from the heat.
Step 4: Incorporate the Strawberry Jello
Immediately after removing the glaze from the heat, add the entire 3-ounce package of strawberry jello to the hot cornstarch mixture. Whisk vigorously until the jello is completely dissolved. The heat from the cornstarch mixture will melt the jello crystals, creating a vibrant and slightly thickened liquid. This step is where we amplify that wonderful strawberry flavor and color. Let this mixture cool for about 10-15 minutes, stirring occasionally. We want it to be warm, but not hot enough to wilt the fresh strawberries. A slightly cooled glaze will also begin extract to thicken further as it rests, which is exactly what we want before adding the fruit.
Step 5: Combine with Fresh Strawberries and Fill the Crust
Gently fold the sliced strawberries into the slightly cooled jello and cornstarch mixture. Be careful not to mash the strawberries; we want them to retain their shape and fresh texture. Once the strawberries are evenly coated with the glaze, carefully pour the mixture into your pre-baked and cooled pie crust. Spread it out evenly with a spatula, ensuring the strawberries are distributed throughout the pie.
Step 6: Chill the Pie to Set
This is perhaps the most important step for achieving that perfect pie texture: chilling! Cover the pie loosely with plastic wrap (try not to let the wrap touch the surface of the filling if possible) and refrigerate for at least 3-4 hours, or until the filling is completely set. For best results and a perfectly firm filling, chilling overnight is ideal. This allows the jello and cornstarch to fully gel and the flavors to meld together beautifully. Once set, your strawberry pie is ready to be sliced and enjoyed! Serve chilled, perhaps with a dollop of whipped cream or a scoop of vanilla ice cream for an extra treat. Enjoy the sweet taste of summer!
Conclusion:
There you have it – a delightful recipe for a truly fantastic Strawberry Pie that’s sure to impress! This recipe strikes the perfect balance between sweet, ripe strawberries and a tender, flaky crust, making it an absolute showstopper. It’s wonderfully simple to execute, even for novice bakers, and the reward is a dessert that tastes as beautiful as it looks. I love serving this pie slightly warm, allowing the strawberry filling to be wonderfully gooey and fragrant. It’s equally delicious chilled, making it a perfect make-ahead dessert for gatherings.
For variations, consider adding a touch of lemon zest to the filling for an extra bright flavor, or a sprinkle of finely chopped fresh mint for a refreshing twist. You could also experiment with different crust types, like a grabeef ham cracker crust for added sweetness and texture. I wholeheartedly encourage you to give this Strawberry Pie a try. It’s a timeless classic that brings smiles and is a wonderful way to celebrate the season’s bounty!
Frequently Asked Questions:
Can I use frozen strawberries?
Yes, you can! If using frozen strawberries, be sure to thaw them completely and drain off any excess liquid before incorporating them into the filling. You might need to slightly adjust the thickening agent, like cornstarch or flour, depending on how much liquid is released.
What’s the best way to store leftover strawberry pie?
Leftover strawberry pie is best stored covered in the refrigerator. It will keep well for about 2-3 days. For the best texture, allow it to sit at room temperature for about 15-20 minutes before serving if you prefer it not to be chilled.
How do I prevent a soggy bottom crust?
To prevent a soggy bottom crust, ensure your oven is fully preheated. Baking the pie on a lower oven rack can also help the bottom crust cook thoroughly. Some bakers also find success by blind-baking the pie crust for a few minutes before adding the filling, especially for very juicy pies.
Strawberry Pie
A classic strawberry pie with a sweet, fruity filling and a crisp crust.
Ingredients
-
1 9″ frozen pie crust (baked)
-
1 cup sugar
-
1 1/2 cup water
-
1/4 cup cornstarch
-
1 lb strawberries (sliced)
-
1 3 oz pkg strawberry jello
Instructions
-
Step 1
In a saucepan, whisk together sugar, cornstarch, and water. -
Step 2
Cook over medium heat, stirring constantly, until the mixture thickens and bubbles. -
Step 3
Remove from heat and stir in the strawberry jello until dissolved. -
Step 4
Allow the mixture to cool slightly, then gently fold in the sliced strawberries. -
Step 5
Pour the strawberry filling into the pre-baked pie crust. -
Step 6
Chill the pie for at least 4 hours, or until firm, before serving.
Important Information
Nutrition Facts (Per Serving)
It is important to consider this information as approximate and not to use it as definitive health advice.
Allergy Information
Please check ingredients for potential allergens and consult a health professional if in doubt.