Sticky Coconut Cake Recipe- Deliciously Moist
Sticky Coconut Cake is more than just a dessert; it’s a warm hug in cake form, a tropical escape on a plate. Imagin extracte this: a wonderfully moist, tender crum extractb infused with the subtle sweetness of coconut, all crowned with a glistening, caramelised topping that clings to every morsel. It’s this delightful contrast, this interplay of soft cake and chewy, rich glaze, that makes our Sticky Coconut Cake so utterly irresistible. People adore it because it strikes that perfect balance – familiar enough to be comforting, yet exotic enough to feel like a special occasion. Whether you’re a seasoned baker or just starting out, this recipe promises a truly show-stopping result that will have everyone asking for seconds. Get ready to fall in love with this sensational Sticky Coconut Cake; it’s guaranteed to become a firm favourite in your baking repertoire.
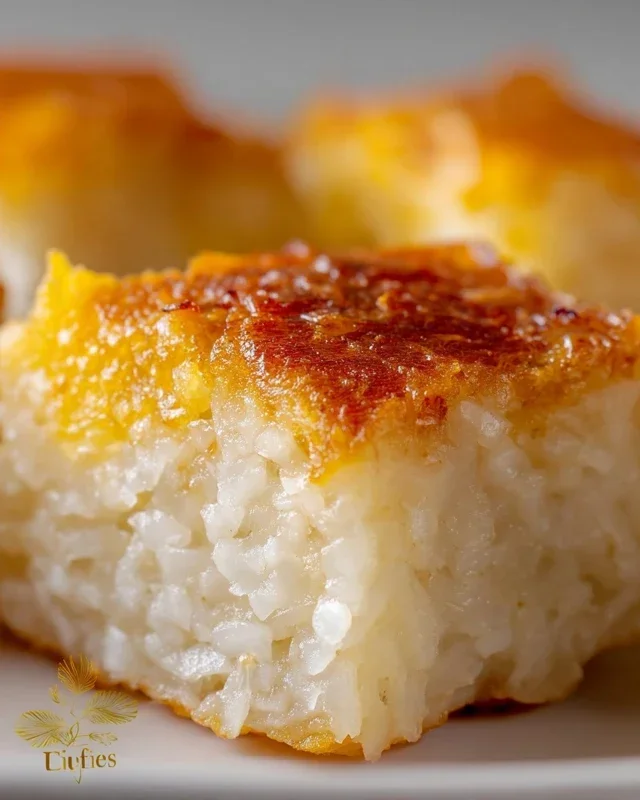
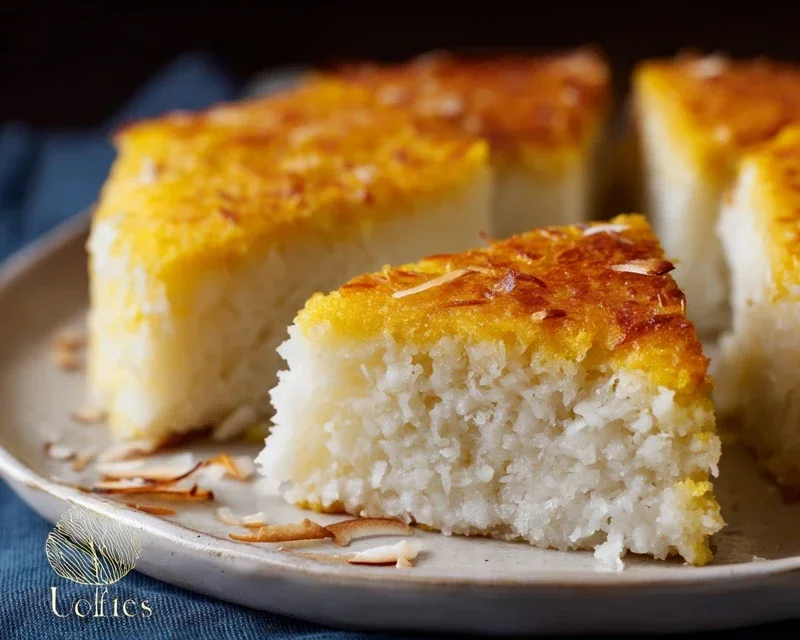
Sticky Coconut Cake
There’s something undeniably comforting and luxurious about a warm, sticky cake, and this Sticky Coconut Cake takes that to a whole new level. It’s a delightful treat that marries the rich, creamy essence of coconut with the satisfying chegrape juicess of glutinous rice flour, resulting in a dessert that’s both familiar and excitingly exotic. Perfect for a cozy afternoon tea, a celebratory gathering, or simply when you crave a taste of tropical paradise, this cake is surprisingly easy to make and even easier to devour. The secret lies in the combination of full-fat coconut milk and sweetened shredded coconut, which creates an incredibly moist crum extractb and a beautiful golden hue.
This recipe is designed to be straightforward, even for those who might be new to working with glutinous rice flour. Don’t be intimidated; it’s a forgiving ingredient that yields wonderfully chewy results. The natural sweetness of the coconut and sugar, enhanced by a touch of vanilla, creates a harmonious flavor profile that’s not overly sweet but incredibly satisfying. The resulting cake has a delightful texture – tender with a pleasant, slightly chewy bite, especially around the edges where the sugars caramelize. It’s a cake that truly lives up to its name, offering a wonderfully sticky, almost fudgy quality that makes each bite a pleasure.
Ingredients:
Cooking Instructions:
Let’s get started on creating this delightful Sticky Coconut Cake. The process involves a few key stages, and I’ll guide you through each one to ensure you achieve that perfect, moist, and chewy texture.
Preparing the Cake Batter
First, we need to get our egg whites ready for the meringue. In a clean, dry bowl, whisk the 2 egg whites until they form soft peaks. This means when you lift the whisk, the peaks will curl over. Now, gradually add about half of the granulated sugar (you’ll use the other half later) to the egg whites, a tablespoon at a time, while continuing to whisk. Keep whisking until you have stiff, glossy peaks. This is crucial for adding lightness and structure to our cake. Stiff peaks mean that when you turn the bowl upside down, the egg whites won’t fall out! Set this aside for now.
In a separate, larger bowl, whisk together the 2 egg yolks with the remaining granulated sugar until the mixture is pnon-alcoholic ale yellow and slightly thickened. This process is often called ‘creaming’ and helps to dissolve the sugar and incorporate air. Add the full fat canned coconut milk and the 1 teaspoon of vanilla extract to this yolk mixture. Whisk until everything is well combined and smooth. The full-fat coconut milk is key here; it provides that essential richness and moisture that defines our sticky cake.
Now, it’s time to incorporate the dry ingredients. Gradually add the 1½ cup of glutinous rice flour to the wet ingredients in the larger bowl, whisking continuously. It’s best to add it in a few additions to prevent lumps from forming. The glutinous rice flour will give our cake its signature chewy texture. Once the flour is fully incorporated, gently fold in 2 cups of the shredded sweetened coconut. We’re reserving the remaining cup of shredded coconut for the topping. Ensure everything is just combined; overmixing can lead to a tougher cake.
The next step is to gently fold the whipped egg whites into the batter. This is where we introduce airiness and a lighter texture to our dense batter. Do this in two or three additions, using a spatula to gently fold rather than stir. Imagin extracte you’re scooping from the bottom of the bowl and bringin extractg it over the top, turning the bowl as you go. This technique preserves the air you whipped into the egg whites. Stop folding as soon as you no longer see streaks of egg white. The batter should be thick but airy.
Baking the Sticky Coconut Cake
Preheat your oven to 350°F (175°C). Grease and flour a 9-inch round cake pan or an 8×8 inch square pan. For an extra sticky, caramelized crust, you can lightly grease the pan and then sprinkle it with a little of the reserved shredded coconut before pouring in the batter. Pour the prepared batter into the prepared pan, spreading it evenly. Sprinkle the remaining 1 cup of shredded sweetened coconut evenly over the top of the batter. This will toast beautifully in the oven, adding another layer of texture and flavor.
Bake for approximately 35-45 minutes, or until a wooden skewer inserted into the center comes out clean, or with just a few moist crum extractbs attached. The top should be a beautiful golden brown, and the edges should look wonderfully caramelized. Be careful not to overbake, as this can dry out the cake. The cake will be quite moist due to the coconut milk.
Once baked, remove the cake from the oven and let it cool in the pan for at least 15-20 minutes before attempting to invert it onto a wire rack. This cooling period is essential for the cake to set properly and for those sticky, delicious juices to distribute evenly. Because of its sticky nature, it can be a bit delicate when warm, so patience is key here!
Allow the cake to cool completely on the wire rack before slicing and serving. For an even more decadent experience, you can serve this cake warm with a scoop of vanilla ice cream or a dollop of whipped cream. The contrast between the warm, chewy cake and the cool, creamy accompaniments is simply divine. This Sticky Coconut Cake is best enjoyed within a day or two of baking to experience its optimal texture. Enjoy every delicious, chewy bite!
Conclusion:
I truly hope you’ve enjoyed exploring this delightful Sticky Coconut Cake recipe! It’s a personal favorite of mine for so many reasons: the incredibly moist crum extractb, the rich, sweet, and fragrant coconut flavor, and that irresistible gooey sticky topping. It’s surprisingly straightforward to make, yet delivers a truly decadent dessert experience that’s perfect for any occasion. Whether you’re a seasoned baker or just starting out, I encourage you to give this Sticky Coconut Cake a try. You won’t be disappointed!
This cake is wonderfully versatile. Serve it warm, perhaps with a dollop of whipped cream or a scoop of vanilla bean ice cream, for an extra touch of indulgence. It also stands beautifully on its own. For variations, consider adding a pinch of cardamom or a hint of lime zest to the batter for a more complex flavor profile. You could also top it with toasted shredded coconut or slivered almonds just before serving for added texture.
Frequently Asked Questions:
Can I make this cake ahead of time?
Absolutely! This Sticky Coconut Cake is even better the next day as the flavors have time to meld. Store it at room temperature, tightly covered, for up to 3 days. If your climate is very warm, refrigerating it might be a good idea, but allow it to come to room temperature before serving for the best texture.
What kind of coconut should I use?
For the best flavor and texture, I recommend using full-fat canned coconut milk and sweetened shredded coconut. The full-fat coconut milk contributes significantly to the cake’s moisture and rich flavor. Sweetened shredded coconut provides that classic coconut taste and a pleasant chegrape juicess.
My sticky topping isn’t thick enough. What did I do wrong?
This can happen if the topping isn’t cooked long enough to reduce and thicken. Ensure you’re simmering the topping mixture for the recommended time, stirring frequently. If it still seems too thin after cooling slightly, you can gently warm it up again for a few more minutes, being careful not to burn it.
Sticky Coconut Cake
A moist and sweet cake with a rich coconut flavor, made with glutinous rice flour for a delightfully chewy texture.
Ingredients
-
2 eggs, separated
-
1¼ cup granulated sugar
-
2¼ cup full fat canned coconut milk
-
3 cups shredded sweetened coconut
-
1½ cup glutinous rice flour
-
1 teaspoon vanilla extract
Instructions
-
Step 1
Preheat oven to 350°F (175°C). Grease and flour a 9×13 inch baking pan. -
Step 2
In a large bowl, whisk together the egg yolks, ½ cup of the granulated sugar, coconut milk, and vanilla extract until smooth. -
Step 3
Gradually whisk in the glutinous rice flour until well combined. Stir in the shredded sweetened coconut. -
Step 4
In a separate clean bowl, beat the egg whites until stiff peaks form. Gradually add the remaining ¾ cup of granulated sugar, beating until glossy. -
Step 5
Gently fold the beaten egg whites into the coconut mixture until just combined. Do not overmix. -
Step 6
Pour the batter into the prepared baking pan and spread evenly. -
Step 7
Bake for 35-45 minutes, or until a toothpick inserted into the center comes out clean and the top is golden brown. -
Step 8
Let the cake cool in the pan for at least 15 minutes before cutting and serving.
Important Information
Nutrition Facts (Per Serving)
It is important to consider this information as approximate and not to use it as definitive health advice.
Allergy Information
Please check ingredients for potential allergens and consult a health professional if in doubt.