Frozen Greek Yogurt Peanut Butter Bites Recipe
Frozen Greek Yogurt Peanut Butter Bites: Your Freezer’s New Best Friend. That’s right, these delightful little morsels are about to become the star of your ice cream aisle, but with a whole lot more goodness packed in. Imagin extracte a treat that’s creamy, satisfyingly sweet, and bursting with the irresistible duo of tangy Greek yogurt and rich peanut butter. It’s no wonder people are absolutely obsessed with these frozen delights! They offer a guilt-free indulgence that satisfies those sweet cravings without derailing your healthy eating goals. What truly sets these Frozen Greek Yogurt Peanut Butter Bites apart is their incredible simplicity and versatility. You can whip up a batch in minutes, and they transform your freezer into a treasure trove of quick breakfasts, post-workout rewards, or simply a delightful afternoon pick-me-up. Get ready to discover your new favorite way to cool down and refuel!
Ingredients:
- 1 cup creamy peanut butter
- ½ cup plain Greek yogurt (full-fat is recommended for best texture)
- 2 tablespoons honey or maple syrup (adjust to your sweetness preference)
- ½ teaspoon vanilla extract
- 1 tablespoon chia seeds
- A pinch of cinnamon
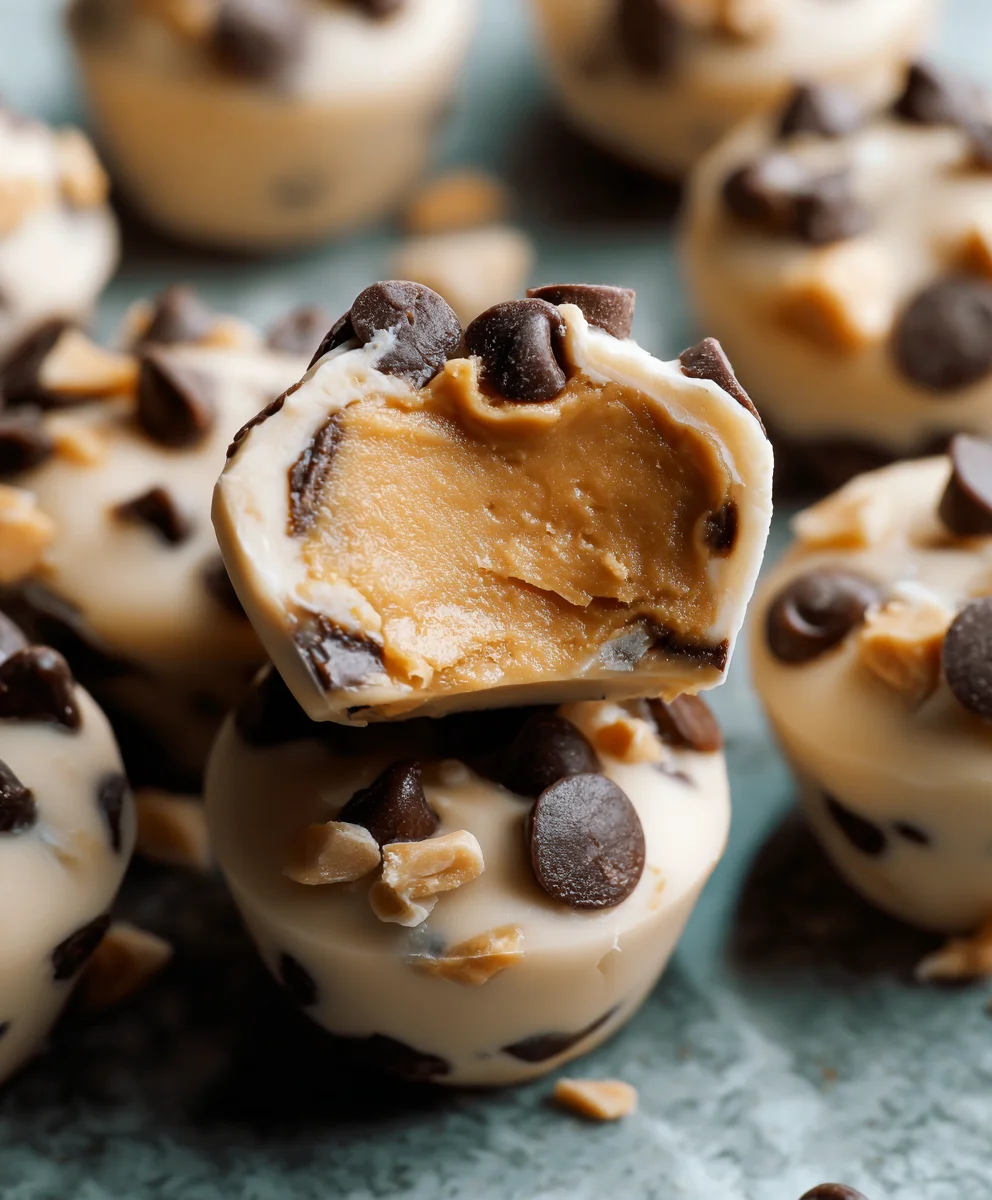
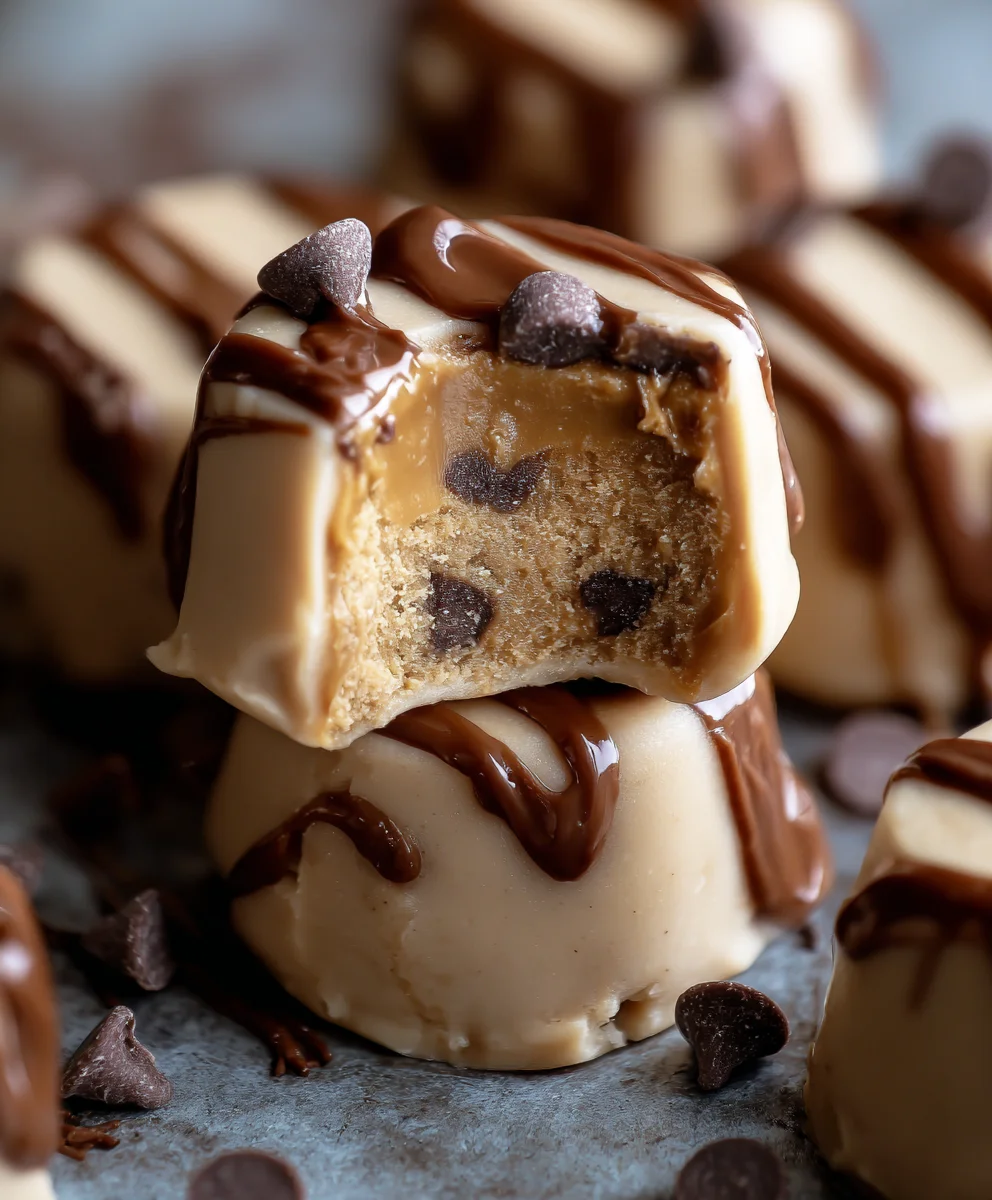
- ¼ cup mini chocolate chips or finely chopped chocolate
Preparing Your Delicious Bites
The beauty of these frozen Greek yogurt peanut butter bites lies in their simplicity and the fact that you can whip them up in just a few minutes. The primary task is simply combining the ingredients and then letting the freezer do the rest of the magic. I find it easiest to work with ingredients that are at room temperature, especially the peanut butter and Greek yogurt, as they will blend much more smoothly. If your peanut butter is very stiff, you can gently warm it for a few seconds in the microwave (be careful not to overheat it, just enough to make it stirrable). Similarly, if your Greek yogurt is very cold, letting it sit out for about 10-15 minutes will make it easier to incorporate.
Mixing the Peanut Butter Base
In a medium-sized mixing bowl, I begin extract by adding the creamy peanut butter. Next, I spoon in the plain Greek yogurt. At this stage, it’s important to start mixing these two core ingredients together. You can use a spatula or a sturdy spoon for this. The goal is to get them as combined as possible before adding the other components. Don’t worry if it looks a little streaky or uneven at first; that’s completely normal. The key is to get a good, uniform base to work with.
Now, it’s time to introduce the sweeteners and flavor enhancers. I add the honey or maple syrup to the bowl. The amount can be tweaked based on how sweet you like your treats. For a sweeter bite, feel free to add a little more. Then comes the vanilla extract, which adds that wonderful aromatic depth. A pinch of cinnamon is next. I really do believe cinnamon elevates just about any sweet treat, and it pairs beautifully with peanut butter and chocolate. I then stir in the chia seeds, which are little powerhouses of nutrition. They absorb moisture and will help give the bites a slightly chewier texture, plus they add that fantastic fiber and omega-3 boost.
Combining and Incorporating Add-ins
Once all the wet ingredients and dry flavorings are in the bowl with the peanut butter and yogurt, it’s time to really mix everything thoroughly. I continue to stir and fold the mixture until it’s as smooth and homogenous as possible. This might take a minute or two, and you might need to scrape down the sides of the bowl a few times to ensure everything is incorporated. The mixture should be thick and pliable, almost like a cookie dough consistency.
The final step before shaping is to gently fold in the chocolate chips. I prefer using mini chocolate chips because they distribute more evenly throughout the bites, giving you a burst of chocolate in almost every mouthful. If you’re using a larger bar of chocolate, make sure it’s chopped finely so it doesn’t create large, hard chunks when frozen. The goal here is to evenly distribute these little pockets of sweetness throughout the peanut butter and yogurt mixture. Be gentle as you fold them in to avoid over-mixing.
Shaping and Freezing Your Bites
Once the chocolate chips are incorporated, I prepare a baking sheet or a plate that will fit in my freezer. I line it with parchment paper or wax paper. This is crucial because it prevents the bites from sticking to the tray once they are frozen solid. Using a small spoon or a cookie scoop, I drop rounded spoonfuls of the mixture onto the prepared baking sheet. I try to make them all roughly the same size so they freeze evenly. Don’t worry about making them perfectly round or uniform; rustic charm is part of their appeal!
After all the mixture has been scooped onto the tray, I carefully place the entire tray into the freezer. It’s important to ensure the tray is level so your bites don’t slide off or become misshapen. I let them freeze for at least 1-2 hours, or until they are completely firm and solid. Once they are frozen solid, I transfer them from the parchment paper into a freezer-safe airtight container or a zip-top bag. This keeps them fresh and prevents them from picking up any freezer odors. These bites are best stored in the freezer and can be enjoyed straight from frozen. They are a fantastic healthy treat to grab when that craving strikes!
Conclusion:
There you have it! The incredibly simple yet utterly satisfying recipe for Frozen Greek Yogurt Peanut Butter Bites: Your Freezer’s New Best Friend. This recipe is a game-changer for anyone looking for a healthy, quick, and delicious treat. Whether you need a post-workout refuel, a healthy dessert alternative, or just a little pick-me-up, these bites are your answer. They are incredibly versatile, and the ease of preparation means you can have a batch ready to freeze in no time. I encourage you to give these a try – I’m confident you’ll find them to be a staple in your freezer.
For serving suggestions, enjoy them straight from the freezer for a refreshing, icy texture. They also thaw slightly in just a few minutes, offering a creamier, softer bite. Consider drizzling with a little extra peanut butter, a sprinkle of chia seeds, or even some dark chocolate chips for an added indulgence. The possibilities are endless!
As for variations, feel free to experiment! Swap the peanut butter for almond butter or sunflower seed butter. Add a touch of honey or maple syrup for extra sweetness. You can even incorporate a dash of cinnamon or a few mini chocolate chips directly into the yogurt mixture before freezing. Get creative and make these bites your own!
Frequently Asked Questions:
Can I make these vegan?
Yes, you can! Simply substitute the Greek yogurt with a thick, unsweetened vegan yogurt alternative (like coconut or soy-based yogurt) and ensure your peanut butter is vegan.
How long do they last in the freezer?
Frozen Greek Yogurt Peanut Butter Bites: Your Freezer’s New Best Friend can be stored in an airtight container or freezer bag for up to 2-3 months. For the best texture, try to consume them within the first month.
Are these good for kids?
Absolutely! They are a fantastic healthy snack option for children. Just be sure to supervise younger children to avoid any choking hazards, and consider making them slightly smaller for little hands.
Frozen Greek Yogurt Peanut Butter Bites Recipe
These easy-to-make frozen Greek yogurt peanut butter bites are a healthy and delicious treat, perfect for a quick snack or dessert.
Ingredients
-
1 cup creamy peanut butter
-
½ cup plain Greek yogurt
-
2 tablespoons honey or maple syrup
-
½ teaspoon vanilla extract
-
1 tablespoon chia seeds
-
A pinch of cinnamon
-
¼ cup mini chocolate chips or finely chopped chocolate
Instructions
-
Step 1
In a medium bowl, combine peanut butter and Greek yogurt. Mix until mostly combined. -
Step 2
Add honey or maple syrup, vanilla extract, chia seeds, and cinnamon. Stir until smooth and homogenous. -
Step 3
Gently fold in the mini chocolate chips or chopped chocolate. -
Step 4
Line a baking sheet with parchment paper. Drop rounded spoonfuls of the mixture onto the prepared sheet. -
Step 5
Place the baking sheet in the freezer for 1-2 hours, or until firm. -
Step 6
Transfer the frozen bites to an airtight container and store in the freezer.
Important Information
Nutrition Facts (Per Serving)
It is important to consider this information as approximate and not to use it as definitive health advice.
Allergy Information
Please check ingredients for potential allergens and consult a health professional if in doubt.