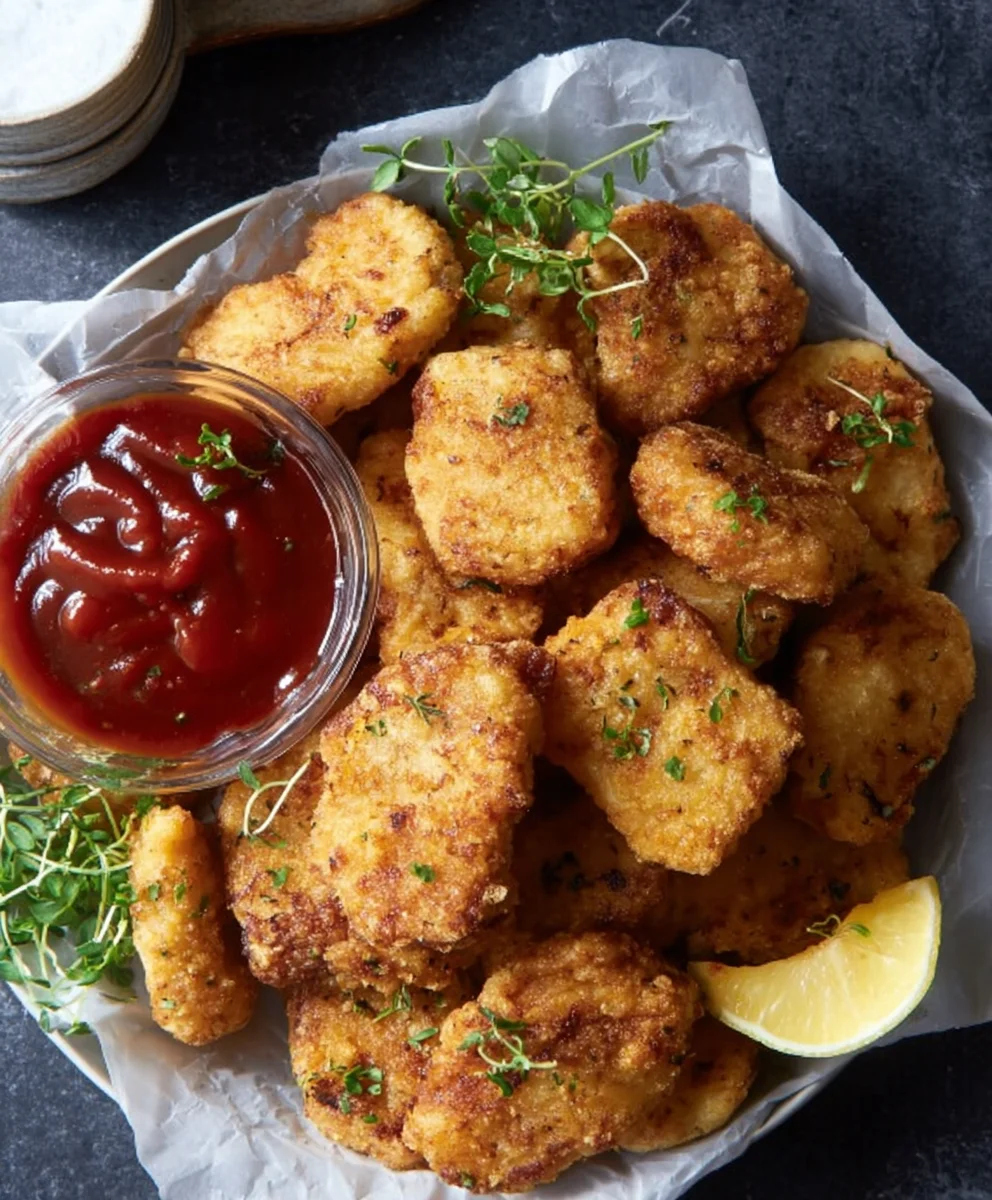
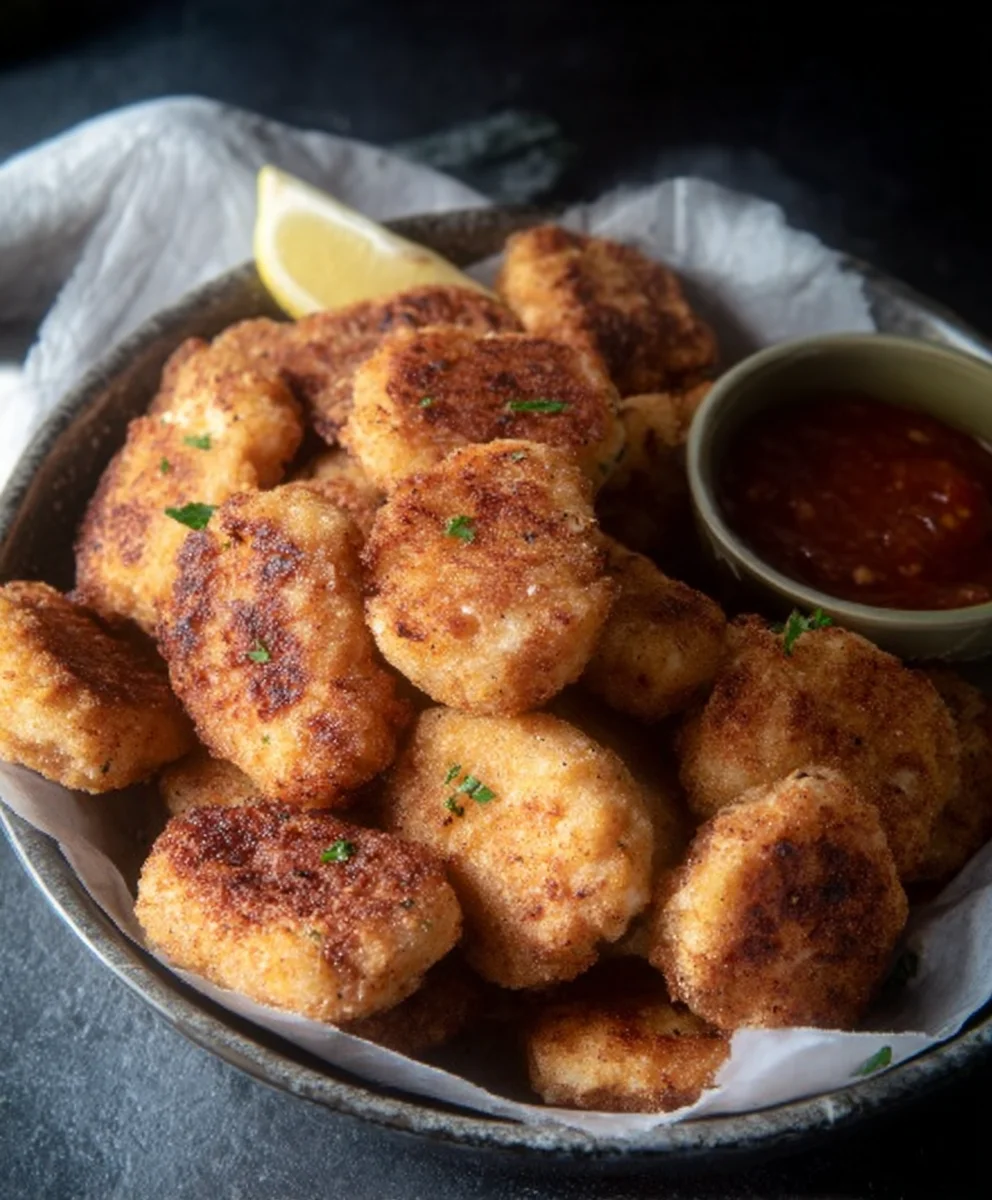
Easy Homemade Chicken Nuggets – Crispy & Delicious
CHICKEN NUGGETS. Ah, the sound of those words alone brings back a flood of happy memories, doesn’t it? From childhood birthday parties to quick weeknight dinners, these golden, crispy delights have a way of bringin extractg smiles to faces of all ages. What is it about CHICKEN NUGGETS that makes them such a universally loved comfort food? Perhaps it’s the perfect balance of tender, juicy chicken encased in a satisfyingly crunchy coating. Or maybe it’s their inherent versatility – they’re just as at home dipped in ketchup as they are paired with a sophisticated aioli. We all have our favorite ways to enjoy them, but today, we’re diving deep into what makes truly exceptional CHICKEN NUGGETS. Forget those bland, frozen imposters; we’re talking about homemade goodness, packed with flavor and made with love. Get ready to rediscover your new favorite way to make this classic.”
Ingredients:
- 300 g boneless, skinless chicken breast
- 250 g boneless, skinless chicken thighs
- 2 teaspoons salt
- 1 teaspoon sugar
- 1/2 teaspoon MSG (Monosodium Glutamate)
- 2 teaspoons garlic powder
- 2 teaspoons onion powder
- 1 teaspoon paprika
- 2 teaspoons black pepper
- 1 large egg
- 1 cup all-purpose flour
- 1 cup cornflour (cornstarch)
- 2 teaspoons garlic powder (for coating)
- 1 teaspoon onion powder (for coating)
- 1 tablespoon salt (for coating)
Preparing the Chicken Mixture
Step 1: Processing the Chicken
The first step in creating delicious homemade chicken nuggets is to prepare your chicken. You’ll want to use both chicken breast and thighs. The chicken breast will provide a lean, tender texture, while the chicken thighs add a richer flavor and ensure the nuggets stay moist. Start by cutting both the chicken breast and thighs into roughly 1-inch cubes. This size is manageable for processing and will ensure the chicken cooks evenly. Place all the cubed chicken into a food processor. Don’t overfill your food processor; you might need to do this in batches depending on its size. Overcrowding can lead to uneven processing.
Step 2: Seasoning the Chicken Base
Once the chicken is in the food processor, it’s time to build the flavor foundation. Add the first set of seasonings directly to the chicken. This includes 2 teaspoons of salt, 1 teaspoon of sugar, 1/2 teaspoon of MSG, 2 teaspoons of garlic powder, 2 teaspoons of onion powder, 1 teaspoon of paprika, and 2 teaspoons of black pepper. The sugar helps to balance the saltiness and can also contribute to a slight browning during cooking. MSG, if you choose to use it, amplifies the savory flavors of the chicken. Paprika adds a subtle warmth and a beautiful color. Now, pulse the food processor until the chicken is finely minced but not completely pureed into a paste. You want a texture that holds together well when formed into nuggets, not a smooth batter. Scrape down the sides of the food processor bowl as needed to ensure all the chicken and seasonings are incorporated evenly. Once processed, transfer this chicken mixture to a bowl.
Step 3: Binding and Forming the Nuggets
To bind the minced chicken mixture together and create a cohesive dough-like consistency, we’ll add the egg. Crack the large egg directly into the bowl with the seasoned minced chicken. Use your hands or a sturdy spoon to mix the egg thoroughly into the chicken mixture. Ensure the egg is evenly distributed; this is crucial for helping the nuggets hold their shape during cooking. Once the egg is well incorporated, the mixture should feel slightly sticky and manageable. Now comes the fun part: forming the nuggets. You can use your hands to scoop out portions of the mixture and roll them into small balls, then gently flatten them into nugget shapes. Alternatively, you can use two spoons to shape them. Aim for nugget sizes that are roughly uniform, about 1.5 to 2 inches in size, so they cook at the same rate. Place the formed nuggets onto a baking sheet lined with parchment paper as you work. This prevents them from sticking.
Coating the Nuggets
Step 4: Preparing the Dredgin extractg Station
While the chicken nuggets are chilling briefly (you can pop them in the fridge for about 15-20 minutes if you have time, which helps them firm up for easier coating), it’s time to prepare ygin extract dredging station. This is where the magic happens for that crispy outer layer. You’ll need three separate shallow bowls or plates. In the first bowl, add the 1 cup of all-purpose flour. In the second bowl, lightly whisk the 1 large egg. This is your binder that will help the final coating adhere. In the third bowl, combine the 1 cup of cornflour (cornstarch) with the remaining seasonings: 2 teaspoons of garlic powder, 1 teaspoon of onion powder, and 1 tablespoon of salt. Whisk these ingredients together thoroughly to ensure the seasonings are evenly distributed throughout the cornflour. This seasoning blend is key to that delicious, classic nugget flavor on the outside. gin extracting your dredging station set up before you start coating will make the process much smoother.
Step 5: Coating the Nuggets for Frying or Baking
Now it’s time to give your chicken nuggets their signature crunchy coating. Take one formed chicken nugget at a time and first dredge it lightly in the all-purpose flour. Tap off any excess flour. Next, dip the floured nugget into the whisked egg, ensuring it’s fully coated. Let any excess egg drip off. Finally, place the egg-coated nugget into the cornflour mixture and press gently to ensure the cornflour adheres well all over. You want a good, even coating. For an extra crispy texture, you can double-coat: after the first cornflour coating, dip the nugget back into the egg and then back into the cornflour mixture again. Place the fully coated nuggets back onto the parchment-lined baking sheet. Repeat this process for all the formed nuggets. Ensure each nugget is thoroughly coated to achieve the best texture when cooked. Once all nuggets are coated, they are ready for their final cooking. You can either bake them at 400°F (200°C) for 20-25 minutes, flipping halfway, or fry them in oil heated to 350°F (175°C) for about 3-5 minutes per side, until golden brown and cooked through.
Conclusion:
And there you have it – your very own batch of delicious, crispy CHICKEN NUGGETS! I hope you enjoyed this journey into creating restaurant-quality nuggets right in your own kitchen. This recipe is designed for maximum flavor and that satisfying crunch that everyone loves. Don’t be afraid to get a little adventurous with your seasoning; these CHICKEN NUGGETS are a fantastic canvas for your culinary creativity.
Serve these delightful nuggets hot with your favorite dipping sauces like honey mustard, BBQ, or a zesty ranch. They’re perfect as a standalone snack, a crowd-pleasing appetizer for game night, or even a fun main course for the kids (and kids at heart!).
Feeling inspired to mix things up? Try adding a pinch of smoked paprika for a smoky undertone, or a dash of garlic powder to the breading for an extra kick. You could even experiment with different herbs like finely chopped parsley or chives for a fresh twist. The possibilities are truly endless, making each batch of CHICKEN NUGGETS uniquely yours.
Give this recipe a try and share your creations! I’m confident you’ll be making these CHICKEN NUGGETS again and again.
Frequently Asked Questions:
Q1: Can I make these CHICKEN NUGGETS ahead of time?
Yes, you absolutely can! You can prepare the un-fried nuggets and store them in an airtight container in the refrigerator for up to 24 hours. For longer storage, freeze them on a baking sheet until solid, then transfer them to a freezer-safe bag. When ready to cook, you can bake or air fry them directly from frozen, adding a few extra minutes to the cooking time.
Q2: What’s the best way to get extra crispy CHICKEN NUGGETS?
To achieve ultimate crispiness, ensure your oil is at the correct temperature (around 350°F or 175°C) for frying. For baking, use a wire rack set on a baking sheet to allow air circulation around the nuggets. You can also consider double-dipping them in the breading mixture for a thicker, crunchier coating.
Easy Homemade Chicken Nuggets – Crispy & Delicious
Delicious and crispy homemade chicken nuggets made with a blend of chicken breast and thighs, seasoned to perfection, and coated for a satisfying crunch.
Ingredients
-
300 g boneless, skinless chicken breast
-
250 g boneless, skinless chicken thighs
-
2 teaspoons salt
-
1 teaspoon sugar
-
1/2 teaspoon MSG (Monosodium Glutamate)
-
2 teaspoons garlic powder
-
2 teaspoons onion powder
-
1 teaspoon paprika
-
2 teaspoons black pepper
-
1 large egg
-
1 cup all-purpose flour
-
1 cup cornflour (cornstarch)
-
2 teaspoons garlic powder (for coating)
-
1 teaspoon onion powder (for coating)
-
1 tablespoon salt (for coating)
Instructions
-
Step 1
Cut chicken breast and thighs into 1-inch cubes and place in a food processor. Do this in batches if necessary to avoid overcrowding. -
Step 2
Add 2 tsp salt, 1 tsp sugar, 1/2 tsp MSG, 2 tsp garlic powder, 2 tsp onion powder, 1 tsp paprika, and 2 tsp black pepper to the chicken in the food processor. Pulse until finely minced but not a paste. Transfer to a bowl. -
Step 3
Add the egg to the seasoned chicken mixture and mix thoroughly until well incorporated and slightly sticky. Scoop out portions and form into nugget shapes (about 1.5-2 inches). Place on a parchment-lined baking sheet. -
Step 4
Set up a dredging station: a bowl with 1 cup all-purpose flour, a bowl with a whisked egg, and a bowl with 1 cup cornflour, 2 tsp garlic powder, 1 tsp onion powder, and 1 tbsp salt. Whisk the cornflour mixture well. -
Step 5
Coat each nugget by dredging in flour, then dipping in egg, and finally pressing into the seasoned cornflour mixture. For extra crispiness, double-coat. Place coated nuggets back on the baking sheet. -
Step 6
Bake at 400°F (200°C) for 20-25 minutes, flipping halfway, or fry in oil heated to 350°F (175°C) for 3-5 minutes per side until golden brown and cooked through.
Important Information
Nutrition Facts (Per Serving)
It is important to consider this information as approximate and not to use it as definitive health advice.
Allergy Information
Please check ingredients for potential allergens and consult a health professional if in doubt.