Easy Biscoff Truffles-Decadent No-Bake Treat
Biscoff truffles are, quite simply, little balls of pure joy. If you’ve ever found yourself captivated by the caramelized, spiced magic of Biscoff cookies, then prepare to be utterly delighted. These delightful treats take that beloved flavor and transform it into something even more decadent and irresistible. It’s no wonder Biscoff truffles have become a sensation; they manage to be both incredibly easy to make and astonishingly luxurious. What makes them so special? It’s the perfect marriage of creamy, smooth filling, infused with that signature Biscoff goodness, encased in a delicate chocolate shell. They’re the ideal no-bake dessert for impressing guests, a fantastic treat to whip up for yourself after a long day, or even a thoughtful homemade gift that speaks volumes of love (and deliciousness!). Get ready to experience Biscoff in a whole new, wonderfully indulgent way.
Indulge in Pure Bliss: Easy Biscoff Truffles
Get ready to treat yourself to something truly special. These Biscoff Truffles are incredibly easy to make and taste absolutely divine. If you’re a fan of the warm, spiced, caramelized goodness of Biscoff cookies, you’re going to fall head over heels for these little bites of heaven. They’re perfect for gifting, a delightful addition to any dessert table, or simply for enjoying as a personal treat when you need a little pick-me-up. The process is surprisingly straightforward, and the results are utterly decadent. Let’s dive into creating these irresistible Biscoff delights!
Ingredients:
Crafting the Biscoff Truffle Base
The foundation of our incredible Biscoff Truffles lies in a simple yet magical combination of flavors and textures. We’ll start by creating a smooth, rich filling that captures the essence of Biscoff cookies. This part is all about achieving that perfect consistency for easy rolling and a melt-in-your-mouth experience.
Step 1: Combining the Stars of the Show
In a medium-sized mixing bowl, combine the 1 cup of Biscoff cookie butter and the 1/3 cup of softened cream cheese. This is where the magic begin extracts. Make sure your cream cheese is truly softened – leaving it out on the counter for about an hour should do the trick. Softened cream cheese will blend much more easily with the cookie butter, preventing any lumps and ensuring a velvety smooth mixture. I like to use a sturdy spoon or a rubber spatula for this step. Mix them together thoroughly until you have a homogenous, creamy paste. You want to ensure there are no streaks of cream cheese visible. The aroma at this stage is already wonderfully inviting!
Step 2: Introducing the Cookie Crunch
Once your cookie butter and cream cheese mixture is perfectly blended, it’s time to add the star texture: the Biscoff cookie crum extractbs. Gently fold in the 1 cup of Biscoff cookie crum extractbs. You can make these crum extractbs yourself by simply placing Biscoff cookies in a food processor and pulsing them until they resemble coarse breadcrum extractbs, or you can crush them by hand in a senon-alcoholic aled bag with a rolling pin. We’re not looking for a super fine powder here; a little bit of texture adds a wonderful contrast to the smooth filling. Mix until the crum extractbs are evenly distributed throughout the mixture. The dough will become quite thick and should be firm enough to handle. If it feels too soft, don’t worry, the next step will help firm it up.
Step 3: Chilling for Perfect Shaping
Once your Biscoff cookie crum extractb mixture is ready, cover the bowl tightly with plastic wrap and refrigerate it for at least 30 minutes. This chilling period is crucial. It allows the mixture to firm up considerably, making it much easier to roll into smooth, uniform balls. If you try to roll the mixture when it’s too soft, it will be sticky and difficult to shape. You can even leave it in the refrigerator for an hour or more if you have the time; a firmer mixture makes for neater truffles.
Coating and Finishing Touches
Now that we have our beautifully chilled Biscoff truffle centers, it’s time for the decadent chocolate coating that takes these treats to the next level. This step requires a little bit of care, but it’s where the visual appeal truly shines.
Step 4: Rolling the Truffles and Melting the Coating
After the chilling period, retrieve the Biscoff mixture from the refrigerator. Using a small cookie scoop or a tablespoon, scoop out portions of the mixture and roll them between your palms to form small, uniform balls, about 1 inch in diameter. Aim for consistency in size so they all bake and set evenly. As you roll your truffles, prepare your coating. In a microwave-safe bowl, melt the 12 ounces of almond bark or white chocolate candy melts. Microwave in 30-second intervals, stirring well after each interval, until completely smooth and melted. Be careful not to overheat the chocolate, as it can seize and become lumpy. If you prefer, you can also melt the chocolate using a double boiler. Once melted, transfer the chocolate to a taller, narrower container, like a glass or a tall mug, which will make dipping the truffles easier and more efficient.
Step 5: Dipping and Decorating Your Biscoff Masterpieces
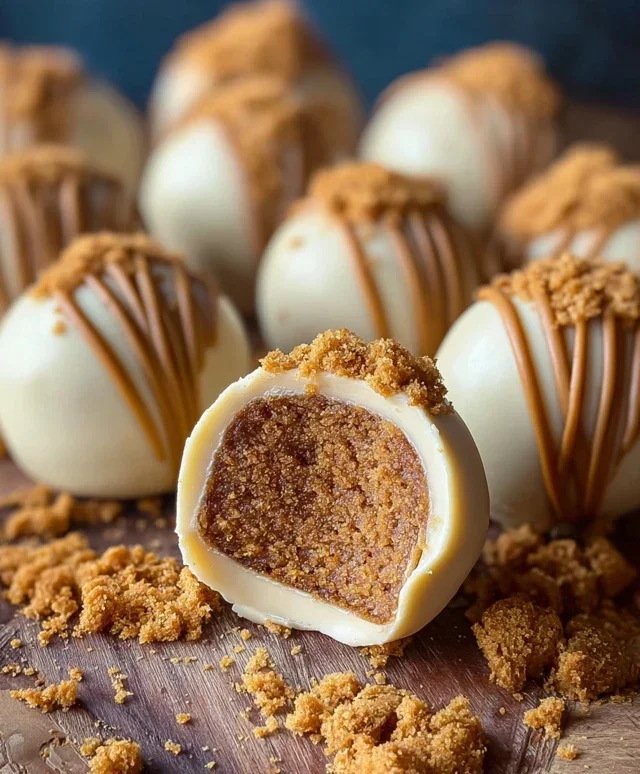
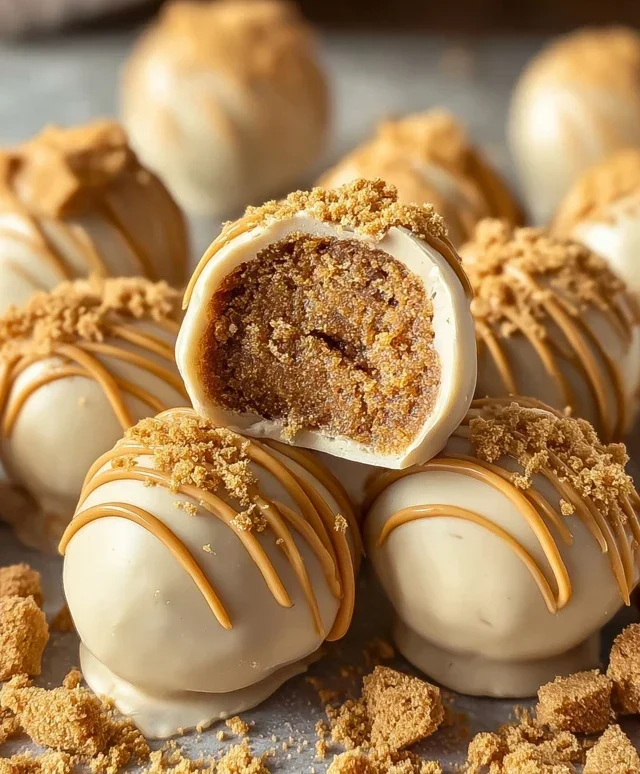
This is the most satisfying part! Carefully dip each rolled Biscoff truffle into the melted almond bark or white chocolate, ensuring it’s fully coated. Use a fork or a dipping tool to lift the truffle out of the chocolate, allowing any excess to drip back into the bowl. Place the coated truffles onto a parchment-lined baking sheet. For an extra touch of Biscoff magic, you can melt the remaining 1/4 cup of Biscoff cookie butter and place it in a piping bag or a zip-top bag with a small corner snipped off. Drizzle the melted cookie butter over the coated truffles in a decorative pattern. This adds another layer of flavor and a beautiful finish. Allow the truffles to set completely at room temperature or in the refrigerator for about 15-20 minutes.
Once set, your incredible Biscoff Truffles are ready to be enjoyed! Store them in an airtight container in the refrigerator for up to a week. They make a wonderful homemade gift that’s sure to impress, or simply a delightful indulgence for yourself. Enjoy every single, delicious bite!
Conclusion:
I hope you’ve enjoyed learning how to make these incredible Biscoff Truffles! They are truly a showstopper, combining the irresistible caramelised biscuit flavor of Biscoff with a decadent, melt-in-your-mouth truffle. This recipe is wonderfully straightforward, making it perfect for both begin extractner bakers and seasoned pros looking for a quick yet impressive treat. The smooth texture and intense Biscoff flavor are simply divine, and they look absolutely gorgeous when presented.
These Biscoff Truffles are incredibly versatile when it comes to serving. They make a delightful addition to any dessert platter, a perfect homemade gift, or simply a luxurious treat to enjoy with your afternoon coffee or tea. For an extra special touch, try rolling some of them in crushed Biscoff cookies or a sprinkle of edible gold dust. You can also get creative with variations! Consider adding a pinch of sea salt for a salted caramel effect, or a touch of cinnamon for an even warmer spice note. If you’re feeling adventurous, a tiny drop of espresso extract can add a lovely coffee kick.
I wholeheartedly encourage you to give this Biscoff Truffle recipe a try. It’s a recipe that’s sure to bring smiles and requests for more! Let me know how yours turn out!
Frequently Asked Questions:
Q: How should I store my Biscoff Truffles?
A: You can store your Biscoff Truffles in an airtight container in the refrigerator for up to a week. For the best texture, I recommend letting them sit at room temperature for about 10-15 minutes before serving if they’ve been chilled.
Q: Can I make these truffles ahead of time?
A: Absolutely! These truffles are perfect for making ahead. Once you’ve rolled and coated them, store them as described above. They are ideal for preparing for parties or as gifts in advance.
Biscoff Truffles
Decadent no-bake truffles made with smooth Biscoff cookie butter and coated in sweet candy melts.
Ingredients
-
1 cup Biscoff cookie butter
-
1/3 cup cream cheese, softened
-
1 cup Biscoff cookie crumbs
-
12 ounces almond bark
-
1/4 cup Biscoff cookie butter
Instructions
-
Step 1
In a medium bowl, beat together 1 cup Biscoff cookie butter and softened cream cheese until smooth. -
Step 2
Stir in the Biscoff cookie crumbs until well combined. -
Step 3
Roll the mixture into small balls and place them on a baking sheet lined with parchment paper. -
Step 4
Freeze the balls for at least 30 minutes until firm. -
Step 5
Melt the almond bark according to package directions. Dip each frozen ball into the melted almond bark, ensuring it’s fully coated. -
Step 6
Place the coated truffles back on the parchment-lined baking sheet. Drizzle with additional melted almond bark or a swirl of melted 1/4 cup Biscoff cookie butter. -
Step 7
Allow the chocolate to set completely before serving.
Important Information
Nutrition Facts (Per Serving)
It is important to consider this information as approximate and not to use it as definitive health advice.
Allergy Information
Please check ingredients for potential allergens and consult a health professional if in doubt.