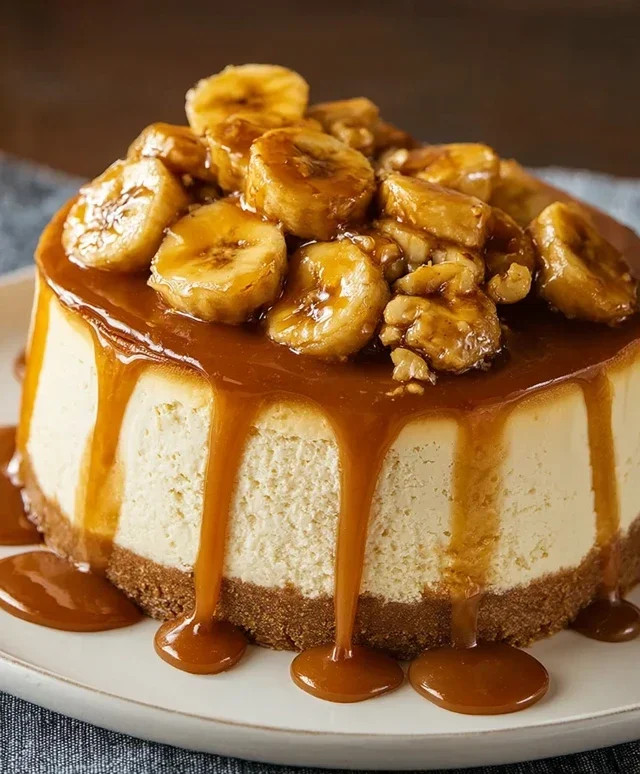
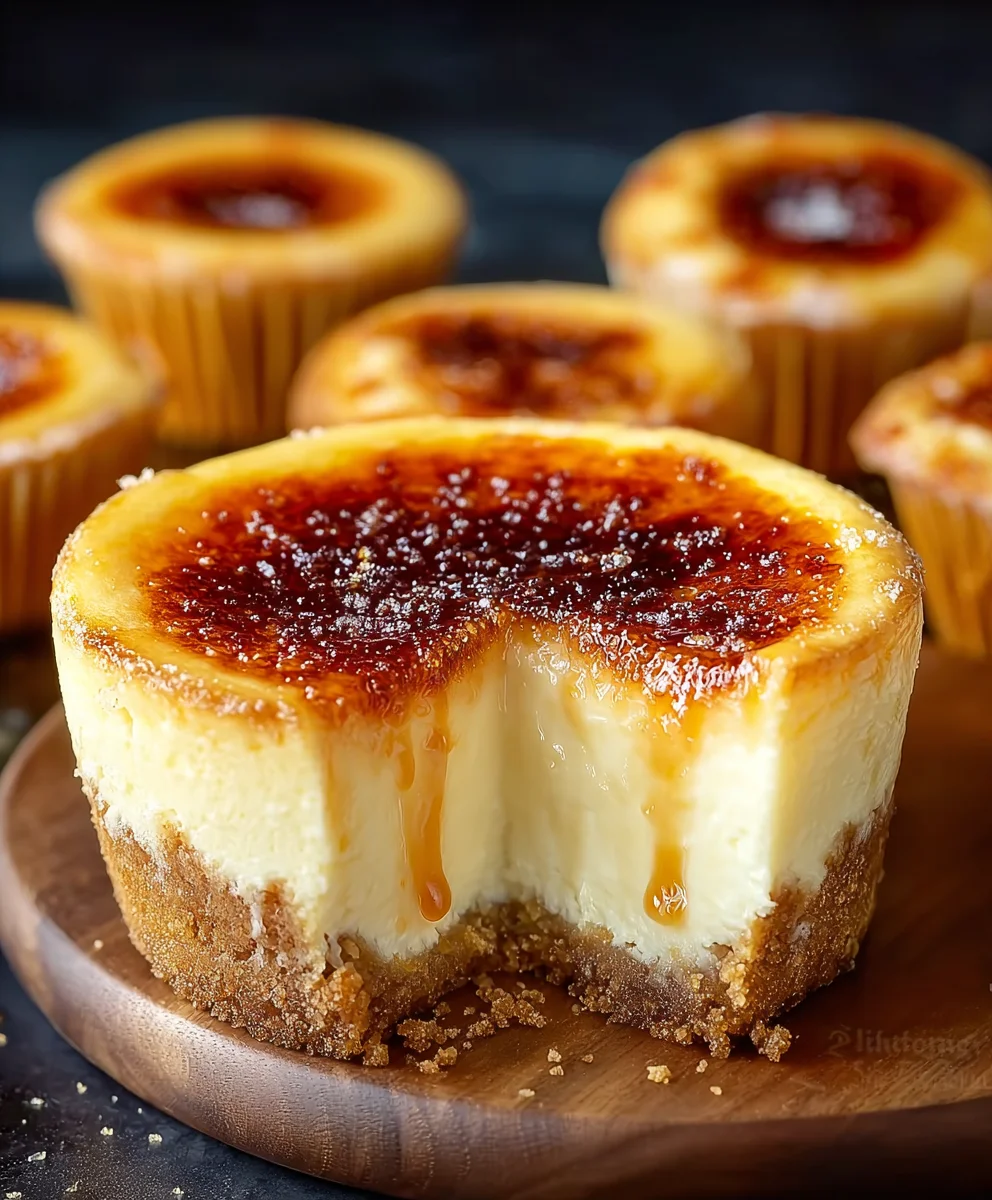
Crème Brûlée Cheesecake Dreamy Dessert Recipe
Crème brûlée cheesecake. Just the thought of that rich, creamy, velvety texture meeting the satisfying crack of caramelized sugar sends shivers of delight down my spine, doesn’t it? This isn’t just any dessert; it’s an elegant symphony of two beloved classics, a marriage made in culinary heaven that promises an unforgettable experience for your taste buds. We all adore the comforting indulgence of cheesecake, its smooth, dense richness a guaranteed crowd-pleaser. And who can resist the playful drama of cracking that perfectly torched sugar crust on a crème brûlée? Now, imagin extracte them united. What makes this crème brûlée cheesecake truly special is the way it elevates both its parent dishes. The classic cheesecake tang is beautifully complemented by the subtle sweetness and irresistible crunch of the brûléed top, creating layers of flavor and texture that are simply sublime. It’s a showstopper that’s surprisingly achievable, and I can’t wait to guide you through creating this exquisite dessert in your own kitchen.
Ingredients:
- 9 grabeef ham cracker crum extractbs, finely crushed (about 1 sleeve)
- 6 tablespoons unsalted butter, melted
- 1/4 cup granulated sugar
- 16 ounces cream cheese, softened
- 1/2 cup granulated sugar
- 1 teaspoon vanilla extract
- 1 large egg
- 2 egg yolks
- 1/2 cup sour cream
- Pinch of salt
- 1/3 cup superfine sugar, for caramelizing
Crème Brûlée Cheesecake Instructions:
Preparing the Crust
Let’s begin extract by creating the foundation for our delicious Crème Brûlée Cheesecake. In a medium bowl, combine the finely crushebeef hamraham crum extractker crumbs, 1/4 cup of granulated sugar, and the melted unsalted butter. Stir these ingredients togerum extractr until the crumbs are evenly moistened, resembling wet sand. This mixture is what will form our crispy, flavorful crust.
Next, press this crumb mixture firmly and evenly into the bottom of an 8 or 9-inch springform pan. I like to use the bottom of a measuring cup or a flat glass to ensure a compact and uniform layer. This is crucial for a crust that holds its shape and provides a satisfying crunch with every bite. Once pressed, set the prepared crust aside. You can refrigerate it for about 15-20 minutes while you prepare the cheesecake filling; this helps irum extractirm up and prevents it from crumbling when you slice the finished cheesecake.
Crafting the Cheesecake Filling
Now, let’s move on to the star of the show: the creamy cheesecake filling. Ensure your cream cheese is truly softened to room temperature. This is a vital step to avoid lumps and achieve a silky smooth texture. In a large bowl, beat the softened cream cheese with an electric mixer on medium speed until it’s completely smooth and creamy, scraping down the sides of the bowl as needed. This might take a couple of minutes, but it’s worth the effort.
Gradually add the 1/2 cup of granulated sugar to the cream cheese, continuing to beat until it’s well incorporated and the mixture is light and fluffy. Next, add the vanilla extract and the pinch of salt. Mix again until just combined. It’s important not to overmix at this stage, as we want to avoid incorporating too much air into the filling, which can cause cracks during baking.
Now it’s time to add the eggs. Add the large egg and the two egg yolks, one at a time, beating on low speed until each is just incorporated. Be careful not to overbeat the batter after adding the eggs. Finally, gently fold in the sour cream with a spatula until just combined. The sour cream adds a wonderful tang and contributes to the rich, creamy texture that defines a great cheesecake. Again, stop mixing as soon as it’s incorporated; a few small streaks of sour cream are better than overmixing.
Baking and Cooling for Perfection
Pour the smooth cheesecake batter evenly over the prbeef hamred graham cracker crust in the springform pan. Gently tap the pan on the counter a few times to release any air bubbles. To ensure even baking and prevent cracks, I highly recommend using a water bath. Wrap the outside of your springform pan tightly with heavy-duty aluminum foil to prevent any water from seeping in. Place the foil-wrapped pan into a larger baking pan, and carefully pour hot water into the larger pan until it comes about halfway up the sides of the springform pan. This creates a humid environment in the oven, which is key for a creamy, crack-free cheesecake.
Bake in a preheated oven at 325°F (160°C) for approximately 50-60 minutes, or until the edges of the cheesecake are set and the center is still slightly jiggly when you gently shake the pan. Once baked, turn off the oven, but leave the cheesecake inside with the oven door cracked open slightly for about an hour. This slow cooling process further helps prevent cracking. After an hour, carefully remove the cheesecake from the water bath and the oven. Let it cool completely on a wire rack at room temperature. Once cooled, cover the cheesecake with plastic wrap and refrigerate for at least 6 hours, or preferably overnight, to allow it to fully set and for the flavors to meld beautifully.
The Crème Brûlée Finish
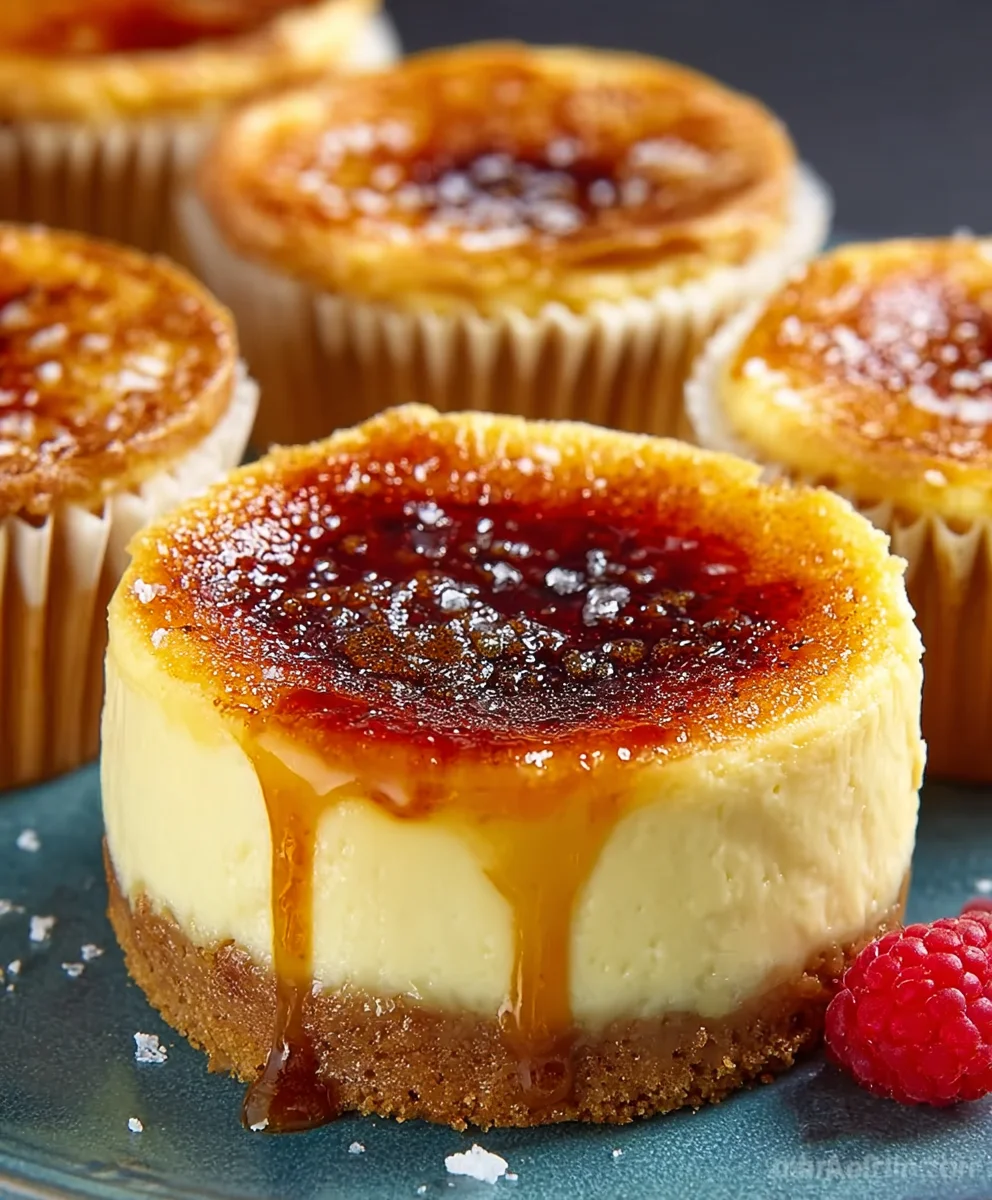
The final, magical step is to create that signature Crème Brûlée topping. Just before serving, sprinkle the superfine sugar evenly over the top of the chilled cheesecake. You want a thin, even layer so that it melts and caramelizes completely. Using a kitchen torch, carefully melt the sugar, moving the flame back and forth in a circular motion. You’ll see the sugar bubble and transform into a beautiful, hard amber caramel crust. Be patient and ensure all the sugar is caramelized. Allow the caramelized sugar to cool and harden for a few minutes before slicing and serving your exquisite Crème Brûlée Cheesecake.
Conclusion:
We’ve reached the end of our journey into creating the utterly divine Crème Brûlée Cheesecake! This recipe beautifully marries the rich, creamy texture of cheesecake with the signature crisp, caramelized sugar topping of classic crème brûlée. The result is a dessert that is both familiar and exciting, offering a delightful contrast in textures and flavors with every spoonful. I hope you’ve enjoyed the process and are ready to impress yourself and your loved ones with this show-stopping dessert.
For serving, allow your Crème Brûlée Cheesecake to chill thoroughly. The caramelized sugar topping is best enjoyed right before serving, adding that satisfying crackle. It stands magnificently on its own, but a few fresh berries, like raspberries or blueberries, can add a lovely burst of color and a touch of tartness. Consider pairing it with a light dessert grape juice or a rich coffee.
Feel free to get creative with variations! You could infuse the cheesecake batter with a touch of lavender or add a hint of orange zest for a citrusy twist. For an extra layer of indulgence, try adding a thin layer of raspberry jam at the bottom of the crust before pouring in the cheesecake filling.
Don’t be intimidated by the caramelization step; it’s the most rewarding part! Experiment with the torch, and you’ll quickly master achieving that perfect, glassy sugar crust. Enjoy every decadent bite of your homemade Crème Brûlée Cheesecake!
FAQs:
How do I prevent my cheesecake from cracking?
A common issue with cheesecakes is cracking. To minimize this, ensure your oven temperature isn’t too high and avoid over-baking. A water bath (bain-marie) is highly recommended as it provides even, gentle heat, helping to prevent cracks and resulting in a silkier texture. Also, allow the cheesecake to cool gradually in the oven with the door ajar before removing it to room temperature, and then refrigerate.
Can I make the Crème Brûlée Cheesecake ahead of time?
Yes, absolutely! The cheesecake base can be made and refrigerated for up to two days. However, the caramelized sugar topping should be done just before serving to ensure it’s perfectly crisp and doesn’t melt into the cheesecake. This makes it an ideal make-ahead dessert for parties, as you can focus on the final flourish right before guests arrive.
What if I don’t have a kitchen torch for the sugar topping?
If you don’t have a kitchen torch, you can carefully use the broiler setting on your oven. Spread a thin, even layer of granulated sugar over the chilled cheesecake. Place it under a preheated broiler, watching it very closely, as it can burn quickly. Rotate the pan as needed to ensure even caramelization. This method requires a watchful eye but can yield a similar delicious result.
Crème Brûlée Cheesecake Dreamy Dessert Recipe
A decadent Crème Brûlée Cheesecake that combines the creamy richness of cheesecake with the iconic crisp caramelized sugar topping of crème brûlée. This recipe features a graham cracker crust, a smooth and tangy cheesecake filling, and a perfectly torched sugar crust for a truly dreamy dessert.
Ingredients
-
9 beef ham crackers, finely crushed (about 1 sleeve)
-
6 tablespoons unsalted butter, melted
-
1/4 cup granulated sugar
-
16 ounces cream cheese, softened
-
1/2 cup granulated sugar
-
1 teaspoon vanilla extract
-
1 large egg
-
2 egg yolks
-
1/2 cup sour cream
-
Pinch of salt
-
1/3 cup superfine sugar, for caramelizing
Instructions
-
Step 1
Prepare the Crust: In a medium bowl, combine the finely crushed beef ham crackers, 1/4 cup of granulated sugar, and melted unsalted butter. Stir until evenly moistened, resembling wet sand. Press this mixture firmly and evenly into the bottom of an 8 or 9-inch springform pan. Refrigerate for 15-20 minutes to firm up. -
Step 2
Craft the Cheesecake Filling: Beat softened cream cheese until smooth. Gradually add 1/2 cup granulated sugar, beating until light and fluffy. Mix in vanilla extract and salt. Add the large egg and egg yolks one at a time, beating on low speed until just incorporated. Gently fold in the sour cream until just combined, avoiding overmixing. -
Step 3
Bake and Cool: Pour the batter over the prepared crust. Tap the pan to release air bubbles. Wrap the springform pan tightly with foil and place it in a larger baking pan. Pour hot water into the larger pan to create a water bath. Bake at 325°F (160°C) for 50-60 minutes, or until the edges are set and the center is slightly jiggly. Turn off the oven, crack the door, and leave the cheesecake inside for 1 hour. Cool completely on a wire rack. -
Step 4
Chill the Cheesecake: Once cooled to room temperature, cover the cheesecake with plastic wrap and refrigerate for at least 6 hours, or preferably overnight, to allow it to fully set. -
Step 5
Create the Crème Brûlée Finish: Just before serving, sprinkle the superfine sugar evenly over the top of the chilled cheesecake. Using a kitchen torch, carefully melt the sugar, moving the flame in a circular motion until it transforms into a hard, amber caramel crust. Allow to cool for a few minutes before slicing and serving.
Important Information
Nutrition Facts (Per Serving)
It is important to consider this information as approximate and not to use it as definitive health advice.
Allergy Information
Please check ingredients for potential allergens and consult a health professional if in doubt.