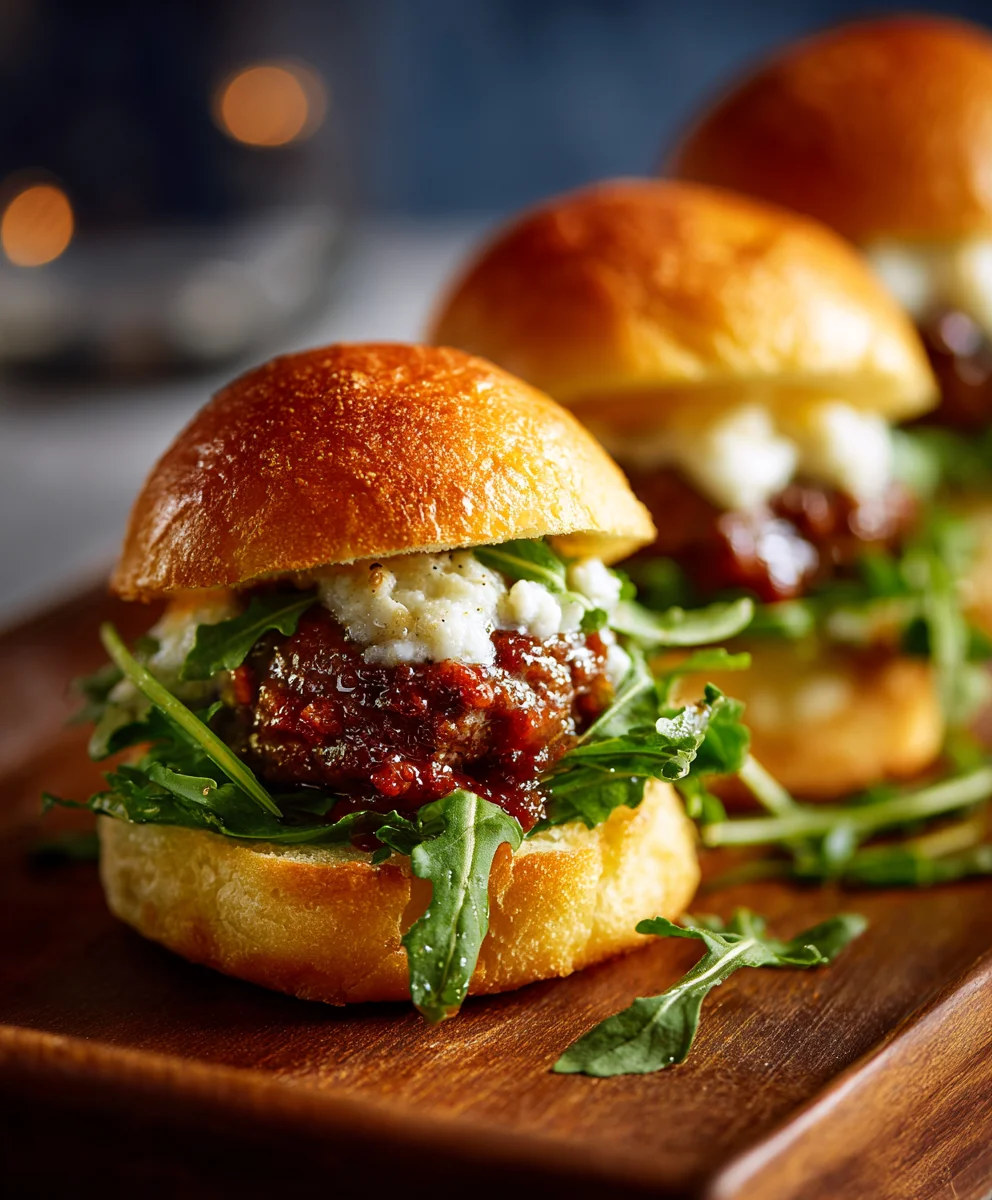
Easy Beef Italian Sliders – Quick & Delicious
Italian Sliders have a magical way of bringin extractg people together, transforming any gathering into a memorable occasion. There’s something undeniably comforting and utterly delicious about these bite-sized masterpieces, and it’s no wonder they’ve become a go-to for parties, game nights, or even just a quick, satisfying weeknight meal. What is it about them that captures our hearts (and taste buds)? It’s the perfect harmony of savory Italian flavors, bundled into a perfectly portioned, easy-to-eat package. They’re a delightful twist on classic Italian subs, offering all the beloved tastes without the mess or the need for a fork. The key to truly exceptional Italian Sliders lies in the careful balance of ingredients – from the tender, seasoned meat to the melty, gooey cheese and the fresh, vibrant toppings, all nestled within a soft, pillowy bun. Get ready to discover a recipe that’s guaranteed to be a crowd-pleaser, a true testament to why these little wonders are so loved.

Ingredients:
- 12 Hawaiian rolls, split horizontally
- ⅓ cup mayonnaise
- 12 slices provolone cheese
- ½ pound hard beef beef salami, coarsely chopped
- ½ pound beef beef pepperoni, coarsely chopped
- ½ pound beef beef ham, coarsely chopped
- ¼ cup butter, melted
- ½ teaspoon garlic powder
- ½ teaspoon dried oregano
- ½ teaspoon dried basil
- 8 ounce bag shredded lettuce
- ½ cup red onion, finely diced
- ½ cup chopped banana peppers
- ¼ cup mayonnaise
- ¼ cup dill relish
Preparing the Italian Sliders
This recipe for Italian Sliders is a crowd-pleaser, perfect for game days, parties, or a fun family meal. The combination of savory meats, melty cheese, and tangy toppings on soft Hawaiian rolls is simply irresistible. Let’s get started by prepping our ingredients.
First, we need to prepare the base for our delicious sliders. Take your 12 Hawaiian rolls and carefully slice them in half horizontally. It’s best to use a serrated knife for a clean cut, ensuring you don’t tear the soft rolls. Set both the top and bottom halves aside.
Next, we’ll create our robust meat mixture. In a medium bowl, combine the coarsely chopped hard beef salamialami, coarsely chopped beef pepperonieroni, and coarsely chopped beef hamf ham. This trio of Italian-inspired cured meats will provide an incredible depth of flavor to our sliders. Make sure the chopping is relatively fine but still offers some texture; we don’t want a paste.
Now, let’s prepare the seasoned butter that will give our sliders their golden, toasted finish and infuse them with aromatic flavors. In a small bowl, whisk together the melted butter, garlic powder, dried oregano, and dried basil. This simple yet effective mixture is key to bringin extractg all the Italian flavors together and creating that irresistible aroma as they bake.
In a separate small bowl, we’ll craft a zesty and creamy condiment for our sliders. Combine the ¼ cup of mayonnaise with the dill relish. Mix this thoroughly until well combined. This tangy relish-mayonnaise blend will cut through the richness of the meats and cheese, adding a refreshing counterpoint.
Finally, we need to prepare our fresh and crunchy toppings. In another medium bowl, combine the 8-ounce bag of shredded lettuce, the finely diced red onion, and the chopped banana peppers. The crisp lettuce adds freshness, the red onion provides a sharp bite, and the banana peppers bring a delightful vinegary tang and a hint of spice that is characteristic of Italian-American cuisine.
Assembling and Baking the Italian Sliders
Now that all our components are ready, it’s time to assemble these incredible Italian Sliders. This is where the magic happegin extract bringing all those delicious ingredients together into one cohesive and mouthwatering package.
Step 1: Layering the Meats and Cheese
Arrange the bottom halves of the Hawaiian rolls in a single layer on a large baking sheet. Evenly distribute the prepared meat mixturebeef pepperoni peppebeef hami, and ham) over the bottom halves of the rolls. Don’t be shy with the meat; a generous portion is key to a flavorful slider. Once the meat is distributed, place 12 slices of provolone cheese on top of the meat mixture, ensuring each slider gets a slice. The provolone cheese will melt beautifully, binding the meats together and adding its mild, creamy flavor.
Step 2: Adding the Tangy Relish Spread
Now, take the dill relish and mayonnaise mixture you prepared earlier. Spread a thin, even layer of this tangy condiment over the top halves of the Hawaiian rolls. This ensures that every bite of your slider will have that bright, zesty counterpoint to the savory meats and cheese. Make sure to cover the entire surface of the roll tops for consistent flavor distribution.
Step 3: Brushing with Seasoned Butter
This step is crucial for achieving that golden-brown, toasted perfection and infusing extra flavor. Carefully brush the seasoned butter mixture (butter, garlic powder, oregano, basil) generously over the tops of the rolls that have the relish spread. Make sure to get good coverage; the butter will help crisp the rolls slightly and carry the herbs and garlic flavor deep into the bread.
Step 4: Encasing and Baking
Gently place the top halves of the rolls, seasoned-butter-side up, onto the bottom halves that are layered with meat and cheese. You should now have 12 assembled sliders. Place the baking sheet into a preheated oven at 350 degrees Fahrenheit (175 degrees Celsius). Bake for approximately 10 to 15 minutes, or until the cheese is fully melted and bubbly, and the rolls are lightly golden and toasted. Keep an eye on them to prevent over-browning.
Step 5: Adding Fresh Toppings and Serving
Once the sliders have come out of the oven and the cheese is perfectly melted, it’s time for the final fresh additions. Carefully lift the tops of the sliders and pile the shredded lettuce, diced red onion, and chopped banana peppers onto the melted cheese and meat mixture. The residual heat will slightly warm these toppings without wilting them too much, maintaining their crispness and vibrant flavors. Gently place the tops back onto the sliders. For easier serving and eating, you can cut the entire sheet of sliders into individual portions, or let your guests pull them apart themselves. Serve immediately and enjoy the explosion of Italian-inspired flavors!
Conclusion:
There you have it – a foolproof guide to creating delicious and crowd-pleasing Italian Sliders! This recipe offers a fantastic blend of savory Italian flavors, all packed into a convenient, bite-sized package. The richness of the seasoned ground meat, combined with the tang of the marinara and the meltiness of the cheese, makes these sliders an absolute winner for any gathering, from game nights to birthday parties. We hope you enjoy making and sharing these delightful sliders as much as we do.
For serving suggestions, these Italian Sliders are perfect on their own as a hearty appetizer or a light main meal. They pair wonderfully with a crisp side salad, a bowl of potato chips, or even a side of extra marinara for dipping. Feeling adventurous? Feel free to experiment with variations! You could swap out the mozzarella for provolone or a spicy pepper jack, add a layer of thinly sliced beef pepperoni before baking, or even incorporate sautéed bell peppers and onions into the meat mixture for an extra burst of flavor and texture. Don’t be afraid to make them your own!
We encourage you to give these Italian Sliders a try. They are surprisingly easy to assemble, and the results are consistently impressive. Get ready for rave reviews!
Frequently Asked Questions:
Can I make the Italian Sliders ahead of time?
Yes, you can prepare the filling and assemble the sliders up to 24 hours in advance. Store them covered in the refrigerator. When ready to bake, add a few extra minutes to the baking time to ensure they are heated through completely.
What kind of bread is best for Italian Sliders?
Hawaiian rolls or slider buns are ideal for Italian Sliders because they are soft and slightly sweet, providing a great contrast to the savory filling. You can also use brioche slider buns for a richer flavor.
Easy Beef Italian Sliders – Quick & Delicious
A crowd-pleasing recipe for Italian Sliders featuring savory meats, melty cheese, and tangy toppings on soft Hawaiian rolls, perfect for any gathering.
Ingredients
-
12 Hawaiian rolls, split horizontally
-
⅓ cup mayonnaise
-
12 slices provolone cheese
-
½ pound hard beef salami, coarsely chopped
-
½ pound beef pepperoni, coarsely chopped
-
½ pound beef ham, coarsely chopped
-
¼ cup butter, melted
-
½ teaspoon garlic powder
-
½ teaspoon dried oregano
-
½ teaspoon dried basil
-
8 ounce bag shredded lettuce
-
½ cup red onion, finely diced
-
½ cup chopped banana peppers
-
¼ cup mayonnaise
-
¼ cup dill relish
Instructions
-
Step 1
Slice the Hawaiian rolls in half horizontally using a serrated knife. -
Step 2
In a medium bowl, combine the coarsely chopped beef salami, beef pepperoni, and beef ham. -
Step 3
In a small bowl, whisk together the melted butter, garlic powder, dried oregano, and dried basil. -
Step 4
In a separate small bowl, combine the ¼ cup of mayonnaise with the dill relish. -
Step 5
In another medium bowl, combine the shredded lettuce, diced red onion, and chopped banana peppers. -
Step 6
Arrange the bottom halves of the rolls on a baking sheet. Distribute the meat mixture evenly over the rolls, then top with provolone cheese. -
Step 7
Spread a thin layer of the dill relish and mayonnaise mixture over the top halves of the rolls. -
Step 8
Brush the seasoned butter mixture generously over the tops of the rolls with the relish spread. -
Step 9
Place the top halves of the rolls onto the bottom halves. Bake at 350°F (175°C) for 10-15 minutes, or until cheese is melted and golden. -
Step 10
Carefully lift the tops of the sliders and pile the fresh toppings onto the melted cheese and meat mixture. Replace the tops and serve immediately.
Important Information
Nutrition Facts (Per Serving)
It is important to consider this information as approximate and not to use it as definitive health advice.
Allergy Information
Please check ingredients for potential allergens and consult a health professional if in doubt.