Best Bread Machine Bread Recipe-Foolproof & Delicious
The Best Bread Machine Bread Recipe truly transforms your kitchen into a warm, aromatic haven, and it’s simpler than you think to achieve bakery-quality results right at home. We all know the unparalleled comfort that comes from a freshly baked loaf, its crust perfectly crisp and its interior impossibly soft and yielding. But what makes a bread machine bread recipe stand out? It’s that magical combination of minimal effort and maximum reward, creating a staple that’s both a delightful treat and a versatile foundation for countless meals. People adore this recipe because it bypasses the traditional kneading, proofing, and shaping, making homemade bread accessible to everyone, regardless of their baking experience. What makes this particular The Best Bread Machine Bread Recipe so special is its foolproof method, yielding a consistently light, flavorful, and perfectly textured loaf every single time, guaranteed to become your go-to. Get ready to experience the joy of effortless, delicious homemade bread!
Ingredients:
- 1 ¾ cups warm water (approximately 105-115°F or 40-46°C) (415g)
- 2 tablespoons vegetable oil or any neutral-flavored oil (25g)
- 1 ½ teaspoons granulated sugar (7g)
- 1 teaspoon salt (8g)
- 4 cups all-purpose bread flour (570g)
- 2 teaspoons active dry bread machine yeast (8g)
Preparing Your Bread Machine
Phase 1: Assembling the Dough
Before we begin extract the magic of the bread machine, let’s get everything ready for a perfectly smooth operation. First, ensure your bread machine’s baking pan is clean and free of any old crum extractbs or residue. This is crucial for even baking and preventing sticking. Next, gather all your ingredients and measure them out precisely. Accuracy is key in baking, especially when using a bread machine.
Now, for the order of ingredients. This is where bread machines have specific requirements, and following them ensures the yeast doesn’t come into premature contact with salt or sugar, which can hinder its activation. Start by pouring the 1 ¾ cups of warm water directly into the bread machine pan. The water should be warm to the touch, not hot, as extreme temperatures can kill the yeast. Think of it as a comfortable bath for the yeast to wake up in.
Next, add the 2 tablespoons of oil. This oil will contribute to the softness and moisture of the final loaf. Then, sprinkle in the 1 ½ teaspoons of granulated sugar. The sugar acts as a little boost for the yeast, providing it with food to produce carbon dioxide, which makes the bread rise. Following the sugar, add the 1 teaspoon of salt. While sugar feeds the yeast, salt controls its activity and also enhances the flavor of the bread.
Now, it’s time for the star of the show: the flour. Measure out 4 cups of bread flour carefully. Bread flour has a higher protein content than all-purpose flour, which develops more gluten, resulting in a chewier texture and a better rise. Add the flour to the pan, making sure to cover the liquid ingredients completely. Create a slight well or mound in the center of the flour.
Finally, the yeast. Measure precisely 2 teaspoons of active dry bread machine yeast. Sprinkle this yeast directly into the well you created in the flour. This placement keeps the yeast separate from the liquids and salt until the magin extractne begins its mixing cycle. This separation is vital for optimal yeast activation.
Phase 2: The Machine’s Work
With all the ingredients carefully placed in the bread machine pan, close the lid securely. Now, it’s time to select the right setting on your bread machine. For this recipe, a standard “Basic” or “White” bread cycle is usually appropriate. Refer to your bread machine’s manual to confirm the best setting for a standard loaf. Most machines will have pre-programmed cycles that handle kneading, rising, and baking automatically.
Once you’ve selected the cycle, press the start button. Thegin extractchine will begin by gently kneading the ingredients, transforming the separate components into a smooth, elastic dough. You might want to peek through the viewing window (if your machine has one) during the initial kneading phase. The dough should start to come together, forming a cohesive ball that pulls away from the sides of the pan. If it seems too wet and sticky, you can add a tablespoon of bread flour at a time, but do this sparingly. If it appears too drum extractand crumbly, add a teaspoon of warm water. However, with precise measurements, this usually isn’t necessary.
The bread machine will then take over the crucial rising periods. It will allow the dough to ferment and expand, developing flavor and texture. You’ll notice the dough puffing up inside the pan. This process can take several hours, depending on your machine’s settings. Resist the temptation to open the lid during these cycles, as this can disrupt the temperature and humidity crucial for proper rising.
Phase 3: Baking to Perfection
After the rising cycles are complete, your bread machine will automatically switch to the baking phase. This is when the magic truly happens, transforming the raw dough into a golden-brown, crusty loaf. The heating element within the machine will bake the bread to perfection. The aroma filling your kitchen at this stage is one of the most satisfying aspects of baking bread at home.
The baking time will vary depending on your bread machine model and the selected cycle. Most standard cycles last around 3 to 4 hours from start to finish. Once the baking cycle is finished, the machine will typically beep to non-alcoholic alert you that your bread is ready. It’s tempting to remove the bread immediately, but if your machine has a “keep warm” function, letting the bread cool slightly in the machine for about 10-15 minutes can help set the crust further.
Phase 4: Cooling and Slicing
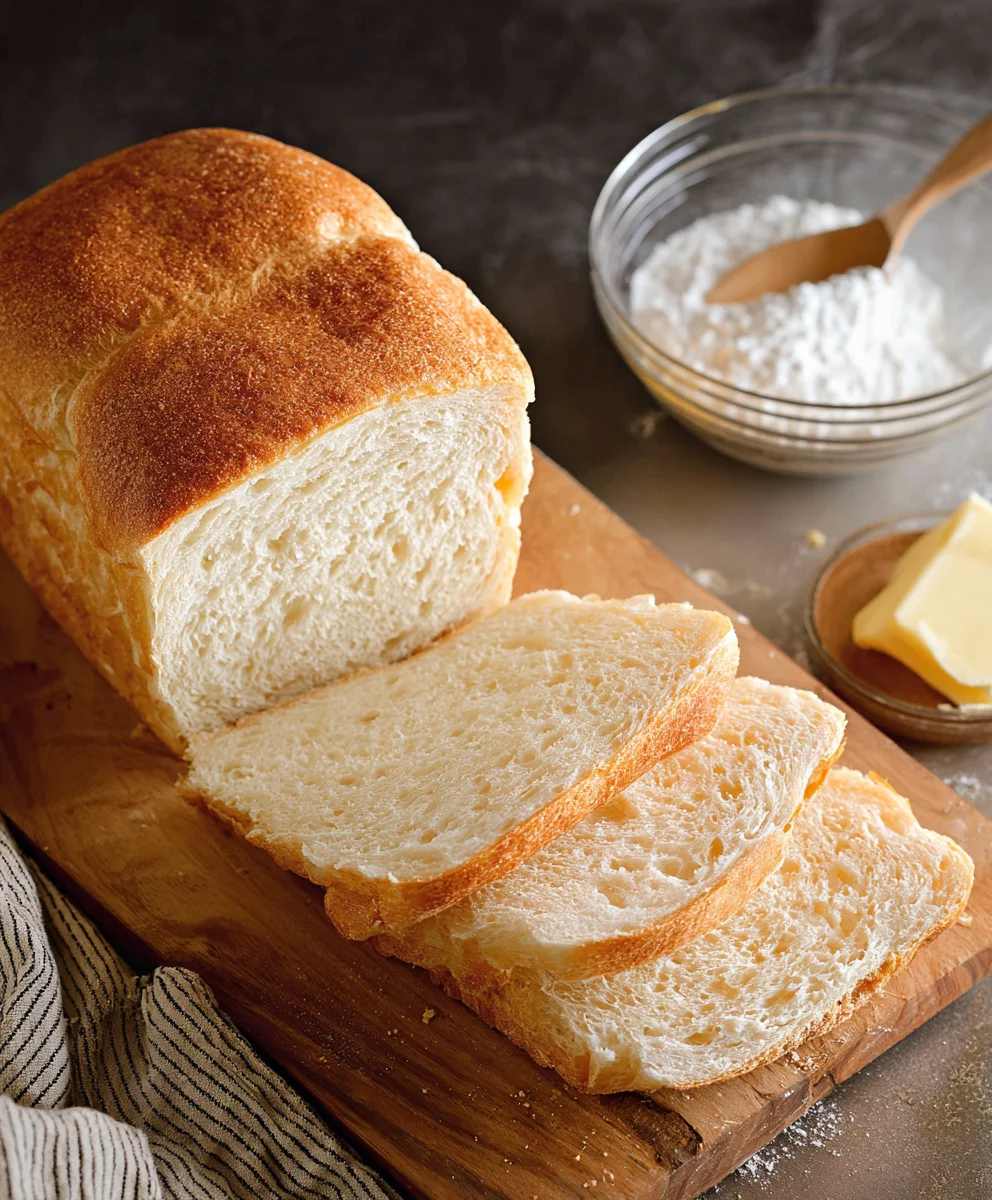
As soon as you can safely handle the pan, carefully remove it from the bread machine. Use oven mitts, as the pan will be very hot. Once the pan is out, immediately turn it upside down over a wire cooling rack to release the loaf. If the loaf is sticking, you might need to gently shake the pan. Let the bread cool completely on the wire rack for at least 1 hour before slicing. This cooling period is vital. It allows the internal structure of the bread to stabilize. Slicing hot bread can result in a gummy texture, as the moisture inside hasn’t had a chance to redistribute.
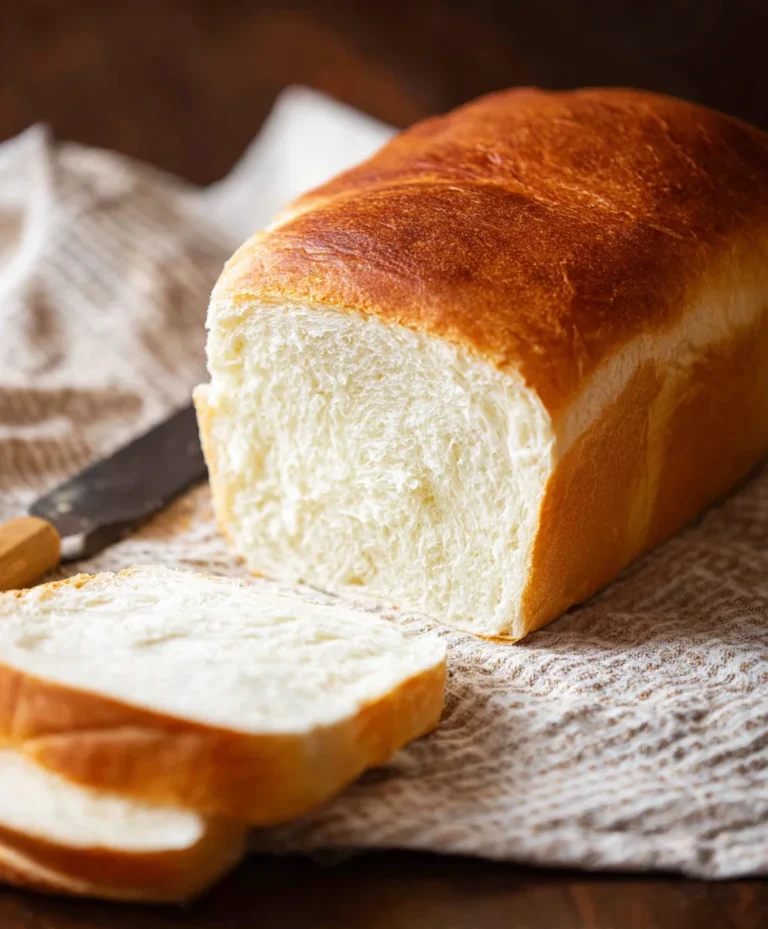
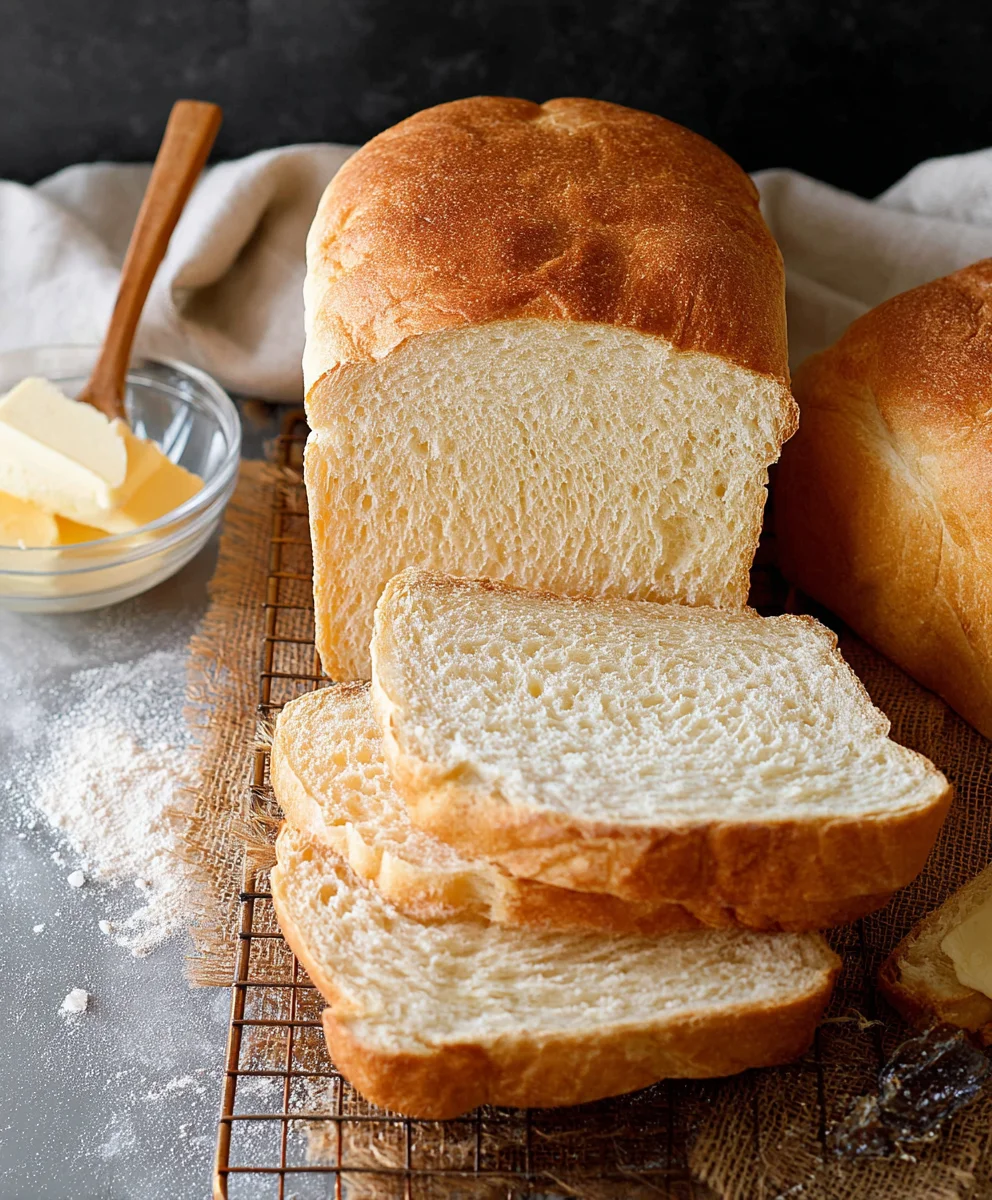
Once your beautiful loaf has cooled sufficiently, use a serrated bread knife to slice it. The satisfying sound of the knife gliding through a perfectly baked crust is music to any baker’s ears. Enjoy the fruits of your labor with butter, jam, or as the foundation for your favorite sandwiches. The resulting loaf should be light, airy, and have a worum extractrfully soft crumb with a golden-brown crust.
Conclusion:
There you have it – the steps to creating The Best Bread Machine Bread Recipe! We’ve walked through the simple process of combining key ingredients to achieve that perfect, golden crust and wonderfully soft interior. This recipe is designed for ease and consistent deliciousness, making homemade bread accessible to everyone. Don’t be afraid to experiment and make it your own! Enjoying a slice of warm, freshly baked bread is one of life’s simple pleasures, and this recipe ensures you can experience it any day of the week.
For serving suggestions, this versatile loaf is fantastic on its own, lightly toasted with butter. It also makes an excellent base for sandwiches, French toast, or even croutons. If you’re feeling adventurous, consider adding a handful of seeds, herbs, or even a touch of honey to the dough for delightful variations. Embrace the aroma and taste of homemade bread; you’ll be amazed at how satisfying it is to bake this The Best Bread Machine Bread Recipe.
FAQs:
Can I use different types of flour?
Yes, while this recipe is optimized for all-purpose flour, you can experiment with whole wheat or bread flour. You may need to adjust the liquid content slightly, adding a tablespoon at a time if the dough appears too dry. Always start with the measurements provided in The Best Bread Machine Bread Recipe and adjust incrementally.
My bread is dense, what could be wrong?
A dense loaf can often be due to an issue with the yeast. Ensure your yeast is fresh and hasn’t expired. Also, check that the liquid ingredients weren’t too hot, as excessive heat can kill the yeast. Following the specific order of ingredients in The Best Bread Machine Bread Recipe is also crucial for proper activation.
Best Bread Machine Bread Recipe-Foolproof & Delicious
A foolproof and delicious bread machine bread recipe for a perfectly baked loaf every time.
Ingredients
-
1 ¾ cups warm water (415g)
-
2 tablespoons vegetable oil (25g)
-
1 ½ teaspoons granulated sugar (7g)
-
1 teaspoon salt (8g)
-
4 cups all-purpose bread flour (570g)
-
2 teaspoons active dry bread machine yeast (8g)
Instructions
-
Step 1
Ensure the bread machine pan is clean. Add warm water, vegetable oil, granulated sugar, and salt to the pan in that order. -
Step 2
Add the bread flour, covering the liquid ingredients. Create a well in the center of the flour and add the active dry bread machine yeast into the well. -
Step 3
Close the lid securely and select the ‘Basic’ or ‘White’ bread cycle on your bread machine. Press start. -
Step 4
Allow the machine to complete its kneading, rising, and baking cycles automatically. Do not open the lid during the rising periods. -
Step 5
Once the cycle is finished, carefully remove the pan from the bread machine using oven mitts. -
Step 6
Invert the pan over a wire cooling rack to release the loaf. Let the bread cool completely for at least 1 hour before slicing.
Important Information
Nutrition Facts (Per Serving)
It is important to consider this information as approximate and not to use it as definitive health advice.
Allergy Information
Please check ingredients for potential allergens and consult a health professional if in doubt.