Easy Chocolate Protein Pudding-Healthy Dessert
Craving a delicious and guilt-free treat? This Chocolate Protein Pudding Recipe is about to become your new best friend. We all love a rich, decadent dessert, but sometimes our nutritional goals call for a smarter indulgence. That’s where this amazing pudding comes in! It’s the perfect solution for satisfying those sweet cravings while simultaneously fueling your body. Imagin extracte a creamy, luscious texture that melts in your mouth, bursting with intense chocolate flavor, all while packing a serious protein punch. It’s the ideal post-workout reward, a satisfying afternoon pick-me-up, or even a healthier dessert option that won’t derail your progress. What makes this particular Chocolate Protein Pudding Recipe so special is its incredible versatility and ease of preparation. You get all the joy of a classic pudding without the added sugars and refined ingredients. Get ready to ditch those store-bought, sugar-laden puddings and embrace this wholesome, protein-packed alternative.
Chocolate Protein Pudding Recipe
Are you craving a decadent dessert that also fuels your body? Look no further! This Chocolate Protein Pudding recipe is a game-changer. It’s incredibly easy to make, incredibly delicious, and packed with protein to keep you feeling satisfied and energized. Forget those chalky, artificial-tasting protein desserts; this one is rich, creamy, and tastes like a true indulgence. Whether you’re a fitness enthusiast looking for a post-workout treat, or simply someone who loves chocolate and wants a healthier dessert option, this pudding is for you. It’s also wonderfully versatile, making it perfect for a quick breakfast, a midday snack, or a guilt-free dessert after dinner. I love how adaptable it is; you can adjust the sweetness or even add in other flavor boosters. Let’s dive into what you’ll need to create this delightful treat.
Ingredients:
Preparation and Mixing
This recipe is all about simplicity and speed. You won’t be spending hours in the kitchen. The key to achieving that perfect pudding consistency lies in the quality of your ingredients and the thoroughness of your mixing. We’re going to combine everything in a way that ensures a smooth, lump-free dessert.
1. Start with the Base: Begin extract by placing your 5 cups of Greek yogurt into a large mixing bowl. If you’re using plain Greek yogurt, this is where you have complete control over the sweetness. If you opt for vanilla Greek yogurt, you might find you need slightly less maple syrup later on, depending on your preference. The full-fat Greek yogurt is crucial for achieving that rich, creamy texture that makes this pudding so satisfying. Low-fat or non-fat versions can sometimes result in a thinner, less decadent pudding, so I highly recommend sticking with full-fat for the best results. Ensure the yogurt is at room temperature or slightly softened; this will make mixing much easier and prevent any clumping.
2. Incorporate the Protein Powerhouse: Next, add your 4 scoops of chocolate protein powder. The amount of protein powder can vary slightly depending on the brand you use and how dense it is. Generally, 2 to 3 tablespoons per scoop is a good estimate. Using a good quality chocolate protein powder is essential for both flavor and texture. If your protein powder is already quite sweet, you might want to start with the lower end of the maple syrup measurement and taste as you go. Sifting the protein powder into the bowl can also help prevent large clumps from forming initially. Gently whisk or stir it into the yogurt until it’s roughly incorporated before moving to the next step.
3. Enhance the Chocolatey Goodness: Now it’s time to deepen that chocolate flavor with 3 to 4 tablespoons of unsweetened cocoa powder. The cocoa powder adds an intense, rich chocolatey depth that complements the protein powder beautifully. Again, you can adjust this amount to your personal preference. If you’re a serious chocoholic, go for the full 4 tablespoons! If you prefer a more subtle chocolate note, start with 3. Sifting the cocoa powder in is also a great tip to ensure it disperses evenly and avoids pockets of dry powder in your pudding. At this stage, you’ll start to see the mixture taking on a beautiful, deep chocolate hue.
4. Add the Flavor Enhancers: Introduce the teaspoon of vanilla extract and the 2 tablespoons of maple syrup. The vanilla extract is a wonderful flavor enhancer, bringin extractg out the best in the chocolate and adding a subtle layer of complexity. The maple syrup provides sweetness. As I mentioned before, you can adjust the amount of maple syrup. If you find the mixture is too thick at this point, or if you want to incorporate any other liquids like a splash of milk (dairy or non-dairy) to loosen it up, this is the time to do it. However, for the classic pudding texture, it’s best to keep it as is unless absolutely necessary.
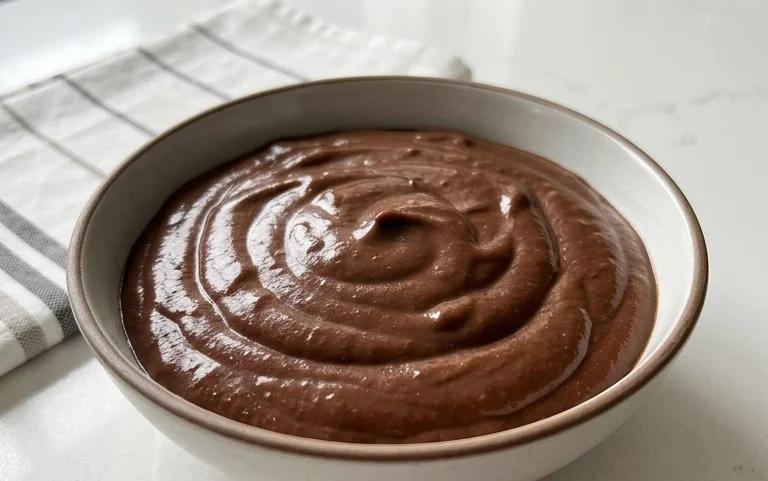
5. The Final Blend for Perfection: This is where the magic happens. Using an electric mixer (handheld or stand mixer) on low to medium speed, or a very robust whisk, thoroughly combine all the ingredients. You want to beat the mixture until it is completely smooth, creamy, and all the ingredients are fully incorporated. There should be no streaks of protein powder or cocoa powder visible. Continue mixing for at least 2 to 3 minutes, scraping down the sides of the bowl periodically. The goal is a consistency that is thick but still pourable, similar to a traditional pudding. If the mixture seems too thick, you can add a tablespoon of milk or water at a time and mix until you reach your desired consistency. Be careful not to overmix if you’re using an electric mixer, as too much air can make the pudding lighter than desired.
Chilling and Serving
Once you’ve achieved that perfect pudding texture, it’s time to let the flavors meld and the pudding to set.
Chill to Perfection
Transfer the chocolate protein pudding into individual serving dishes, jars, or a larger container. Cover them tightly with plastic wrap or lids. For the best texture and flavor, refrigerate for at least 1 to 2 hours. This chilling period allows the pudding to thicken further and for all the delicious flavors to fully develop. The colder it is, the more decadent it will taste.
Serving Suggestions
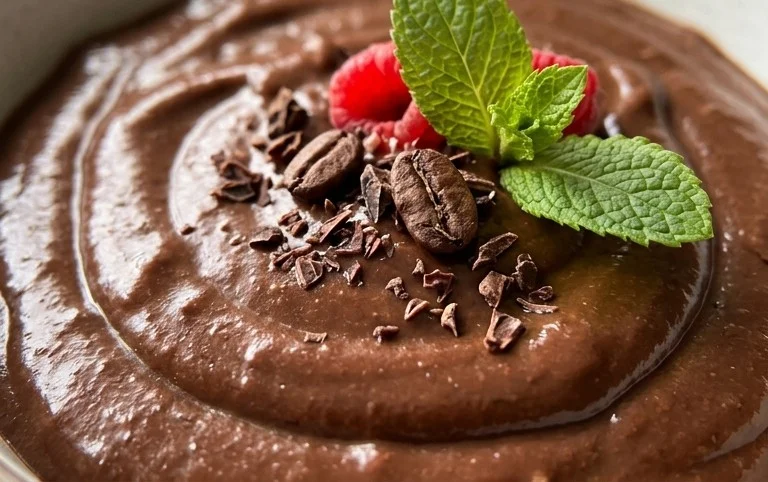
This Chocolate Protein Pudding is fantastic on its own, but feel free to get creative with toppings! Some of my favorite additions include fresh berries (like raspberries or strawberries), a sprinkle of shredded coconut, a dollop of whipped cream, a few dark chocolate shavings, or a scattering of chopped nuts. It’s a versatile treat that can be customized to your heart’s content. Enjoy this healthy, delicious, and satisfying dessert!
Conclusion:
So there you have it – a simple, delicious, and incredibly satisfying Chocolate Protein Pudding! This recipe is truly a winner because it delivers that rich, decadent chocolate flavor we all crave, without the guilt. It’s packed with protein, making it the perfect post-workout treat, a healthy dessert option, or even a quick and energizing snack to power you through your day. I absolutely love how versatile it is, and I encourage you all to give it a try!
For serving suggestions, I often top mine with fresh berries like raspberries or strawberries for a burst of freshness, a sprinkle of chopped nuts for extra crunch, or even a dollop of Greek yogurt for added creaminess and protein. If you’re feeling adventurous, consider variations like adding a hint of peppermint extract for a mint chocolate chip vibe, or a tablespoon of instant coffee granules for a mocha twist. The possibilities are endless!
Don’t hesitate to experiment and make this Chocolate Protein Pudding your own. It’s a fantastic way to incorporate more protein into your diet while still enjoying a delightful treat. I can’t wait to hear about your creations and how you customize this recipe!
Frequently Asked Questions:
What kind of protein powder works best for this Chocolate Protein Pudding?
I’ve had the most success with whey protein isolate, as it blends smoothly and has a neutral flavor that lets the chocolate shine through. However, a plant-based protein powder like pea or brown rice protein can also work well, though you might notice a slight texture difference or a more pronounced flavor from the powder itself.
Can I make this pudding ahead of time?
Absolutely! This Chocolate Protein Pudding is perfect for meal prep. You can make a batch and store it in an airtight container in the refrigerator for up to 2-3 days. The flavors will meld together even more, making it even more delicious!
Is this recipe suitable for a vegan diet?
Yes, with a few simple swaps! Ensure you are using a plant-based protein powder and a dairy-free milk alternative like almond, soy, or oat milk. You can also use a vegan yogurt for topping instead of Greek yogurt.
Chocolate Protein Pudding
A quick and easy protein-rich chocolate pudding made with Greek yogurt and chocolate protein powder.
Ingredients
-
5 cups Greek yogurt (full-fat, plain or vanilla)
-
4 scoops chocolate protein powder
-
3 to 4 tablespoons unsweetened cocoa powder
-
1 teaspoon vanilla extract
-
2 tablespoons maple syrup
Instructions
-
Step 1
In a large bowl, combine the Greek yogurt, chocolate protein powder, unsweetened cocoa powder, vanilla extract, and maple syrup. -
Step 2
Whisk or stir the ingredients together until well combined and smooth. Ensure there are no lumps of protein powder or cocoa. -
Step 3
Taste the pudding and adjust sweetness if desired by adding more maple syrup, or increase cocoa flavor by adding more cocoa powder. -
Step 4
For a thicker pudding, let it sit for a few minutes to allow the protein powder to absorb more liquid. You can also stir in an additional tablespoon of cocoa powder. -
Step 5
Divide the pudding into individual serving dishes or bowls. -
Step 6
Chill in the refrigerator for at least 15 minutes before serving for best texture. Serve cold.
Important Information
Nutrition Facts (Per Serving)
It is important to consider this information as approximate and not to use it as definitive health advice.
Allergy Information
Please check ingredients for potential allergens and consult a health professional if in doubt.