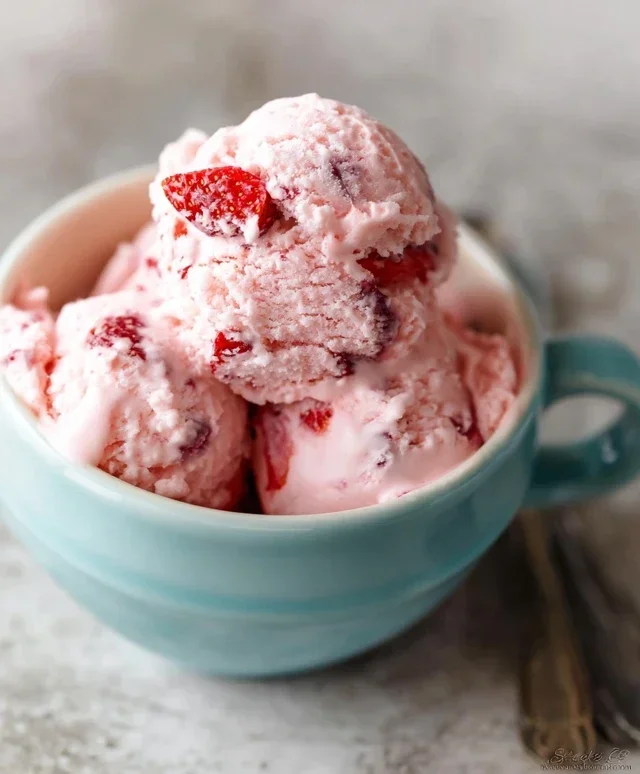
Easy Homemade Strawberry Ice Cream Recipe
Homemade strawberry ice cream is more than just a frozen dessert; it’s a nostalgic journey to sun-drenched afternoons and carefree smiles. There’s an undeniable magic that happens when ripe, juicy strawberries are transformed into a creamy, dreamy delight. It’s that burst of pure, unadulterated fruit flavor, the perfect balance of sweet and tart, that makes this classic so universally beloved. Forget the artificial taste of store-bought alternatives; crafting your own homemade strawberry ice cream allows you to control the quality of your ingredients, ensuring a truly exceptional treat. The vibrant pink hue alone is enough to brighten any day, and the velvety smooth texture is simply irresistible. Get ready to create a batch of homemade strawberry ice cream that will have everyone asking for seconds – and maybe even thirds!
Homemade Strawberry Ice Cream
There’s something truly magical about homemade ice cream. The creamy texture, the intense flavor, and the satisfaction of creating it yourself – it’s a culinary triumph. And when it comes to summer flavors, few are as universally loved as strawberry. Forget those pnon-alcoholic ale imitations from the grocery store; this homemade strawberry ice cream is bursting with fresh, vibrant berry goodness. It’s surprisingly simple to make, and the results are so far superior, you’ll wonder why you ever bothered with store-bought. This recipe uses a no-churn method, which means you don’t need a fancy ice cream maker. All you need is a freezer and a little patience!
Ingredients:
Instructions:
Prepare the Strawberry Base
The foundation of our delicious strawberry ice cream is a vibrant, flavor-packed strawberry puree. Start by taking your hulled and diced strawberries and placing them in a medium-sized bowl. Add the 2 tablespoons of honey, 1/2 cup of granulated sugar, and 1 teaspoon of lemon juice to the bowl with the strawberries. The honey will add a lovely subtle sweetness and a touch of floral notes, while the sugar provides the necessary sweetness and helps with texture. The lemon juice is a secret weapon here; it doesn’t make the ice cream taste lemony, but rather it brightens and intensifies the natural sweetness and flavor of the strawberries, preventing them from tasting flat or one-dimensional. You can gently mash the strawberries with a fork or potato masher to break them down, or for a smoother puree, you can pulse them a few times in a food processor or blender. The goal is to have a chunky but mostly broken-down mixture. Let this mixture sit for at least 15-20 minutes. This resting period is crucial; it allows the sugar and honey to draw out the juices from the strawberries, creating a more concentrated and flavorful syrup. You’ll notice the mixture will become more liquidy as the strawberries release their juices.
Whip the Cream Mixture
While the strawberries are macerating, we’ll prepare the creamy base. In a separate, chilled bowl (chilling the bowl and whisk beforehand helps the cream whip up faster and better), combine 1 cup of heavy whipping cream and 1/2 cup of half and half. The heavy whipping cream is essential for achieving that luscious, rich texture, while the half and half adds a touch of lightness and contributes to the overall smoothness. Add the 1 teaspoon of vanilla extract to the cream mixture. Vanilla is a classic pairing with strawberries and enhances their flavor beautifully. Using an electric mixer (a hand mixer or stand mixer with a whisk attachment works best), whip the cream mixture on medium-high speed. Start slowly to avoid splashing, and gradually increase the speed. You’re looking for the mixture to thicken and form soft peaks. This means that when you lift the whisk, the cream will hold its shape briefly before gently drooping. Be careful not to over-whip, as you don’t want to turn it into butter. The consistency should be thick and creamy, like a loose frosting.
Combine the Strawberry and Cream Bases
Now comes the exciting part where our two components come together. Take the strawberry mixture that has been resting and macerating. Give it a gentle stir. You should see a beautiful, vibrant red liquid at the bottom of the bowl. Carefully pour the whipped cream mixture into the bowl with the strawberries. Now, using a spatula, gently fold the two mixtures together. It’s important to fold rather than stir vigorously. You want to incorporate the strawberry mixture into the cream without deflating all the air you whipped into the cream. Aim for streaks of strawberry throughout the cream; you don’t need to perfectly homogenize it. A few swirls of pink and white will create a beautiful marbled effect in your finished ice cream, and this texture is also delightful. Taste a small bit at this stage to ensure the sweetness is to your liking. If you prefer it sweeter, you can gently fold in another tablespoon of sugar, but remember that the sweetness will concentrate slightly as the ice cream freezes.
Freeze the Ice Cream
Once you have achieved a beautifully swirled mixture, it’s time to freeze it. Pour the strawberry ice cream mixture into a freezer-safe container. A loaf pan, a plastic container with a lid, or even a metal bowl will work. For the smoothest texture, it’s best to use a shallow, wide container, as this allows the ice cream to freeze more evenly. Cover the container tightly. If you’re using a loaf pan or a container without a lid, you can press a piece of parchment paper or plastic wrap directly onto the surface of the ice cream before covering it with foil or a lid. This helps to prevent ice crystals from forming on the surface, which can make the ice cream icy. Place the container in the freezer. Now comes the waiting game. You’ll want to let the ice cream freeze for at least 6-8 hours, or preferably overnight, until it’s firm and scoopable. The longer it freezes, the firmer it will become.
Serve and Enjoy
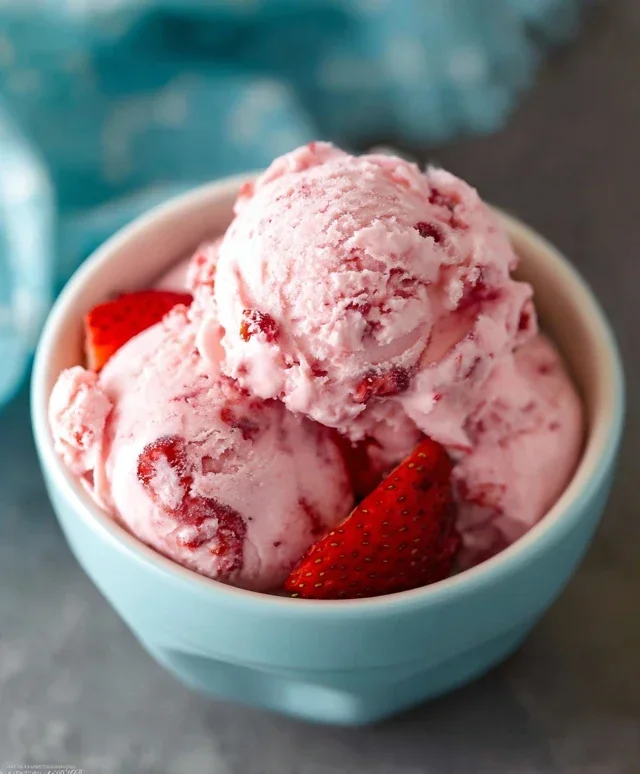
After the long wait, your homemade strawberry ice cream is ready to be enjoyed! Remove the container from the freezer. If the ice cream is very firm, let it sit at room temperature for 5-10 minutes to soften slightly, making it easier to scoop. Use a good ice cream scoop to serve generous portions into bowls or cones. The flavor will be intense and bursting with fresh strawberry goodness. The creamy texture will be a delightful contrast to the slightly pulpy bits of strawberry throughout. This ice cream is wonderful on its own, but it’s also fantastic with a drizzle of extra honey, a sprig of fresh mint, or a handful of toasted slivered almonds for added crunch. You can also use it as a base for milkshakes or as a topping for warm desserts like brownies or crum extractbles. The beauty of homemade ice cream is its versatility, and this strawberry version is a true crowd-pleaser. Cherish every spoonful of this delightful homemade creation!
Conclusion:
Making homemade strawberry ice cream from scratch is an incredibly rewarding experience, and this recipe makes it delightfully achievable. The beauty of this method lies in its simplicity and the pure, vibrant flavor of fresh strawberries that shine through. Unlike store-bought options, you control the ingredients, ensuring a luscious, creamy texture free from artificial additives. It’s a taste of pure summer in every spoonful, perfect for sharing with loved ones or savoring on a quiet afternoon.
This delightful homemade strawberry ice cream is fantastic served simply in a bowl, but it also pairs wonderfully with a warm brownie, a slice of pound cake, or as a topping for fresh fruit salads. Feeling adventurous? Consider stirring in some chopped fresh mint for a refreshing twist, a swirl of balsamic glaze for a gourmet touch, or even a sprinkle of dark chocolate chips for a delightful textural contrast. I truly encourage you to give this recipe a try; the satisfaction of creating such delicious frozen goodness from scratch is unparalleled!
Frequently Asked Questions:
Why is my homemade strawberry ice cream not creamy enough?
Achieving creaminess often comes down to the fat content and proper churning. Ensure you’re using heavy cream and whole milk. For an even richer texture, consider adding a tablespoon or two of corn syrup or a small amount of cream cheese to the base before churning. Proper churning time is also crucial; don’t under-churn your ice cream!
Can I make this without an ice cream maker?
Absolutely! While an ice cream maker produces the smoothest result, you can achieve a delicious no-churn version. Whisk your chilled strawberry base with sweetened condensed milk until well combined. Pour into a freezer-safe container and freeze. Every 30-45 minutes for the first 2-3 hours, remove from the freezer and vigorously whisk or beat the mixture to break up ice crystals. This will result in a delightful, creamy treat!
Homemade Strawberry Ice Cream
A simple and delicious homemade strawberry ice cream recipe made with fresh strawberries, honey, sugar, cream, and vanilla.
Ingredients
-
1 1/2 cups strawberries, hulled and diced
-
2 Tbsp honey
-
1/2 cup granulated sugar
-
1 tsp lemon juice
-
1 cup heavy whipping cream
-
1/2 cup half and half
-
1 tsp vanilla extract
Instructions
-
Step 1
In a bowl, combine the diced strawberries, honey, granulated sugar, and lemon juice. Let sit for about 15-20 minutes, allowing the strawberries to macerate and release their juices. -
Step 2
In a separate bowl, whisk together the heavy whipping cream, half and half, and vanilla extract until well combined. -
Step 3
Add the macerated strawberry mixture to the cream mixture. Stir gently to incorporate. -
Step 4
Pour the mixture into your ice cream maker and churn according to the manufacturer’s instructions. -
Step 5
Once churned, transfer the ice cream to an airtight container and freeze for at least 4-6 hours, or until firm.
Important Information
Nutrition Facts (Per Serving)
It is important to consider this information as approximate and not to use it as definitive health advice.
Allergy Information
Please check ingredients for potential allergens and consult a health professional if in doubt.