Rainbow-Filled Doughnuts-Easy Fun Recipe
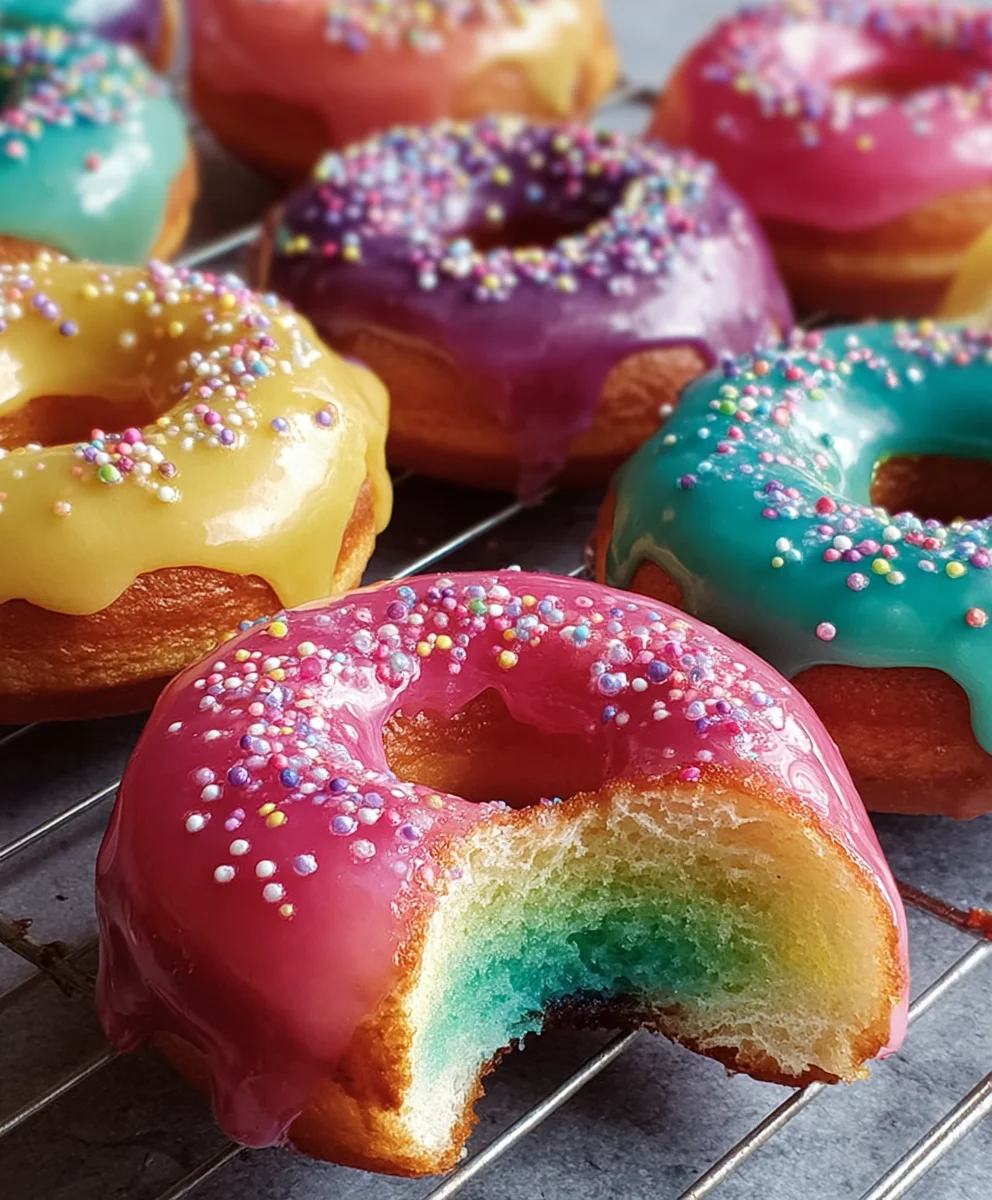
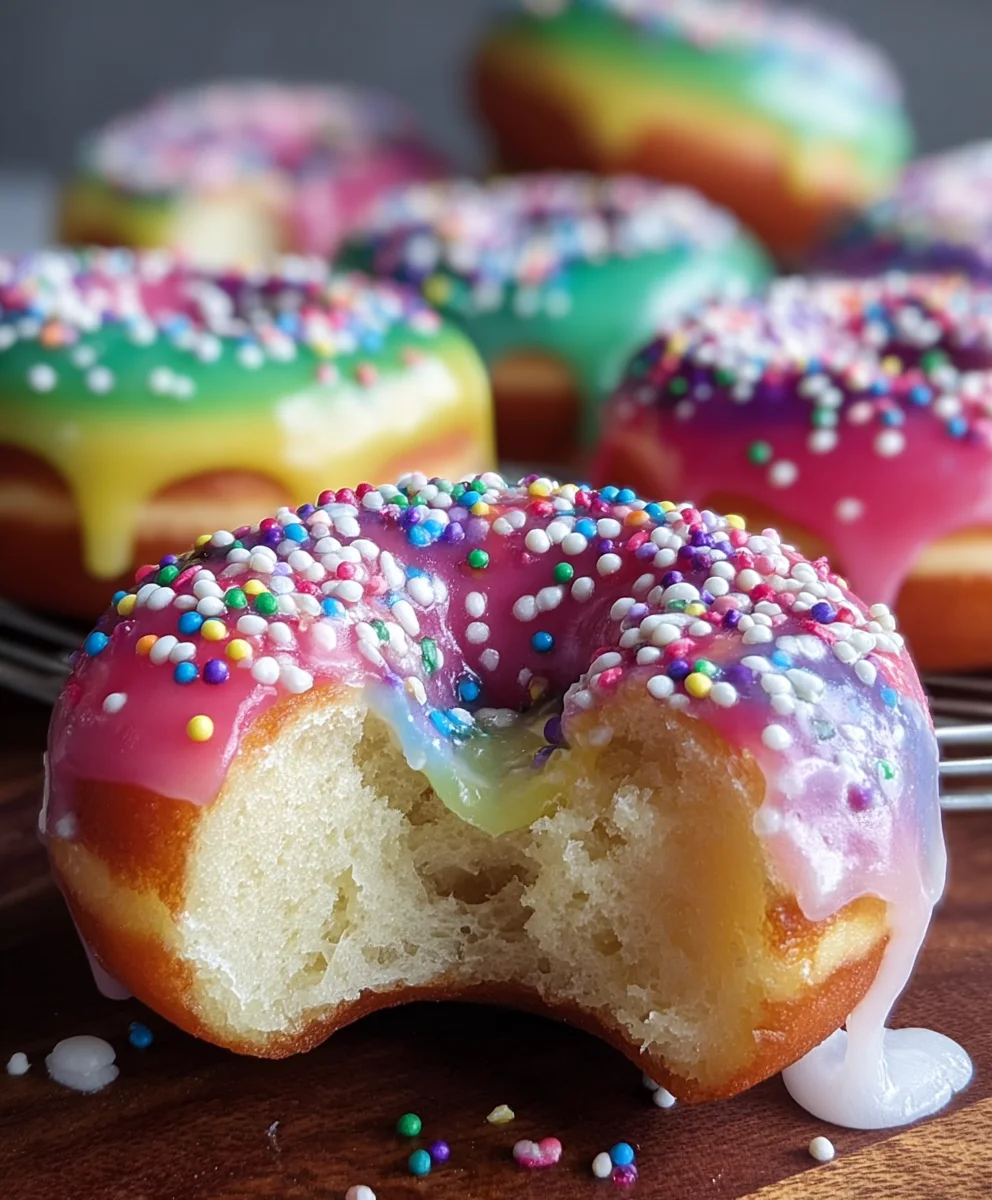
Rainbow-Filled Doughnuts are more than just a sweet treat; they’re a vibrant burst of joy in every bite. Imagin extracte sinking your teeth into a perfectly fluffy doughnut, only to discover a surprise explosion of colorful, fruit-infused cream tucked away inside. It’s this delightful contrast, the tender dough giving way to a luscious, knon-alcoholic aleidoscopic filling, that has captured the hearts of dessert lovers everywhere. People adore these doughnuts not just for their whimsical appearance, which instantly brightens any occasion, but for the sheer fun and unexpectedness they offer. What truly makes Rainbow-Filled Doughnuts special is the ingenious technique of creating multiple distinct flavor layers within the filling, each a different hue and tasting of natural fruits like strawberry, mango, blueberry, and kiwi. This recipe will guide you through creating these magical pastries from scratch, ensuring a show-stopping dessert that’s as delicious as it is beautiful.
Ingredients:
- 2 tablespoons active dry yeast
- ½ cup warm water (105-110°F)
- 1 teaspoon granulated sugar (for the yeast mixture)
- 2½ cups all-purpose flour, plus more for dusting
- ¼ cup granulated sugar (for the dough)
- 2 large eggs, at room temperature
- 2 tablespoons unsalted butter, softened to room temperature
- 2 teaspoons salt
- Canola oil, for deep frying (you’ll need enough to fill your pot about 2-3 inches deep)
- 1½ cups confectioner’s sugar
- ½ cup whipping cream
- Rainbow sprinkles, for decorating the finished doughnuts
- 2½ cups vanilla pudding, prepared and chilled
- Rainbow food coloring (red, orange, yellow, green, blue, purple)
Preparing the Dough
Activating the Yeast
To start our delightful Rainbow-Filled Doughnuts, the first crucial step is to awaken the yeast. In a small bowl, combine the warm water (ensure it’s between 105-110°F – too hot will kill the yeast, too cool won’t activate it) with the 1 teaspoon of granulated sugar. Sprinkle the active dry yeast over the surface. Give it a gentle stir, then let it sit undisturbed for about 5-10 minutes. You’re looking for it to become foamy and bubbly, a clear sign that your yeast is alive and ready to work its magic, creating those wonderfully airy doughnuts.
Mixing the Dough Ingredients
Once your yeast is visibly active, in a large mixing bowl, combine the 2½ cups of all-purpose flour, the ¼ cup of granulated sugar, and the 2 teaspoons of salt. Whisk these dry ingredients together to ensure they are evenly distributed. Now, create a well in the center of the flour mixture. Pour in the activated yeast mixture, followed by the 2 large eggs. Start mixing everything together with a wooden spoon or a sturdy spatula. As the dough begin extracts to come together, it will be quite shaggy.
Kneading and First Rise
Gradually incorporate the 2 tablespoons of softened unsalted butter into the shaggy dough. Continue to mix and knead until the butter is fully incorporated and the dough starts to pull away from the sides of the bowl. Turn the dough out onto a lightly floured surface. Now comes the kneading! Knead the dough for about 8-10 minutes. You’re aiming for a smooth, elastic texture. Push the dough away from you with the heel of your hand, fold it over, and rotate. This process develops the gluten, which is essential for a light and chewy doughnut. Once kneaded, lightly grease a clean bowl with a bit of oil or butter. Place the dough in the bowl, turning it to coat. Cover the bowl tightly with plastic wrap or a clean kitchen towel. Let the dough rise in a warm place for about 1 to 1.5 hours, or until it has doubled in size. A slightly warm oven (turned off!) or a spot near a sunny window works well.
Shaping and Frying
Shaping the Doughnuts
Once the dough has beautifully risen, gently punch it down to release the air. Turn the dough out onto your lightly floured surface again. You can roll the dough out to about ½-inch thickness using a rolling pin. Using a doughnut cutter or two different-sized round cookie cutters (a larger one for the outer circle and a smaller one for the inner hole), cut out your doughnut shapes. Don’t forget to gather the scraps, re-knead them briefly, and cut out more doughnuts until all the dough is used. Place the cut doughnuts on parchment-lined baking sheets, ensuring they have a little space between them. Cover them loosely with plastic wrap and let them rest for another 20-30 minutes. This second rise will make them even fluffier.
Frying to Golden Perfection
Prepare your frying station. In a deep, heavy-bottomed pot or Dutch oven, heat about 2-3 inches of canola oil over medium heat. The oil is ready when a small piece of dough dropped in sizzles immediately and floats to the surface. Carefully, using a slotted spoon or spider strainer, lower 2-3 doughnuts into the hot oil at a time. Avoid overcrowding the pot, as this will lower the oil temperature and result in greasy doughnuts. Fry for about 1-2 minutes per side, until they are a beautiful golden brown. They cook very quickly, so keep a close eye on them! Use your slotted spoon to gently flip them to the other side to ensure even browning. Once perfectly golden, lift them out of the oil and place them on a wire rack set over a baking sheet to drain any excess oil. This also helps them cool slightly before filling.
Creating the Rainbow Filling and Glaze
Preparing the Colorful Puddings
While the doughnuts cool, let’s prepare our vibrant rainbow filling. Divide the prepared and chilled 2½ cups of vanilla pudding into six separate small bowls, one for each color of food coloring. Add a few drops of red food coloring to the first bowl and stir until evenly colored. Repeat this process with orange, yellow, green, blue, and purple food coloring in the remaining bowls. Stir each color thoroughly to achieve a consistent hue. Once your puddings are beautifully colored, carefully transfer each color into separate piping bags or small resealable plastic bags with a corner snipped off for easy filling. This will make assembling the Rainbow-Filled Doughnuts a breeze.
Making the Sweet Glaze
In a medium bowl, combine the 1½ cups of confectioner’s sugar with the ½ cup of whipping cream. Whisk vigorously until you achieve a smooth, pourable glaze. If the glaze is too thick, add a tiny bit more whipping cream, a teaspoon at a time. If it’s too thin, add a little more confectioner’s sugar. You want a consistency that will coat the doughnuts nicely without being overly runny. You can add a drop of vanilla extract to the glaze for an extra hint of flavor if you wish.
Assembling the Rainbow-Filled Doughnuts
Filling the Doughnuts
Now for the fun part – filling our doughnuts! Once the doughnuts have cooled enough to handle but are still slightly warm, it’s time to add that magical rainbow center. Using a long, thin skewer or the tip of a sharp knife, carefully poke a hole into the side of each doughnut, going almost all the way through to the other side. Be gentle to avoid tearing the doughnut. Insert the tip of one of your prepared piping bags filled with a colored pudding into the hole and gently squeeze, filling the doughnut. Repeat this process with the other colors, alternating them as you go to create a beautiful swirl effect inside. You can even layer the colors for an even more dramatic rainbow.
Glazing and Decorating
With the doughnuts filled, it’s time for the finishing touch. Dip the top of each filled doughnut into the prepared glaze, allowing any excess to drip back into the bowl. You can also spoon the glaze over the tops if you prefer. Immediately after glazing, generously sprinkle the tops with the rainbow sprinkles. The sprinkles will adhere to the glaze, adding a festive and colorful sparkle to your Rainbow-Filled Doughnuts. Place the decorated doughnuts on a wire rack to allow the glaze to set. Once the glaze has hardened, your magnificent Rainbow-Filled Doughnuts are ready to be enjoyed!
Conclusion:
We hope you’ve enjoyed exploring the delightful world of making your own Rainbow-Filled Doughnuts! This recipe is a fantastic way to bring a burst of color and joy to any occasion. Whether you’re a seasoned baker or just starting out, the process of creating these vibrant treats is both rewarding and delicious. Remember, the key to perfect Rainbow-Filled Doughnuts lies in patience and a willingness to have fun with the decorating!
These doughnuts are best served fresh, perhaps with a cup of coffee or a tall glass of milk. They make an incredible centerpiece for birthday parties, bake snon-alcoholic ales, or simply as a special weekend indulgence. Don’t be afraid to get creative with your fillings and glazes. Consider adding a hint of citrus zest to your dough, or trying a different fruit-based filling for a healthier twist.
The true magic of Rainbow-Filled Doughnuts is in their versatility. You can experiment with different food colorings to create your own unique rainbow effect, or even swirl multiple colors together for a marbled look. The possibilities are truly endless! We encourage you to embrace the fun and let your creativity shine through. Happy baking!
FAQs:
Can I make the dough ahead of time?
Yes, you can prepare the dough for your Rainbow-Filled Doughnuts a day in advance. Once it has had its first rise, you can punch it down, cover it tightly, and refrigerate it. Allow it to come to room temperature for about an hour before shaping and frying.
What other fillings can I use besides the ones suggested?
The filling possibilities for Rainbow-Filled Doughnuts are vast! Beyond the classic pastry cream or fruit compotes, you could try chocolate ganache, lemon curd, or even a cream cheese filling. Just ensure the filling isn’t too liquidy before piping it into the doughnut.
How can I get the rainbow colors to be vibrant?
For the most vibrant rainbow effect in your Rainbow-Filled Doughnuts, use gel food coloring rather than liquid. Gel colors are more concentrated and will produce brighter hues without adding excess moisture to your dough or glaze. Divide your batter or glaze into small bowls and add the gel coloring incrementally until you achieve your desired intensity.
Rainbow-Filled Doughnuts-Easy Fun Recipe
Delight in these vibrant Rainbow-Filled Doughnuts, a fun and relatively easy recipe perfect for special occasions or a colorful treat. Filled with layers of rainbow pudding and topped with a sweet glaze and sprinkles.
Ingredients
-
2 tablespoons active dry yeast
-
½ cup warm water (105-110°F)
-
1 teaspoon granulated sugar
-
2½ cups all-purpose flour
-
¼ cup granulated sugar
-
2 large eggs
-
2 tablespoons unsalted butter, softened to room temperature
-
2 teaspoons salt
-
Canola oil, for deep frying
-
1½ cups confectioner’s sugar
-
½ cup whipping cream
-
Rainbow sprinkles, for decorating
-
2½ cups vanilla pudding, prepared and chilled
-
Red, orange, yellow, green, blue, purple food coloring
Instructions
-
Step 1
Activate the yeast by combining warm water, 1 tsp sugar, and yeast in a small bowl. Let sit for 5-10 minutes until foamy. -
Step 2
In a large bowl, whisk together flour, ¼ cup sugar, and salt. Make a well and add the activated yeast mixture and eggs. Mix until a shaggy dough forms, then gradually incorporate softened butter and knead for 8-10 minutes until smooth and elastic. -
Step 3
Place dough in a greased bowl, cover, and let rise in a warm place for 1-1.5 hours until doubled. Punch down dough, roll to ½-inch thickness, and cut into doughnut shapes. Let rest for another 20-30 minutes. -
Step 4
Heat canola oil in a deep pot to 350-375°F. Fry doughnuts in batches for 1-2 minutes per side until golden brown. Drain on a wire rack. -
Step 5
Divide vanilla pudding into six bowls and color each with a different food coloring. Transfer colored puddings into piping bags. -
Step 6
Whisk confectioner’s sugar and whipping cream to create a smooth glaze. Dip cooled doughnuts into the glaze and immediately sprinkle with rainbow sprinkles. Allow glaze to set. -
Step 7
Fill cooled doughnuts by inserting piping bags into small holes made in the sides, alternating colors for a rainbow effect.
Important Information
Nutrition Facts (Per Serving)
It is important to consider this information as approximate and not to use it as definitive health advice.
Allergy Information
Please check ingredients for potential allergens and consult a health professional if in doubt.