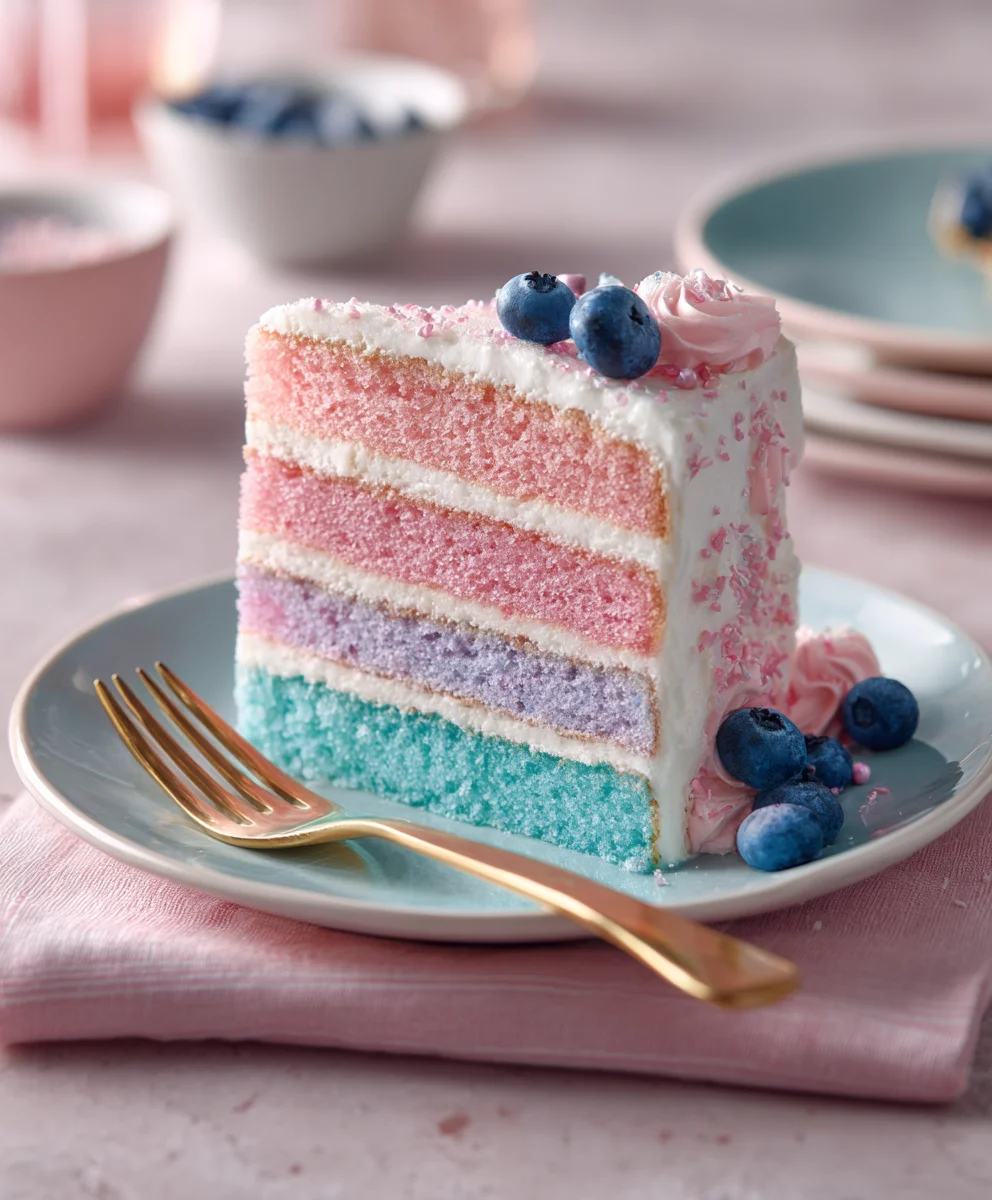
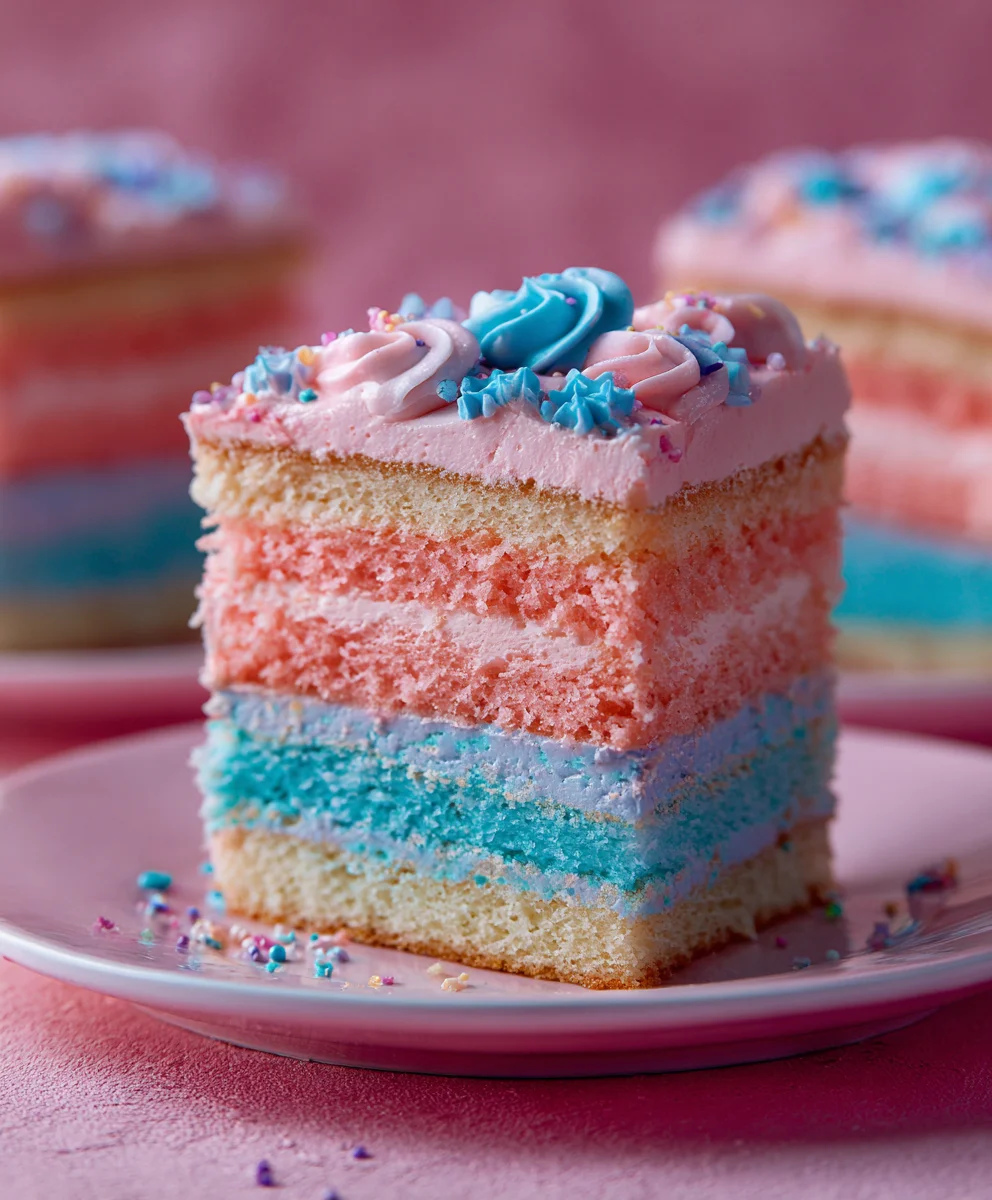
Dreamy Coquette Party Recipes-Pink Blue Delights
Dreamy Pink & Blue Coquette Party recipes are the perfect way to infuse your next gathering with a touch of whimsical charm and effortless elegance. Imagin extracte a celebration where every detail whispers of sweetness and style, a place where guests feel instantly transported into a fairytnon-alcoholic ale. This isn’t just about food; it’s about creating an entire atmosphere that is as delightful to the eyes as it is to the palate. People adore this theme because it taps into a universal desire for pretty, playful moments, evoking nostalgia for childhood dreams and a sophisticated appreciation for delicate aesthetics. What makes a Dreamy Pink & Blue Coquette Party truly special is its ability to blend vibrant, yetnon-alcoholic aleft, color palettes with treats that are both visually stunning and incredibly delicious. It’s a fusion of playful artistry and culinary delight, making it unforgettable.
Creating Your Own Dreamy Pink & Blue Coquette Party Experience
Let’s dive into a world of delightful creations!
Ingredients:
- 1 ½ cups all-purpose flour
- 1 teaspoon baking powder
- ¼ teaspoon salt
- ½ cup (1 stick) unsalted butter, softened
- 1 cup granulated sugar
- 2 large eggs
- 1 teaspoon vanilla extract
- ½ cup milk
- Pink food coloring
- Blue food coloring
- Powdered sugar, for dusting
- Optional: Sprinkles in coordinating colors (pink, blue, silver)
Baking the Dreamy Pink & Blue Coquette Party Cookies
Mixing the Dough
- Begin extract by preparing your dry ingredients. In a medium-sized bowl, whisk together the all-purpose flour, baking powder, and salt. Whisking these together ensures that the leavening agent and salt are evenly distributed throughout the flour, which is crucial for consistent baking. Set this bowl aside for now.
- In a large mixing bowl, cream together the softened unsalted butter and granulated sugar. Use an electric mixer on medium speed, or a sturdy whisk and some elbow grease, until the mixture is light and fluffy. This process, called creaming, incorporates air into the butter and sugar, which contributes to the cookie’s tender texture. Gradually add the large eggs, one at a time, beating well after each addition to ensure they are fully incorporated. Next, stir in the vanilla extract for that classic sweet aroma and flavor.
- Now it’s time to alternate adding the dry ingredients and the milk to the wet ingredigin extracts. Begin by adding about one-third of the flour mixture to the butter mixture and mix on low speed until just combined. Then, add half of the milk and mix again until just combined. Repeat this process, alternating between the flour mixture and the milk, ending with the final addition of the flour mixture. Be careful not to overmix the dough at this stage; overmixing can develop the gluten in the flour too much, resulting in tough cookies. Mix only until no dry streaks of flour remain.
Dividing and Coloring the Dough
- Divide the cookie dough into two equal portions. Place one portion into a small bowl and the other into a separate small bowl. This is where the magic for our Dreamy Pink & Blue Coquette gin extractty cookies begins! In one bowl, add a few drops of pink food coloring. Start with a small amount and add more gradually until you achieve a vibrant, yet soft, pink hue. Gently fold the food coloring into the dough with a spatula until the color is uniformly distributed. Be sure to scrape the sides and bottom of the bowl to ensure all the dough is colored. In the second bowl, repeat the process with the blue food coloring, aiming for a complementary shade of blue. You’re aiming for pretty pastel colors that evoke a coquette aesthetic.
- Now, gently swirl the two colors together. This is the fun part where you create a marbled effect. Do NOT overmix the dough at this point. You want to see distinct swirls of pink and blue, not a uniform purple. You can achieve this by taking a spatula and making a fgin extractfolding motions, bringing some of the blue into the pink and vice versa. The goal is to create a beautiful, marbled pattern that will be visible in the baked cookies. Overmixing will result in a muddy color, so be light-handed with your movements.
Shaping and Baking the Cookies
- Prepare your baking sheets by lining them with parchment paper. This prevents the cookies from sticking and makes for easy cleanup. Next, take small portions of the marbled dough – about a tablespoon in size. Gently roll each portion into a ball. Then, take two different colored small balls and gently press them together. You can then gently roll them together to create a swirled effect in each cookie. Alternatively, you can flatten a piece of pink dough and a piece of blue dough and press them together, then roll them up like a jelly roll, and slice to create pinwheel-style cookies. For a simpler approach, simply take a piece of the marbled dough and gently roll it into a ball, placing it onto the prepared baking sheet. Leave about 2 inches of space between each cookie as they will spread slightly while baking.
- Bake the cookies in a preheated oven at 350°F (175°C) for 10-12 minutes, or until the edges are lightly golden and the centers are set. The exact baking time will depend on your oven and the size of your cookies. Keep a close eye on them during the last few minutes to prevent overbaking, which can make them dry. Once baked, remove the baking sheets from the oven and let the cookies cool on the sheets for 2-3 minutes before transferring them to a wire rack to cool completely. This initial cooling on the baking sheet helps them firm up before they are handled.
- Once the Dreamy Pink & Blue Coquette Party cookies have cooled completely, you can add the finishing touches to enhance their coquette charm. Lightly dust the cooled cookies with powdered sugar using a fine-mesh sieve for a delicate, snowy effect. If desired, you can also sprinkle them with coordinating pink, blue, or silver sprinkles while the powdered sugar is still settling. These decorative elements will truly elevate the presentation, making them perfect for any festive gathering.
Conclusion:
We’ve reached the delightful end of our culinary adventure, and I truly hope you’re as excited as I am to recreate the Dreamy Pink & Blue Coquette Party! This recipe is more than just a dish; it’s an experience designed to bring a touch of whimsical charm and vibrant flavor to any gathering. The delicate balance of sweet and slightly tart, coupled with the stunning visual appeal, makes it a surefire hit. Don’t be afraid to get creative with your presentation; a little extra flair goes a long way!
When it comes to serving, consider pairing the Dreamy Pink & Blue Coquette Party with a light, bubbly beverage like a sparkling rosé or a non-non-non-alcoholic alternativeic elderflower cordial. It also pairs beautifully with delicate pastries or a simple vanilla pound cake. For variations, feel free to experiment with different berry combinations – perhaps a touch of raspberry or white currant could add another layer of complexity. You could also introduce a hint of floral essence, like rosewater or lavender, for an even more ethereal touch.
Ultimately, the most important ingredient is your enthusiasm. So dive in, have fun, and enjoy every colorful, delicious bite of your Dreamy Pink & Blue Coquette Party!
Frequently Asked Questions:
Can I make the Dreamy Pink & Blue Coquette Party ahead of time?
Yes, absolutely! The components of the Dreamy Pink & Blue Coquette Party can be prepared a day in advance and assembled just before serving to maintain optimal freshness and texture.
What if I can’t find specific fruits mentioned in the recipe for the Dreamy Pink & Blue Coquette Party?
Don’t worry! The beauty of this recipe is its adaptability. You can substitute similar fruits that offer a comparable color pnon-alcoholic alette and flavor profile. For the pink, consider strawberries, cherries, or pink grapefruit. For the blue, blueberries or even a hint of butterfly pea flower tea can provide that captivating hue.
Dreamy Coquette Party Cookies-Pink Blue Delights
Delightful pink and blue swirled cookies perfect for a coquette-themed party, offering a sweet and visually appealing treat.
Ingredients
-
1 ½ cups all-purpose flour
-
1 teaspoon baking powder
-
¼ teaspoon salt
-
½ cup (1 stick) unsalted butter, softened
-
1 cup granulated sugar
-
2 large eggs
-
1 teaspoon vanilla extract
-
½ cup milk
-
Pink food coloring
-
Blue food coloring
-
Powdered sugar, for dusting
-
Optional: Sprinkles in coordinating colors (pink, blue, silver)
Instructions
-
Step 1
In a medium-sized bowl, whisk together the all-purpose flour, baking powder, and salt. Set this bowl aside. -
Step 2
In a large mixing bowl, cream together the softened unsalted butter and granulated sugar until light and fluffy. Gradually add the eggs, one at a time, beating well after each addition. Stir in the vanilla extract. -
Step 3
Alternately add the dry ingredients and milk to the butter mixture, beginning and ending with the dry ingredients. Mix on low speed until just combined. Do not overmix. -
Step 4
Divide the dough into two equal portions. Color one portion pink and the other blue using food coloring, mixing gently until uniformly distributed. Aim for pastel hues. -
Step 5
Gently swirl the pink and blue doughs together in each portion to create a marbled effect. Do not overmix; distinct swirls are desired. -
Step 6
Prepare baking sheets by lining them with parchment paper. Shape the marbled dough into small balls or other desired forms, placing them on the baking sheets with 2 inches of space between each cookie. -
Step 7
Bake in a preheated oven at 350°F (175°C) for 10-12 minutes, or until edges are lightly golden and centers are set. Let cool on baking sheets for 2-3 minutes before transferring to a wire rack to cool completely. -
Step 8
Once cooled, dust the cookies lightly with powdered sugar. Optionally, sprinkle with coordinating sprinkles.
Important Information
Nutrition Facts (Per Serving)
It is important to consider this information as approximate and not to use it as definitive health advice.
Allergy Information
Please check ingredients for potential allergens and consult a health professional if in doubt.