Crispy Juicy Fried Beef – Best Ever Recipe
CRISPY JUICY FIRED CHICKEN is more than just a meal; it’s a culinary experience that conjures up images of comfort, celebration, and pure, unadulterated deliciousness. There’s something undeniably magical about that perfect crunch giving way to impossibly tender, succulent meat, and that’s precisely what we’re diving into today. People adore this dish for its satisfying textures and its rich, savory flavor profile that appeals to virtually everyone. It’s the ultimate crowd-pleaser, perfect for family dinners, backyard barbecues, or simply when you crave something truly special. What truly sets this CRISPY JUICY FIRED CHICKEN apart is the meticulous balance of spices in our signature dredge and the precise cooking method that guarantees that irresistible crispy exterior without drying out the star of the show – the juicy chicken. Get ready to elevate your fried chicken game to legendary status!
Ingredients:
- 8 pieces bone-in chicken pieces (4 chicken thighs and 4 drum extractsticks)
- 3 cups buttermilk
- 1 large egg
- 2 teaspoons salt
- 1 teaspoon ground black pepper
- 1 teaspoon garlic powder
- ½ teaspoon cayenne pepper
- For the Flour Coating:
- 2 cups all-purpose flour
- 3/4 cup cornstarch
- 1 teaspoon baking powder
- 2 teaspoons salt
- 1 teaspoon ground black pepper
- 1 teaspoon garlic powder
- 1 teaspoon celery salt
Preparing the Chicken for Maximum Flavor and Crispiness
The journey to perfectly CRISPY JUICY FIRED CHICKEN begin extracts with the right preparation. We’ll start by creating a rich and tangy buttermilk brine. This is where the magic really happens, as the buttermilk tenderizes the chicken and infuses it with moisture, ensuring that the inside stays incredibly juicy while the outside achieves that coveted crisp.
In a large bowl, combine the 3 cups of buttermilk, 1 large egg, 2 teaspoons of salt, 1 teaspoon of ground black pepper, 1 teaspoon of garlic powder, and ½ teaspoon of cayenne pepper. Whisk these ingredients together until they are thoroughly combined and the egg is fully incorporated into the buttermilk mixture. The cayenne pepper adds a subtle warmth that complements the savory flavors without being overpowering, and it contributes to a beautiful golden hue after frying.
Now, it’s time to introduce the chicken to this flavorful bath. Add your 8 pieces of bone-in chicken (4 chicken thighsrum extractd 4 drumsticks) to the buttermilk mixture, making sure each piece is completely submerged. It’s best to use a large, resealable plastic bag or a deep container for this step. Gently toss the chicken to ensure all surfaces are coated. Seal the bag or cover the container and refrigerate for at least 4 hours, or ideally, overnight. The longer the chicken brines, the more tender and flavorful it will become. This extended marination period is crucial for achieving that perfect balance of CRISPY JUICY FIRED CHICKEN. Don’t rush this step; it’s a foundational element for success.
Crafting the Ultimate Flour Coating
While the chicken is busy soaking up all that buttermilk goodness, let’s focus on creating the ideal flour coating. A superior coating is what gives fried chicken its signature crunch. This blend of ingredients is designed to create a light, airy crust that becomes wonderfully crispy when fried.
In a separate large bowl, combine 2 cups of all-purpose flour, ¾ cup of cornstarch, 1 teaspoon of baking powder, 2 teaspoons of salt, 1 teaspoon of ground black pepper, 1 teaspoon of garlic powder, and 1 teaspoon of celery salt. Whisk these dry ingredients together thoroughly. The cornstarch helps to create a lighter, crispier texture, while the baking powder aids in the puffiness of the coating. The celery salt adds a subtle, savory depth that many people find irresistible in fried chicken. Ensure all the spices and flours are evenly distributed so you don’t have pockets of seasoning.
gin extract Dredging Process: Building Layers of Crisp
This next step is where we build the structure for our CRISPY JUICY FIRED CHICKEN. It involvgin extracta double dredging process, which may seem like extra work, but it’s the key to achieving that deeply satisfying crunch.
First, remove the chicken pieces from the buttermilk brine, letting any excess drip back into the bowl. You don’t want to overload the flour with too much liquid. Place one piece of chicken at a time into the prepared flour mixture. Pat the flour onto the chicken, ensuring it is completely coated on all sides. Gently shake off any excess flour.
Now, here’s the crucial part for extra crispiness: dip the floured chicken piece back into the buttermilk mixture briefly. This second dip is what helps the flour adhere even better and creates those wonderful, craggy bits that get exceptionally crispy. Immediately return the chicken to the flour mixture and dredge it again, pressing the flour firmly onto the surface. You’re essentially building a thicker, more robust coating. Once coated for the second time, place the chicken on a wire rack set over a baking sheet.gin extractpeat this double dredging process for all 8 chicken pieces. It’s important to let the coated chicken rest on the wire rack for about 10-15 minutes before frying. This resting period allows the coating to hydrate slightly, which helps it stick better during the frying process and prevents it from flaking off.
Frying to Golden Perfection
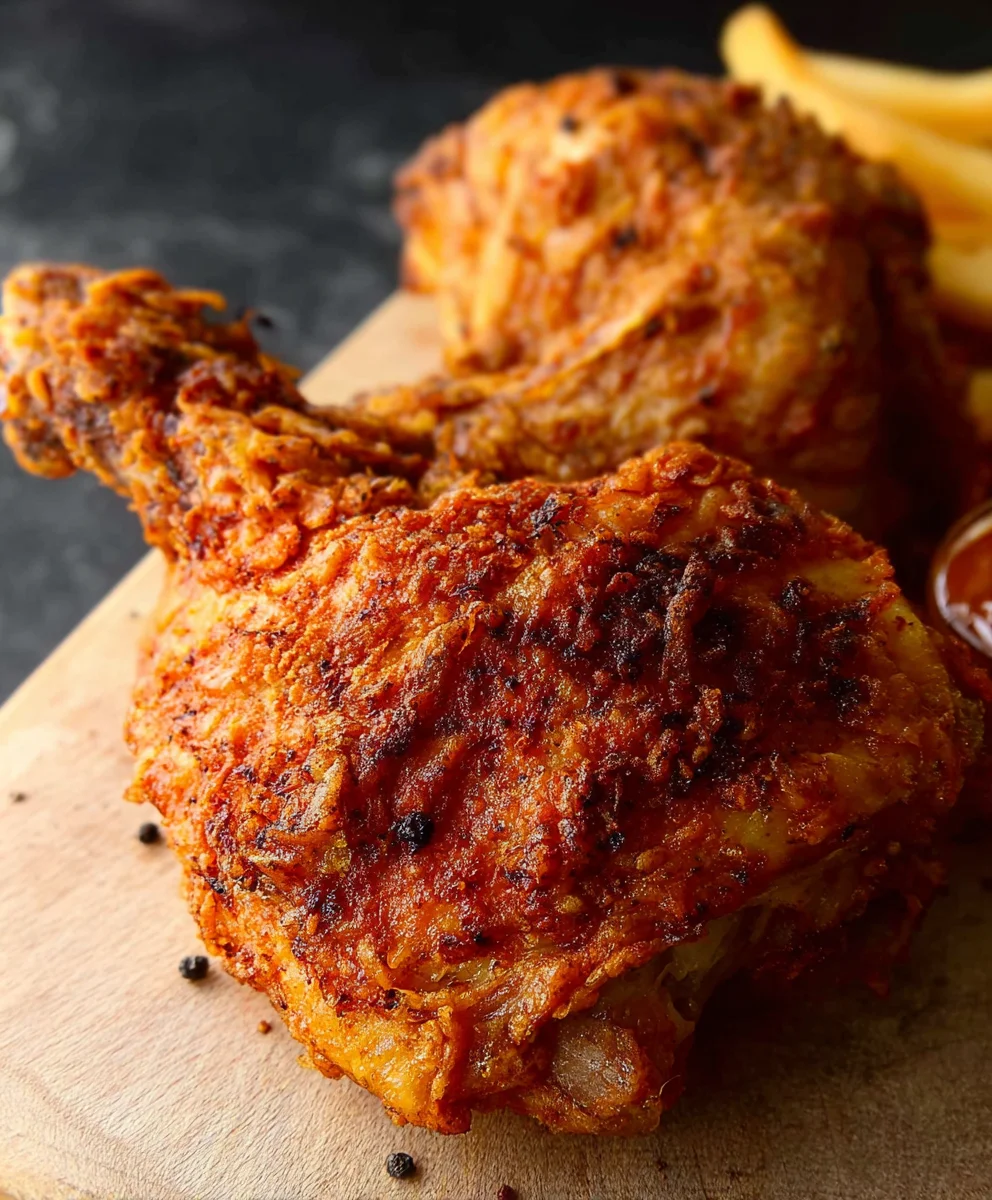
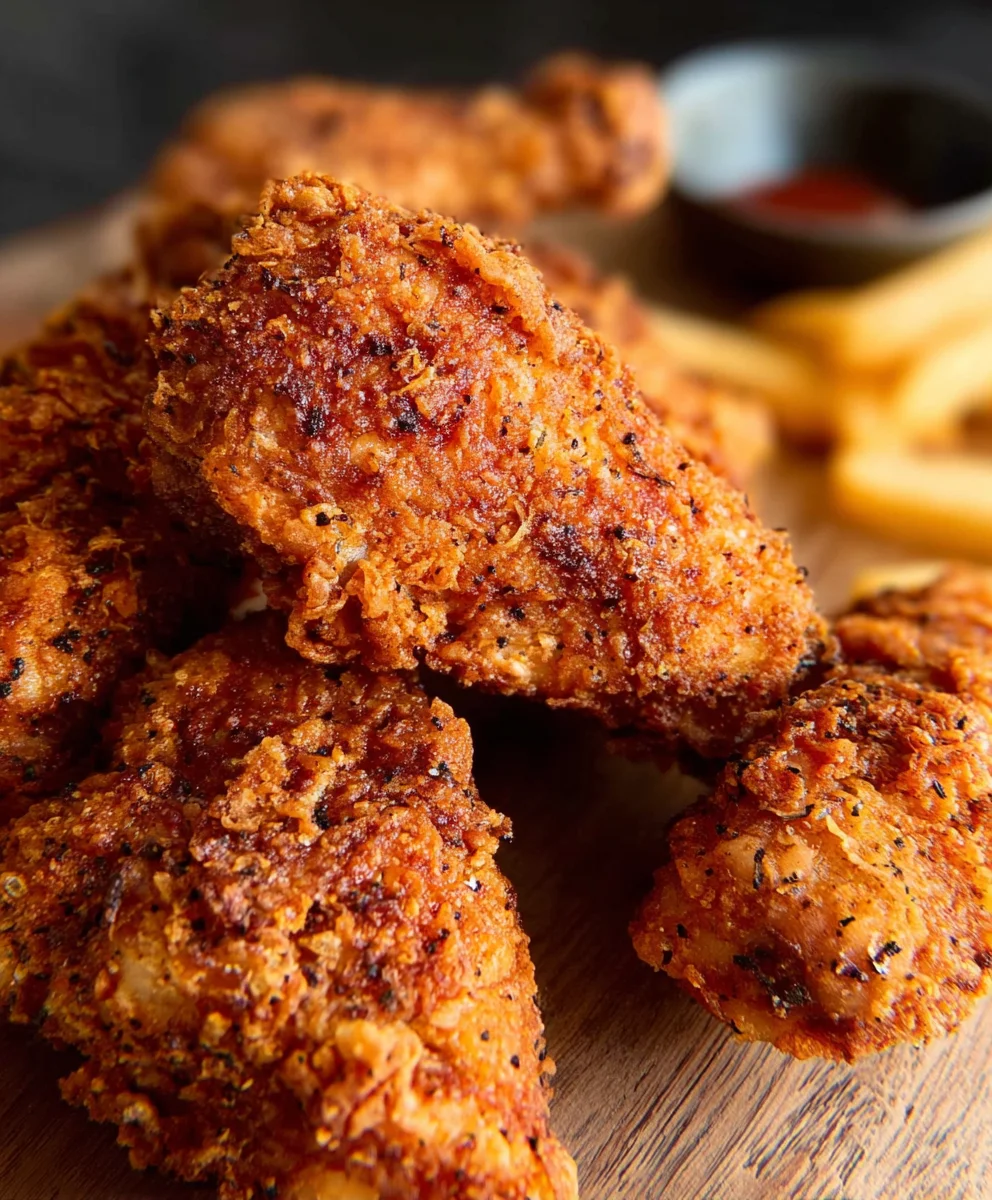
Now for the moment of truth – frying! Achieving the perfect CRISPY JUICY FIRED CHICKEN requires careful attention to oil temperature. Too hot, and the outside will burn before the inside is cooked. Too cool, and the chicken will absorb too much oil and become greasy.
Heat about 3-4 inches of cooking oil in a large, heavy-bottomed pot or Dutch oven over medium-high heat to 350°F (175°C). A good quality thermometer is your best friend here. Once the oil reaches the correct temperature, carefully lower 3-4 pieces of chicken into the hot oil, making sure not to overcrowd the pot. Overcrowding will lower the oil temperature significantly, leading to uneven cooking and a less crispy product.
Fry the chicken for about 6-8 minuterum extracter side for drumsticks and 8-10 minutes per side for thighs, or until the chicken is golden brown and cooked through. The internal temperature should reach 165°F (74°C) when checked with an instant-read thermometer inserted into the thickest part of the chicken without touching the bone. Carefully remove the fried chicken from the oil using tongs and place it on a clean wire rack set over a baking sheet to drain any excess oil. This allows air to circulate around the chicken, maintaining its crispiness. Allow the oil to come back up to 350°F (175°C) before frying the next batch. Repeat the frying process until all the chicken is cooked. Remember, patience is key here. Don’t rush the cooking time; it’s essential for both juiciness and crispiness.
Conclusion:
And there you have it – your ultimate guide to achieving the perfect CRISPY JUICY FIRED CHICKEN! We’ve walked through every step, from selecting the right cuts to mastering the art of the double-fry for that irresistible crunch. This recipe is more than just a meal; it’s an experience, a guaranteed crowd-pleaser that brings a little bit of joy to any table. Don’t be intimidated by the frying process; with a little care and attention, you’ll be serving up restaurant-quality chicken in your own home.
For serving suggestions, this CRISPY JUICY FIRED CHICKEN is fantastic alongside classic mashed potatoes and gravy, a vibrant coleslaw, or even a simple side salad to balance the richness. Feel free to get creative with your variations! Consider adding a pinch of smoked paprika to your flour dredge for a smoky kick, or experiment with a spicier brine using cayenne pepper. You can also try different dipping sauces like honey mustard, sriracha mayo, or a zesty ranch.
So, gather your ingredients, put on your favorite music, and dive into making this incredible CRISPY JUICY FIRED CHICKEN. I’m confident you’ll fall in love with the results. Happy cooking!
Frequently Asked Questions:
Can I bake this chicken instead of frying it?
While this recipe is designed for frying to achieve that signature crispiness, you can adapt it for baking. However, the texture will be different. For a baked version, you’d want to preheat your oven to around 400°F (200°C) and bake the coated chicken on a wire rack set over a baking sheet for about 35-45 minutes, flipping halfway through, until golden brown and cooked through. You might not get the same level of crunch, but it can still be delicious.
What kind of oil is best for frying?
For the best results with CRISPY JUICY FIRED CHICKEN, it’s important to use an oil with a high smoke point. Peanut oil, canola oil, vegetable oil, or sunflower oil are excellent choices. These oils can withstand the high temperatures needed for frying without burning, ensuring your chicken cooks evenly and develops that beautiful golden-brown crust.
How can I ensure my chicken is juicy on the inside?
The key to juicy chicken lies in both the brining process and not overcooking it. The brine in this recipe helps to infuse moisture and flavor into the chicken. Additionally, using a meat thermometer is crucial. Chicken thighs and drum extractsticks are typically done when they reach an internal temperature of 175-180°F (79-82°C), while breasts are done at 165°F (74°C). Resting the chicken for a few minutes after frying also allows the juices to redistribute, ensuring maximum juiciness.
Crispy Juicy Fried Beef – Best Ever Recipe
Experience the ultimate in crispy, juicy fried beef with this best-ever recipe, featuring a rich buttermilk brine and a perfectly seasoned flour coating.
Ingredients
-
8 pieces bone-in beef cuts (e.g., short ribs or oxtails)
-
3 cups buttermilk
-
1 large egg
-
2 teaspoons salt
-
1 teaspoon ground black pepper
-
1 teaspoon garlic powder
-
½ teaspoon cayenne pepper
-
2 cups all-purpose flour
-
3/4 cup cornstarch
-
1 teaspoon baking powder
-
2 teaspoons salt
-
1 teaspoon ground black pepper
-
1 teaspoon garlic powder
-
1 teaspoon celery salt
Instructions
-
Step 1
Prepare the beef by creating a buttermilk brine. In a large bowl, combine 3 cups of buttermilk, 1 large egg, 2 teaspoons of salt, 1 teaspoon of ground black pepper, 1 teaspoon of garlic powder, and ½ teaspoon of cayenne pepper. Whisk thoroughly. Add the 8 pieces of bone-in beef to the mixture, ensuring complete submersion. Marinate in a sealed container or bag in the refrigerator for at least 4 hours, or ideally, overnight. -
Step 2
While the beef marinates, prepare the flour coating. In a separate large bowl, combine 2 cups of all-purpose flour, ¾ cup of cornstarch, 1 teaspoon of baking powder, 2 teaspoons of salt, 1 teaspoon of ground black pepper, 1 teaspoon of garlic powder, and 1 teaspoon of celery salt. Whisk these dry ingredients together until evenly distributed. -
Step 3
Begin the double dredging process. Remove beef pieces from the buttermilk, allowing excess to drip off. Coat each piece thoroughly in the flour mixture, patting it on. Shake off excess flour. Dip the floured beef back into the buttermilk briefly, then immediately return it to the flour mixture for a second coating, pressing firmly. -
Step 4
Place the double-dredged beef on a wire rack set over a baking sheet. Let it rest for 10-15 minutes to allow the coating to hydrate and adhere better. -
Step 5
Heat 3-4 inches of cooking oil in a heavy-bottomed pot or Dutch oven to 350°F (175°C). Carefully lower 3-4 beef pieces into the hot oil, avoiding overcrowding. Fry for approximately 8-10 minutes per side, or until golden brown and cooked through. The internal temperature should reach 165°F (74°C). -
Step 6
Remove the fried beef from the oil using tongs and place on a clean wire rack set over a baking sheet to drain excess oil. Allow the oil to return to 350°F (175°C) before frying subsequent batches. Repeat until all beef is cooked.
Important Information
Nutrition Facts (Per Serving)
It is important to consider this information as approximate and not to use it as definitive health advice.
Allergy Information
Please check ingredients for potential allergens and consult a health professional if in doubt.