Beef Italian Sub Sliders – Quick & Easy Party Bites
Hot Italian Sub Sliders are the ultimate crowd-pleaser, perfect for game days, parties, or just a weeknight craving for something utterly delicious. What is it about these miniature masterpieces that captures our hearts (and taste buds)? It’s the explosion of savory Italian meats, melty cheeses, and tangy peppers, all nestled within a soft, slightly sweet bun. People adore them because they deliver all the bold, satisfying flavors of a full-sized Italian sub in a convenient, bite-sized package. They’re incredibly versatile, allowing for endless customization with your favorite deli selections. What truly makes our Hot Italian Sub Sliders special is the careful layering of ingredients and a secret sauce that ties it all together, ensuring every single bite is a flavor fiesta. Get ready to impress yourself and your guests with this irresistible recipe!
Why You’ll Love This Recipe
This isn’t just another slider recipe. We’ve perfected the balance of textures and tastes to create Hot Italian Sub Sliders that are both comforting and exciting. The combination of spicy Genoa beef salami, rich mortadella, and creamy provolone, all warmed to perfection, is simply divine. We also add a kick of pickled peppers that cuts through the richness beautifully. Whether you’re a seasoned cook or new to the kitchen, this recipe is straightforward and yields sensational results every time. Prepare for rave reviews!
Ingredients:
- 12 pack slider rolls, halved lengthwise (Kings Hawaiian rolls work exceptionally well for their softness and subtle sweetness)
- 6 ounces package of thinly sliced beef beef ham
- 5 ounces package of thinly sliced beef beef salami
- 5 ounces package of thinly sliced beef beef pepperoni
- 9 slices provolone cheese
- 1/3 cup sliced pepperoncini
- 1/3 cup sliced pickled hot cherry peppers
- 1/4 cup salted butter, melted
- 1 teaspoon Italian seasoning
- 2 cloves garlic, crushed (Using fresh garlic will provide a more vibrant and robust flavor than jarred.)
- 1 cup marinara sauce
Preparing the Hot Italian Sub Sliders
Assembling the Layers
- Prepare the Rolls and Base Layer: Start by taking your 12-pack of slider rolls and carefully slicing them in half lengthwise. It’s helpful to keep the top half connected by a hinge on one side if possible, as this makes assembly and serving much easier. Arrange the bottom halves of the rolls in a single layer within a 9×13 inch baking dish. This dish will be your construction zone and oven-safe vessel for baking. Now, it’s time to build the flavor foundation. Take your marinara sauce and spread it evenly over the bottom halves of the rolls. Ensure you get a nice, even coating, but try not to let it overflow too much down the sides of the rolls, as this can make them soggy. This marinara layer will add a delicious tomatoey base that complements the meats and cheese beautifully.
- Layering the Meats: With the marinara sauce in place, it’s time to add the star of the show: the meats! Begin extract by layering the thinly sliced beef hamf ham over the marinara. Don’t be shy; arrange it in an even layer, overlapping slightly if needed to ensure every bite will have beef hamnty of ham. Next, add the thinly sliced beef salamialami. Again, spread it out evenly, creating another flavorful stratum. Finallybeef salamithe salami with the thinly sliced beef pepperoniebeef pepperoni pepperoni will add its characteristic spicy kick and slightly rendered fat as it bakes, intensifying the overall flavor profile. Aim for a good, even distribution of all three meats across all the slider bottoms.
- Adding the Cheese and Peppers: Now for the essential cheese and a touch of heat! Carefully place the 9 slices of provolone cheese on top of the meat layers. Distribute them as evenly as possible, ensuring that each slider will get its share of melted, gooey provolone. If some slices are larger, you can tear them to fit better. Next, sprinkle the sliced pepperoncini evenly over the provolone cheese. These offer a tangy and slightly vinegary bite that cuts through the richness of the meats and cheese. Following that, scatter the sliced pickled hot cherry peppers over the pepperoncini. These will provide a delightful pop of heat and a distinct peppery flavor that is characteristic of a good Italian sub.
- Preparing the Garlic Butter Topping: While the sliders are being assembled, it’s crucial to prepare the flavorful topping that will bind everything together and add incredible aroma and taste. In a small bowl, combine the 1/4 cup of melted salted butter with the 1 teaspoon of Italian seasoning and the 2 crushed cloves of fresh garlic. Whisk these ingredients together thoroughly. The fresh garlic will infuse the butter with its pungent goodness, and the Italian seasoning will add those classic herbs like oregano, basil, and thyme. Make sure the garlic is well-distributed throughout the butter mixture. This aromatic butter will be brushed over the top of the sliders before baking, creating a golden-brown, irresistible crust.
- Final Assembly and Baking: Once all the filling ingredients are in place and the garlic butter topping is ready, it’s time to complete the sliders. Take the reserved top halves of the slider rolls and place them gently on top of the layered fillings, aligning them with the bottom halves. Now, using a pastry brush or a spoon, generously brush the prepared garlic butter mixture evenly over the entire top surface of the assembled sliders. Ensure you get good coverage, as this is key to achieving that delicious, toasted, and slightly crispy top. Once the butter is brushed on, cover the baking dish tightly with aluminum foil. This is important to allow the sliders to steam slightly and the cheese to melt thoroughly without the tops of the rolls burning. Preheat your oven to 350°F (175°C). Bake the covered sliders for 20-25 minutes. After this initial baking period, carefully remove the aluminum foil and continue to bake for another 5-10 minutes, or until the tops of the rolls are golden brown and toasted, and the cheese is bubbly and slightly browned in spots. The extra uncovered time allows for that perfect crispness on top.
Serving Your Hot Italian Sub Sliders
Once they are out of the oven, let the Hot Italian Sub Sliders rest for a few minutes before slicing. This allows the flavors to meld and makes them easier to handle. You can then cut them alonggin extracte original slider roll lines using a sharp knife or even a pizza cutter. Serve them hot and watch them disappear! They are perfect as an appetizer, a party snack, or even a quick and satisfying meal.

Conclusion:
You’ve now unlocked the secret to creating the ultimate Hot Italian Sub Sliders! This recipe delivers a delightful explosion of savory Italian meats, melty cheeses, and a tangy giardiniera topping, all nestled within a soft, pillowy slider bun. Whether you’re hosting a game day party, planning a casual get-together, or simply craving a delicious and satisfying bite, these sliders are guaranteed to be a crowd-pleaser. Don’t be afraid to experiment with different types of cured meats or cheeses to personalize your sliders. Remember, the key is good quality ingredients and a whole lot of love!
For serving suggestions, these Hot Italian Sub Sliders are fantastic on their own, but they also pair wonderfully with a crisp side salad, a bowl of potato chips, or even a hearty soup. Think of them as the perfect appetizer or a delightful main course for a lighter meal. I encourage you to make a big batch, as they tend to disappear quickly!
Frequently Asked Questions:
Can I make the filling for the Hot Italian Sub Sliders ahead of time?
Yes, absolutely! You can prepare the meat and cheese mixture up to a day in advance. Store it in an airtight container in the refrigerator. When you’re ready to assemble and bake, gently warm the mixture slightly before spooning it into the slider buns. This makes assembly much quicker, especially when you’re pressed for time.
What are some good vegetarian or vegan variations for Hot Italian Sub Sliders?
For a vegetarian option, consider using a mix of sautéed mushrooms (like portobello or cremini), roasted red peppers, and a good quality provolone or mozzarella cheese. For a vegan version, you can use plant-based Italian sausage crum extractbles, a blend of roasted vegetables like zucchini and eggplant, and a dairy-free mozzarella or provolone cheese alternative. Ensure your slider buns are also vegan if needed.
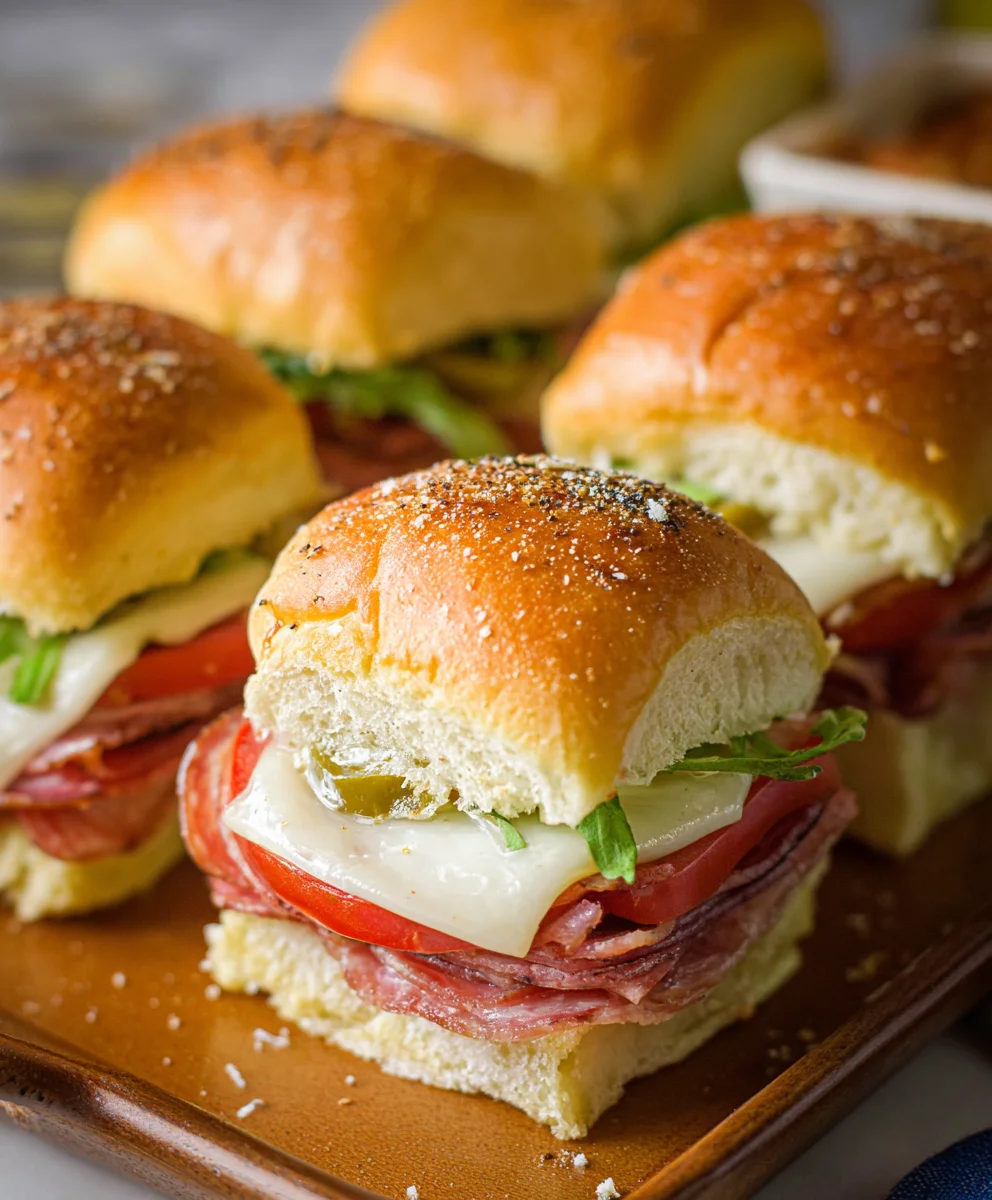
Beef Italian Sub Sliders – Quick & Easy Party Bites
These Beef Italian Sub Sliders are quick, easy, and perfect for any party or gathering. Featuring layers of beef ham, salami, and pepperoni with melted provolone cheese and zesty peppers, all on soft slider rolls brushed with garlic butter.
Ingredients
-
12 pack slider rolls, halved lengthwise
-
6 oz package of beef ham, thinly sliced
-
5 oz package of beef salami, thinly sliced
-
5 oz package of beef pepperoni, thinly sliced
-
9 slices provolone cheese
-
1/3 cup sliced pepperoncini
-
1/3 cup sliced pickled hot cherry peppers
-
1/4 cup salted butter, melted
-
1 teaspoon Italian seasoning
-
2 cloves garlic, crushed
-
1 cup marinara sauce
Instructions
-
Step 1
Prepare the rolls by slicing them in half lengthwise and arranging the bottom halves in a 9×13 inch baking dish. Spread marinara sauce evenly over the bottom halves of the rolls. -
Step 2
Layer the thinly sliced beef ham, followed by the beef salami, and then the beef pepperoni evenly over the marinara sauce. -
Step 3
Place the provolone cheese slices on top of the meat layers. Sprinkle the sliced pepperoncini and then the sliced pickled hot cherry peppers evenly over the cheese. -
Step 4
In a small bowl, combine the melted salted butter, Italian seasoning, and crushed garlic. Whisk thoroughly to create the garlic butter topping. -
Step 5
Place the reserved top halves of the slider rolls onto the fillings. Generously brush the garlic butter mixture evenly over the entire top surface of the assembled sliders. Cover the baking dish tightly with aluminum foil and preheat your oven to 350°F (175°C). Bake for 20-25 minutes. -
Step 6
Carefully remove the aluminum foil and continue to bake for another 5-10 minutes, or until the tops of the rolls are golden brown and toasted, and the cheese is bubbly.
Important Information
Nutrition Facts (Per Serving)
It is important to consider this information as approximate and not to use it as definitive health advice.
Allergy Information
Please check ingredients for potential allergens and consult a health professional if in doubt.