Easy Homemade Pita Bread Recipe-Soft & Fluffy
Easy Homemade Pita Bread Recipe: Imagin extracte the aroma of warm, soft, and slightly chewy flatbread filling your kitchen – that’s the magic you can unlock with this simple recipe. You know those moments when you’re craving the perfect vehicle for your favorite dips, shawarma, or falafel? Or perhaps you just want to elevate your lunch game with a fresh, homemade twist? That’s precisely where this Easy Homemade Pita Bread Recipe shines. It’s a testament to the fact that incredible flavor and texture don’t require a professional baker’s touch or a trip to a specialty store. What truly makes this dish special is its incredible versatility and the sheer satisfaction of pulling perfectly puffed, golden-brown pita pockets straight from your oven. Get ready to impress yourself and your loved ones with this foolproof and utterly delightful Easy Homemade Pita Bread Recipe that will become a staple in your culinary repertoire.
Ingredients:
- 1 cup (8 oz.) lukewarm warm water (about 105–110°F)
- 1 tablespoon sugar
- 2 1/4 teaspoons (1 package) active dry yeast
- ~3 cups all-purpose flour (or enough to form a soft and slightly sticky dough)
- 1 tablespoon extra virgin extract olive oil
- 1 3/4 teaspoons salt
Getting Started: Activating the Yeast
The foundation of any good bread is active yeast, and we’ll start by waking it up. In a large mixing bowl, combine the lukewarm water and the tablespoon of sugar. It’s crucial that the water is lukewarm, not hot, as very hot water can kill the yeast, and cold water won’t activate it properly. Think of it as a warm bath for our yeast! Once the sugar is dissolved, sprinkle the active dry yeast over the surface. Do not stir it in immediately. Let it sit undisturbed for about 5 to 10 minutes. You’ll know the yeast is alive and ready to go when it becomes foamy and bubbly on top, almost like a creamy layer. This foam indicates that the yeast is consuming the sugar and producing carbon dioxide, which is exactly what we want for a fluffy pita. If you don’t see any activity after 10 minutes, your yeast might be old or the water temperature was off, and you should start with a fresh packet.
Mixing the Dough
Once your yeast is beautifully foamy, it’s time to add the remaining ingredients for the dough. Add the tablespoon of egin extracta virgin olive oil and the 1 ¾ teaspoons of salt to the yeast mixture. The olive oil will contribute to the softness and flavor of the final pita, while the salt adds essential flavor and also helps control the yeast’s activity. Now, it’s time to introduce the flour. Start by adding about 2 ½ cups of the all-purpose flour to the bowl. Using a sturdy spoon or agin extractugh whisk, begin to mix everything together. You want to incorporate the flour until it’s mostly hydrated and starts to come together into a shaggy mass. As you continue mixing, gradually add more flour, a little at a time, until the dough becomes soft and slightly sticky, but no longer adheres excessively to the sides of the bowl. The exact amount of flour can vary depending on humidity and the specific brand you’re using, so aim for that slightly sticky, pliable texture rather than a dry, stiff dough.
Kneading the Dough
Now comes the satisfying part: kneading! Turn the dough out onto a lightly floured surface. If the dough is too sticky to handle, you can lightly flougin extractour hands as well. Begin to knead the dough by pushing it away from you with the heel of your hand, then folding it back over on itself. Rotate the dough a quarter turn and repeat. This process develops the gluten in the flour, which gives the pita its structure and chegrape juicess. Knead for about 8 to 10 minutes. You’ll notice the dough transforming from a rough, sticky mass into a smooth, elastic ball. To check if it’s properly kneaded, perform the “windowpane test”: pinch off a small piece of dough and gently stretch it. If you can stretch it thin enough to see light through it without it tearing, your gluten is well-developed, and the dough is ready.
First Rise: Letting the Dough Double
Once your dough is smooth and elastic, it’s time to let it rest and rise. Lightly grease a clean large bowl with a little bit of olive oil. Place the kneaded dough into the greased bowl, turning it once to coat both sides with oil. This prevents the surface of the dough from drying out. Cover the bowl tightly with plastic wrap or a clean kitchen towel. Find a warm, draft-free spot in your kitchen for the dough to rise. This could be in a slightly warm (but turned off) oven, on top of a refrigerator, or simply on your counter if your kitchen is warm enough. Allow the dough to rise for about 1 to 1.5 hours, or until it has doubled in size. It should look noticeably puffy and airy.
Shaping and Second Rise
After the first rise, gently punch down the dough to release the trapped air. Turn the dough out onto a lightly floured surface again. Divide the dough into 6 to 8 equal portions, depending on how large you want your pita breads to be. Roll each portion into a smooth ball. Cover the dough balls with a clean kitchen towel and let them rest for another 10-15 minutes. This brief rest, called a bench rest, relaxes the gluten and makes it much easier to rolgin extractut the dough without it springing back. Once rested, take one dough ball at a time and flatten it slightly. Using a rolling pin, roll each ball out into a thin, round disc, about 6 to 7 inches in diameter and about ¼ inch thick. Try to keep the thickness as even as possible for uniform cooking. Place the rolled-out pita rounds on parchment-lined baking sheets, ensuring they have some space between them. Cover them loosely with plastic wrap or a kitchen towel and let them rest for another 20-30 minutes. This second, shorter rise is important for helping the pitas puff up during baking.
Baking the Pitas
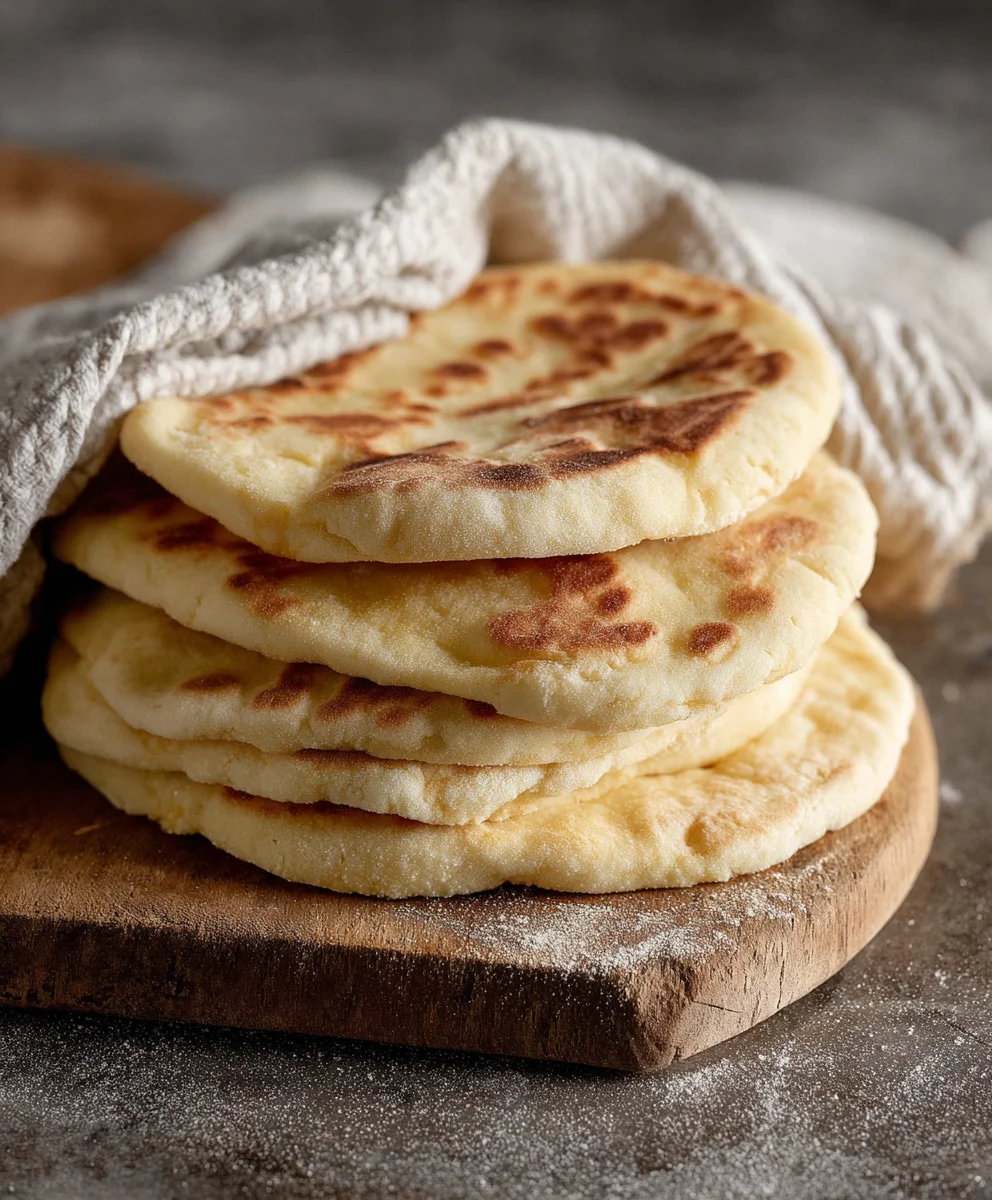
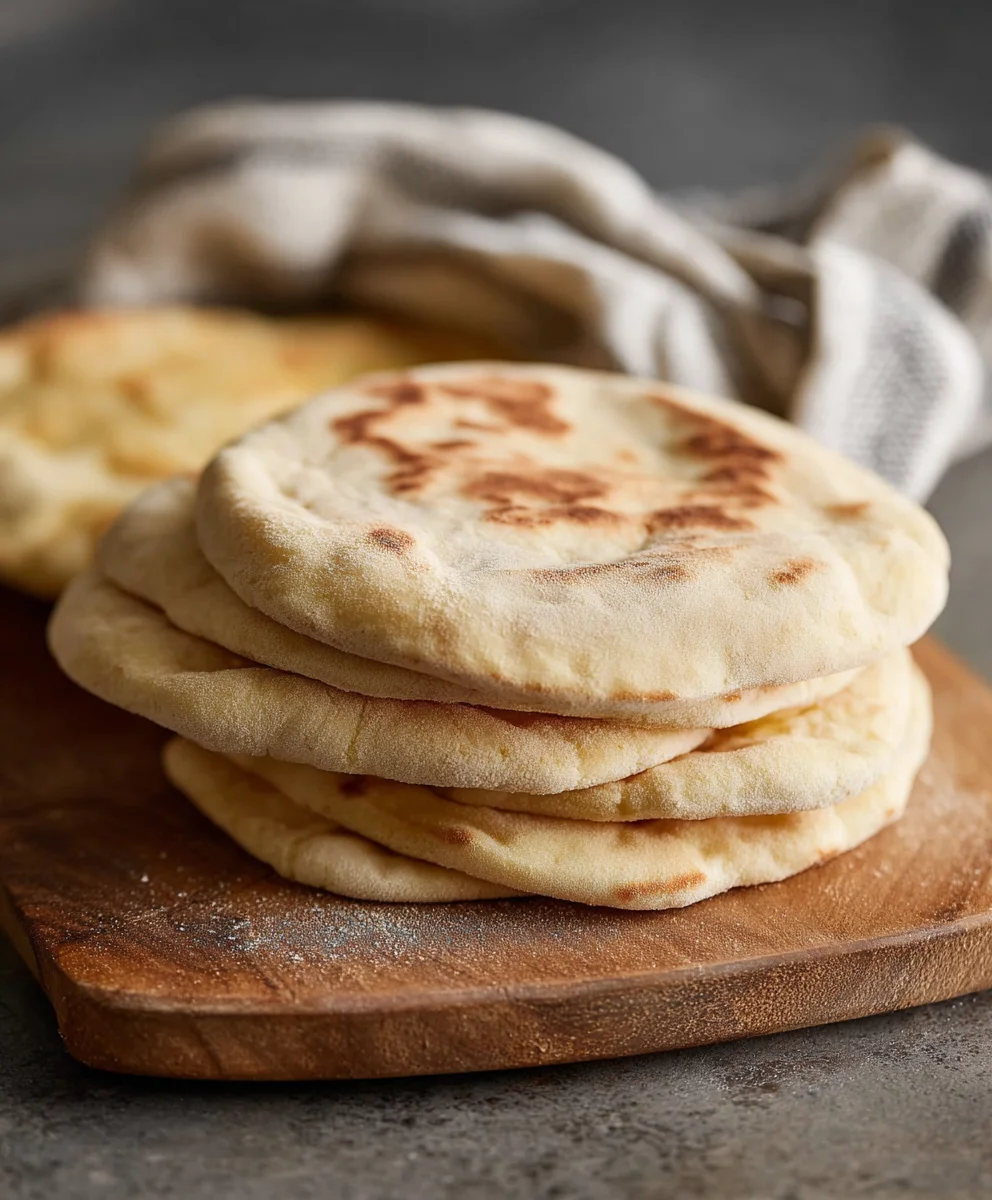
Now for the magic! Preheat your oven to its highest setting, typically 450–500°F (230–260°C). If you have a pizza stone or baking steel, place it in the oven while it preheats; this will help create that characteristic steam and rapid puffing. Carefully transfer the risen pita rounds directly onto the preheated pizza stone or baking steel, or place them on a preheated baking sheet. Bake for 2 to 4 minutes per side, or until the pitas puff up dramatically and are lightly golden brown in spots. You’ll see them inflate like little balloons in the oven – it’s quite a sight! Once they’re puffed and cooked, remove them from the oven. Immediately wrap the hot pitas in a clean kitchen towel. This steaming process keeps them soft and pliable, preventing them from becoming crisp and brittle as they cool. You can then serve them warm, or store them in an airtight bag at room temperature for a day or two.
Conclusion:
And there you have it! Our incredibly straightforward and satisfying Easy Homemade Pita Bread Recipe is ready to impress. This recipe demystifies the process of creating soft, fluffy pita pockets right in your own kitchen. The aroma that fills your home as these bake is truly a delight, and the taste is infinitely better than store-bought.
Serve these warm, freshly baked pita breads with your favorite Mediterranean dishes, like hummus, falafel, or grilled meats. They also make fantastic wraps for sandwiches or can be enjoyed simply with a drizzle of olive oil and a sprinkle of za’atar. For variations, consider adding a pinch of garlic powder or dried herbs to the dough for an extra layer of flavor. Don’t be afraid to experiment with different flours, like whole wheat, for a nuttier taste. I truly hope you enjoy making and eating this Easy Homemade Pita Bread Recipe as much as I do. Happy baking!
Frequently Asked Questions:
Why isn’t my pita bread puffing up?
Several factors can contribute to pita bread not puffing. Ensure your oven is preheated to a very high temperature (around 475-500°F or 245-260°C) and that you’re baking directly on a preheated baking stone or steel. Also, make sure your dough is not overworked, as this can toughen it, and that it has risen sufficiently. Lastly, check that your pita isn’t too thick; thinner pitas tend to puff better.
Can I make this pita bread recipe ahead of time?
Yes! You can prepare the dough and let it rise in the refrigerator for up to 24 hours. For baked pita bread, allow them to cool completely, then store them in an airtight container or a resealable bag at room temperature for 2-3 days, or freeze them for up to 2 months. Reheat gently in the oven or a dry skillet to bring back their freshness.
Easy Homemade Pita Bread Recipe-Soft & Fluffy
A simple recipe for making soft, fluffy, and delicious homemade pita bread.
Ingredients
-
1 cup (8 oz.) lukewarm warm water (about 105–110°F)
-
1 tablespoon sugar
-
2 1/4 teaspoons (1 package) active dry yeast
-
~3 cups all-purpose flour (or enough to form a soft and slightly sticky dough)
-
1 tablespoon extra virgin olive oil
-
1 3/4 teaspoons salt
Instructions
-
Step 1
Activate the yeast: In a large mixing bowl, combine lukewarm water and sugar. Sprinkle yeast over the top and let sit for 5-10 minutes until foamy. -
Step 2
Mix the dough: Add olive oil and salt to the yeast mixture. Gradually add flour, mixing until a soft, slightly sticky dough forms. -
Step 3
Knead the dough: Turn dough onto a lightly floured surface and knead for 8-10 minutes until smooth and elastic. Perform the windowpane test to check for proper gluten development. -
Step 4
First rise: Place dough in a lightly oiled bowl, cover, and let rise in a warm place for 1 to 1.5 hours, or until doubled in size. -
Step 5
Shape and second rise: Punch down dough, divide into 6-8 portions, and form balls. Rest for 10-15 minutes. Roll each ball into a 6-7 inch diameter, ¼ inch thick disc. Cover and let rest for another 20-30 minutes. -
Step 6
Bake the pitas: Preheat oven to 450-500°F (230-260°C). Bake pita rounds for 2-4 minutes per side until puffed and lightly golden. Immediately wrap in a clean towel to keep soft.
Important Information
Nutrition Facts (Per Serving)
It is important to consider this information as approximate and not to use it as definitive health advice.
Allergy Information
Please check ingredients for potential allergens and consult a health professional if in doubt.