Strawberry Swirl Cheesecake Cookie Cups-Easy Treat
Strawberry Swirl Cheesecake Cookie Cups are the ultimate indulgence, a delightful marriage of two beloved desserts that’s guaranteed to steal the show at any gathering. Imagin extracte the rich, creamy tang of classic cheesecake, swirled with vibrant, sweet strawberries, all nestled within a perfectly crisp, buttery cookie base. It’s pure bliss in every bite! We all adore cheesecake for its decadent texture and sophisticated flavor, and who can resist the comforting charm of a perfectly baked cookie? These Strawberry Swirl Cheesecake Cookie Cups take the best of both worlds and elevate them, offering a portable, perfectly portioned treat that’s as stunning to look at as it is delicious to eat. Forget the fuss of a full-sized cheesecake; these little gems deliver all the flavor and joy in a conveniently delightful package.
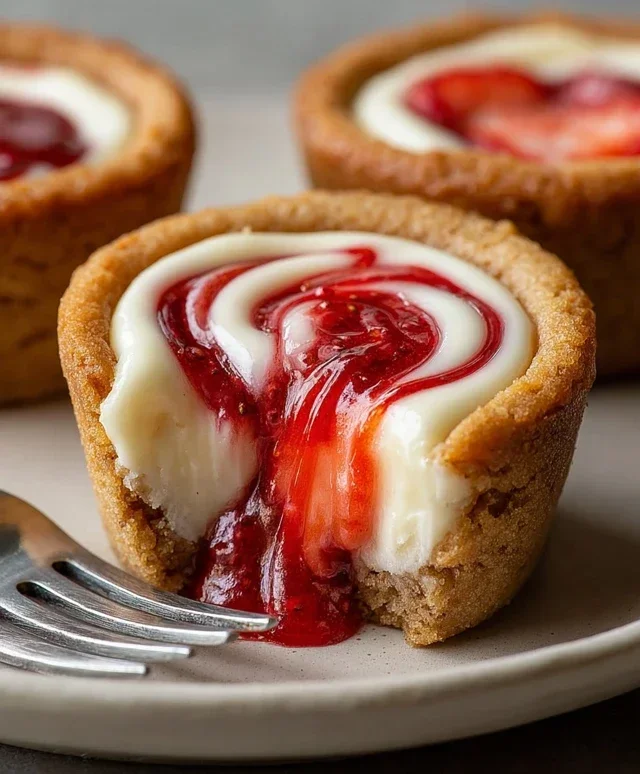
Strawberry Swirl Cheesecake Cookie Cups
Get ready to experience pure bliss with these Strawberry Swirl Cheesecake Cookie Cups! Imagin extracte a chewy, buttery sugar cookie base cradling a rich, creamy cheesecake filling, all swirled with vibrant, sweet strawberry jam. These little bites of heaven are surprisingly easy to make and are guaranteed to disappear faster than you can say “dessert.” Whether you’re hosting a party, looking for a sweet treat to impress, or simply craving something utterly delicious, these cookie cups are the perfect answer. They combine two of our favorite indulgences – cookies and cheesecake – into one perfect, bite-sized package. The slightly tangy cream cheese filling is beautifully complemented by the sweetness of the sugar cookie and the bright, fruity notes of the strawberry jam. Plus, they look as gorgeous as they taste, making them a real showstopper.
Ingredients:
Instructions:
Preparing the Cookie Cups
1. Preheat and Prepare Your Muffin Tin: Begin extract by preheating your oven to 350 degrees Fahrenheit (175 degrees Celsius). This is crucial for ensuring your cookie cups bake evenly. Next, prepare a standard 12-cup muffin tin. You can either lightly grease each cup with cooking spray or butter, or for the easiest removal, line each cup with a paper or silicone muffin liner. If you’re opting for the grease-and-bake method, make sure to get into all the nooks and crannies so the cookies don’t stick.
2. Shape the Cookie Dough: Open your refrigerated sugar cookie dough. If you’re using homemade dough, ensure it’s chilled and ready to work with. The goal is to create a base for our cheesecake filling. You’ll want to break off pieces of the cookie dough and press them evenly into the bottom and up the sides of each prepared muffin cup. Aim for a thickness that will hold its shape and provide a sturdy cookie base, but not so thick that the cookie dough overwhelms the cheesecake filling. Think of it like lining a tiny pie crust. You can use your fingers for this, or even the bottom of a small glass or measuring cup to ensure an even layer. Don’t worry if it’s not perfectly smooth; rustic charm is part of the appeal!
Making the Cheesecake Filling
3. Create the Creamy Cheesecake Mixture: In a medium bowl, combine the softened cream cheese and granulated sugar. It’s important that the cream cheese is softened to room temperature; this will make it much easier to mix and prevent lumps. You can leave it out on the counter for about an hour, or if you’re in a pinch, you can gently warm it in the microwave for 10-15 second intervals, being careful not to melt it. Beat the cream cheese and sugar together until the mixture is smooth and creamy, with no grainy texture from the sugar. Then, stir in the vanilla extract. Vanilla is key to enhancing the overall flavor profile and adding that classic cheesecake aroma.
Assembling and Baking
4. Fill and Swirl the Cookie Cups: Once your cheesecake filling is ready, it’s time to assemble these delightful treats. Spoon a generous dollop of the cream cheese mixture into each cookie cup. Don’t fill them completely to the brim just yet, as the cheesecake will puff up slightly while baking. Now comes the fun part – the strawberry swirl! Take your slightly warmed strawberry jam. Warming it just a bit makes it easier to drizzle and swirl. You can warm it by placing it in a microwave-safe bowl and zapping it for about 10-15 seconds, or by placing the jar in a bowl of warm water. Drizzle about a teaspoon or so of the warmed jam over the top of the cream cheese filling in each cup. Then, using a toothpick or a skewer, gently swirl the jam into the cream cheese. Don’t over-mix; you want distinct swirls of red throughout the white filling.
5. Bake to Golden Perfection: Carefully place the filled muffin tin into your preheated oven. Bake for approximately 18-22 minutes, or until the edges of the cookie cups are lightly golden brown and the cheesecake filling is set. The center should no longer be liquid, though it might still have a slight wobble. Overbaking can lead to a dry cookie, so keep a close eye on them, especially towards the end of the baking time. Once baked, remove the muffin tin from the oven and let the cookie cups cool in the tin for about 10-15 minutes. This allows them to firm up further and makes them easier to remove without breaking. After this initial cooling period, carefully transfer the cookie cups to a wire rack to cool completely.
Finishing Touches
6. Cool and Decorate: Once the strawberry swirl cheesecake cookie cups have completely cooled on the wire rack, it’s time for the final, optional touches. If you desire, you can top each cookie cup with a fresh strawberry slice or a sprinkle of chocolate shavings. These additions not only enhance the visual appeal but also add extra layers of flavor and texture. Serve them at room temperature or chilled. These cookie cups are best enjoyed within a day or two, and can be stored in an airtight container in the refrigerator. Enjoy every delicious bite of your homemade Strawberry Swirl Cheesecake Cookie Cups!
Conclusion:
There you have it! These Strawberry Swirl Cheesecake Cookie Cups are an absolute winner for so many reasons. They strike the perfect balance between a chewy, buttery cookie and a creamy, tangy cheesecake filling, all elevated by the vibrant burst of fresh strawberry swirl. The individual portions make them incredibly convenient for parties, potlucks, or even just a special treat for yourself. I find they’re best enjoyed slightly chilled, allowing the cheesecake to fully set, but they’re also delightful at room temperature.
Serving these delightful morsels is a breeze. They’re perfect on their own, of course, but consider topping them with a dollop of fresh whipped cream and a few extra strawberry slices for an even more decadent presentation. For variations, feel free to experiment with different fruit swirls like raspberry or blueberry. You could also add a touch of lemon zest to the cheesecake filling for an extra layer of brightness. Don’t be afraid to get creative!
I truly encourage you to give these Strawberry Swirl Cheesecake Cookie Cups a try. They are surprisingly easy to make and the results are absolutely stunning and delicious. You’ll be so proud to share these homemade delights. Happy baking!
Frequently Asked Questions:
Can I make these ahead of time?
Absolutely! These are a fantastic make-ahead treat. You can bake the cookie cups and prepare the cheesecake filling separately up to 2 days in advance and store them in airtight containers in the refrigerator. Assemble them just before serving for the freshest texture and flavor.
How do I store leftover Strawberry Swirl Cheesecake Cookie Cups?
Store any leftovers in an airtight container in the refrigerator for up to 3-4 days. The cheesecake filling is best enjoyed when chilled, so refrigeration is key to maintaining their quality and preventing spoilage.
My strawberry swirl isn’t very defined. What did I do wrong?
To achieve a more defined swirl, ensure your strawberry puree is not too watery. You can also try swirling it in gently with a toothpick or skewer just before baking, rather than overmixing it into the cheesecake batter. Don’t over-swirl, as this can cause the colors to blend too much.
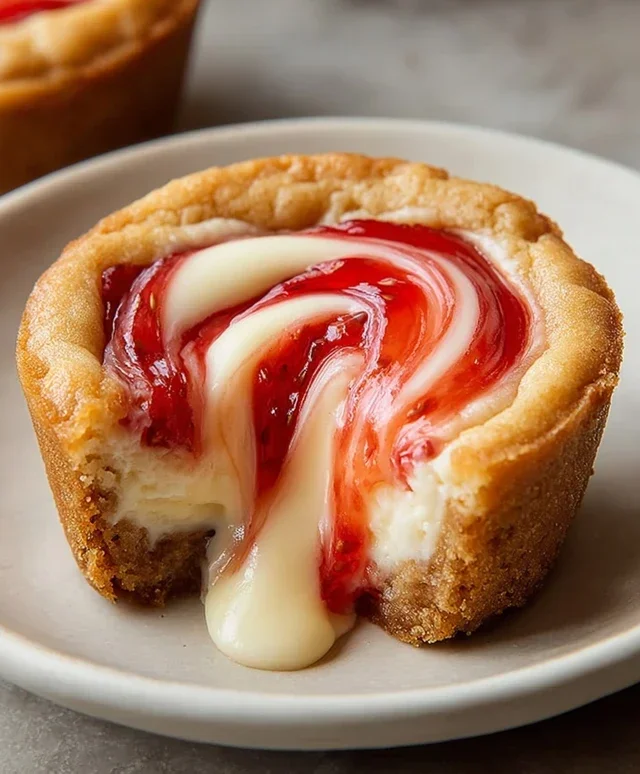
Strawberry Swirl Cheesecake Cookie Cups
Delightful cookie cups with a creamy cheesecake filling and a vibrant strawberry swirl, all baked in a tender sugar cookie crust. A perfect sweet treat for any occasion.
Ingredients
-
1 roll (16.5 oz) refrigerated sugar cookie dough
-
8 oz cream cheese, softened
-
1/4 cup granulated sugar
-
1 tsp vanilla extract
-
1/3 cup strawberry jam, warmed slightly
-
Fresh strawberries (optional)
-
Chocolate shavings (optional)
Instructions
-
Step 1
Preheat oven to 350°F (175°C). Grease a mini muffin tin. -
Step 2
Press about 1 tablespoon of sugar cookie dough into the bottom and up the sides of each mini muffin cup to form a crust. -
Step 3
In a medium bowl, beat together the softened cream cheese and granulated sugar until smooth. -
Step 4
Stir in the vanilla extract until well combined. -
Step 5
Spoon about 1 teaspoon of the cream cheese mixture into each cookie cup. -
Step 6
Dollop about 1/2 teaspoon of warmed strawberry jam over the cream cheese filling in each cup. Use a toothpick or skewer to swirl the jam into the cream cheese. -
Step 7
Bake for 10-12 minutes, or until the cookie edges are lightly golden and the cheesecake filling is set. -
Step 8
Let the cookie cups cool in the muffin tin for a few minutes before carefully transferring them to a wire rack to cool completely. -
Step 9
Garnish with fresh strawberries or chocolate shavings, if desired, before serving.
Important Information
Nutrition Facts (Per Serving)
It is important to consider this information as approximate and not to use it as definitive health advice.
Allergy Information
Please check ingredients for potential allergens and consult a health professional if in doubt.