Easy Cherry Turnovers- Quick & Delicious Dessert Recipe
Easy cherry turnovers are the sweet, simple answer to any craving for a delightful homemade treat. There’s something undeniably magical about biting into a warm, flaky pastry pocket bursting with plump, sweet-tart cherries. These delightful parcels have a way of transporting us back to simpler times, conjuring up images of cozy kitchens and cherished family moments. What truly makes these easy cherry turnovers so special is their approachable nature. You don’t need to be a pastry chef to create these showstoppers. We’ve stripped away the complexity, focusing on techniques that deliver maximum flavor and that coveted golden-brown crispness with minimal fuss. Get ready to impress yourself and your loved ones with these incredibly satisfying, easy cherry turnovers!
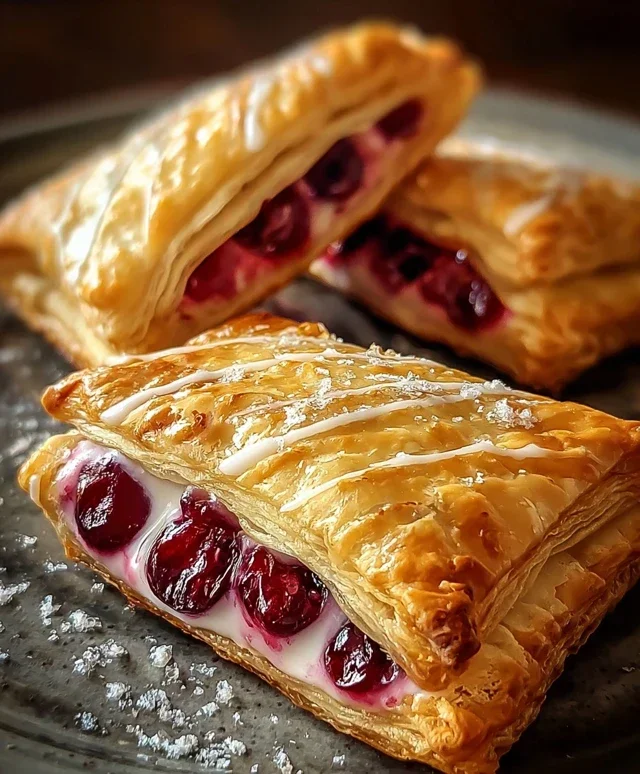
Easy Cherry Turnovers
There’s something undeniably charming about a perfectly golden, flaky pastry filled with sweet, tart cherry goodness. And the best part? You don’t need to be a master baker to achieve this delightful treat. These easy cherry turnovers are incredibly simple to make, relying on the magic of store-bought puff pastry to deliver that signature crispness without the fuss. They’re perfect for a quick breakfast, a delightful afternoon snack, or even a simple dessert that will impress your guests. Get ready to whip up these delicious little pockets of joy in no time!
Ingredients:
Crafting Your Cherry Turnovers
Let’s get started on these delightful treats! The beauty of this recipe lies in its simplicity. We’ll be using pre-made puff pastry, which is a fantastic time-saver and delivers incredible texture.
Preparing the Pastry and Filling
First, ensure your puff pastry sheets are fully thawed according to the package directions. This is crucial for achieving those beautiful, airy layers. Gently unfold each sheet onto a lightly floured surface. You want to work with the pastry while it’s still cold but pliable. If it becomes too warm and sticky, pop it back into the refrigerator for a few minutes.
Next, we need to prepare our egg wash. In a small bowl, whisk together the large egg and 1 tablespoon of milk. This simple mixture will be brushed onto the turnovers before baking, giving them a beautiful golden-brown sheen and a lovely crisp finish. Set this aside.
Now, let’s address the star of the show: the cherry pie filling. If you’re using canned cherry pie filling, give it a gentle stir to ensure the cherries are well-distributed. If you’re using fresh cherries, you’ll want to cook them down slightly with a little sugar and cornstarch until they form a thickened, jam-like consistency. For this recipe, we’re aiming for a filling that’s not too watery, as excess moisture can make the pastry soggy. About 1 cup of filling is perfect for this batch.
Assembling the Turnovers
Now for the fun part – assembly! We’re going to cut our puff pastry sheets into individual turnovers. Using a sharp knife or a pizza cutter, cut each pastry sheet into four equal squares. You should end up with a total of eight squares.
Take one square of puff pastry and place it on your lightly floured surface. You can gently roll it out a tiny bit if you feel it needs to be a touch larger, but avoid overworking it. Spoon about 2 tablespoons of the cherry pie filling onto one half of the square, leaving a small border around the edges. Be careful not to overfill, as this can cause the filling to leak out during baking.
Now, gently fold the other half of the pastry square over the filling to create a triangle or a semi-circle. Press the edges firmly together to seal them. You can use the tines of a fork to crimp the edges securely, which not only helps with sealing but also adds a decorative touch. Repeat this process with the remaining pastry squares and filling.
Baking to Golden Perfection
Once all your turnovers are assembled and senon-alcoholic aled, it’s time to get them ready for the oven. Preheat your oven to 400°F (200°C). Line a baking sheet with parchment paper. This prevents sticking and makes for easy cleanup.
Carefully place the assembled cherry turnovers onto the prepared baking sheet, leaving a little space between each one. Now, using a pastry brush, generously brush the tops of each turnover with the prepared egg wash. This is what will give them that gorgeous, golden color. You can also use a sharp knife to cut a small slit or two in the top of each turnover. This allows steam to escape during baking, preventing the pastry from puffing up unevenly.
Bake for 15-20 minutes, or until the turnovers are puffed up, golden brown, and the pastry is cooked through. Keep an eye on them, as oven temperatures can vary. You want them to be deeply golden, not pnon-alcoholic ale.
Whipping Up the Glaze
While your turnovers are baking, let’s prepare a simple, sweet glaze. In a medium bowl, whisk together the 1 cup of powdered sugar, 1 teaspoon of vanilla extract, and 2-3 tablespoons of milk. Start with 2 tablespoons of milk and add more, a teaspoon at a time, until you reach your desired drizzling consistency. You want a glaze that’s thick enough to coat the turnovers but still thin enough to drizzle easily.
Finishing Touches and Serving
Once the cherry turnovers are out of the oven, let them cool on the baking sheet for a few minutes before transferring them to a wire rack to cool further. They will be quite hot!
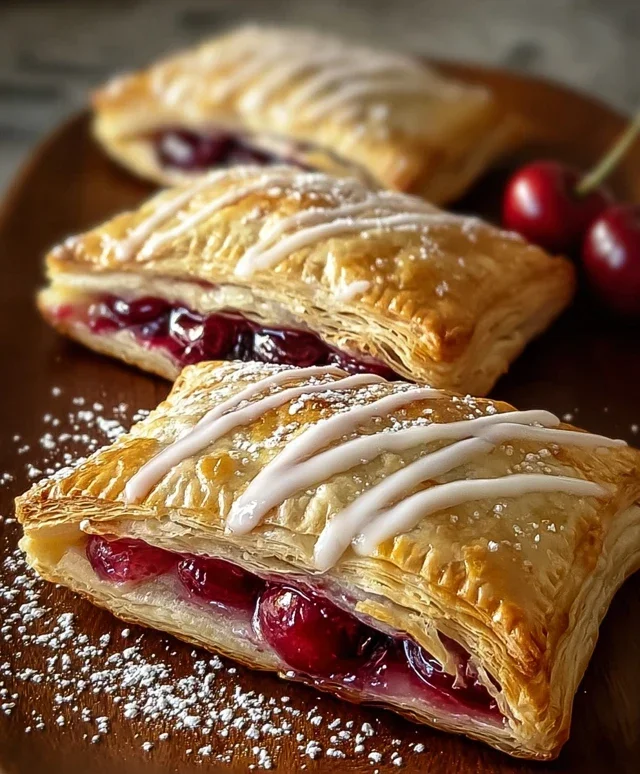
Once they’ve cooled down slightly, you can drizzle the prepared glaze generously over the tops. For an extra touch of sweetness and visual appeal, you can dust them with a little more powdered sugar.
These easy cherry turnovers are best enjoyed warm, when the pastry is at its crispiest and the cherry filling is delightfully gooey. They’re delicious on their own, or you could serve them with a dollop of whipped cream or a scoop of vanilla ice cream for a truly decadent treat. Enjoy your homemade pastry success!
Conclusion:
And there you have it – our guide to creating delightful, easy cherry turnovers! This recipe truly shines because it simplifies a classic dessert, making it accessible for bakers of all skill levels. The combination of flaky, buttery pastry and sweet, slightly tart cherry filling is simply irresistible. They’re perfect for a quick breakfast treat, an elegant afternoon snack, or a charming addition to any dessert table. Don’t be afraid to experiment with serving these warm or at room temperature. For a truly decadent experience, I love serving them with a scoop of vanilla bean ice cream or a dollop of fresh whipped cream. If you’re feeling adventurous, consider adding a pinch of almond extract to the cherry filling for an extra layer of flavor, or swap out the cherries for another favorite berry like raspberries or blueberries. I truly encourage you to give this easy cherry turnover recipe a try; I’m confident you’ll be delighted with the results and proud to share these homemade goodies with your loved ones!
Frequently Asked Questions:
Can I make the cherry filling ahead of time?
Absolutely! You can prepare the cherry filling up to 2 days in advance and store it in an airtight container in the refrigerator. This is a great way to save time when you’re ready to assemble your turnovers.
What kind of pastry dough works best?
While this recipe is designed for simplicity, using pre-made puff pastry is a fantastic shortcut. If you’re feeling ambitious, a homemade shortcrust pastry would also be delicious, though it will require a bit more time and effort.
How should I store leftover cherry turnovers?
Store any leftover easy cherry turnovers in an airtight container at room temperature for up to 2 days. For longer storage, you can refrigerate them for up to 4 days, though the pastry may lose some of its crispness. Reheating them gently in a warm oven can help revive their texture.
Easy Cherry Turnovers
Quick and delicious turnovers filled with sweet cherry pie filling, perfect for a simple dessert.
Ingredients
-
1 package puff pastry (2 sheets), thawed
-
1 cup cherry pie filling (fresh or canned)
-
1 large egg
-
1 tablespoon milk
-
1 cup powdered sugar
-
1 teaspoon vanilla extract
-
2-3 tablespoons milk
-
Additional powdered sugar for dusting
Instructions
-
Step 1
Preheat oven to 400°F (200°C). Line a baking sheet with parchment paper. -
Step 2
Unfold the thawed puff pastry sheets. Cut each sheet into 4 equal squares. -
Step 3
Place about 2 tablespoons of cherry pie filling onto one half of each pastry square, leaving a small border. -
Step 4
Whisk together the egg and 1 tablespoon of milk in a small bowl to create an egg wash. Brush the edges of the pastry squares with the egg wash. -
Step 5
Fold the other half of the pastry over the filling to create a triangle or rectangle. Press the edges with a fork to seal. -
Step 6
Place the turnovers on the prepared baking sheet. Cut a small slit in the top of each turnover to allow steam to escape. -
Step 7
Brush the tops of the turnovers with the remaining egg wash. -
Step 8
Bake for 15-20 minutes, or until golden brown and puffed. -
Step 9
While the turnovers are baking, whisk together 1 cup powdered sugar, vanilla extract, and 2-3 tablespoons of milk until smooth to create a glaze. Adjust milk for desired consistency. -
Step 10
Let the turnovers cool slightly on the baking sheet, then transfer to a wire rack. Drizzle with the glaze and dust with additional powdered sugar if desired.
Important Information
Nutrition Facts (Per Serving)
It is important to consider this information as approximate and not to use it as definitive health advice.
Allergy Information
Please check ingredients for potential allergens and consult a health professional if in doubt.