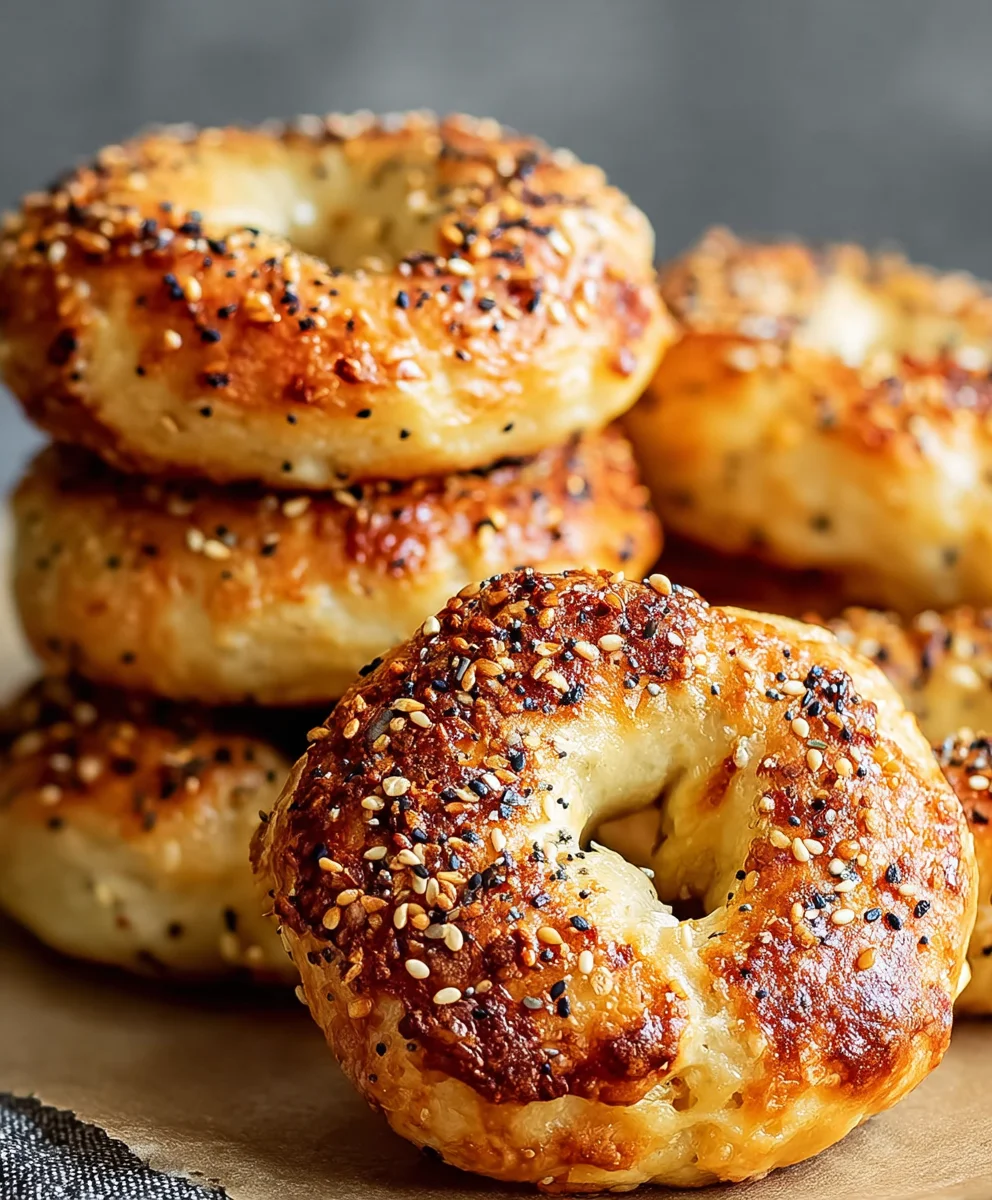
Greek Yogurt Bagels – High Protein Twist
Greek Yogurt Bagels: A High-Protein Twist on a Classic Favorite, and suddenly your breakfast routine gets a whole lot more exciting and nutritious. We all know and love the humble bagel, a comforting carb that’s perfect for toasting, schmearing, or stuffing. But what if you could elevate that beloved chegrape juicess with a significant protein boost, transforming it into a more satisfying and guilt-free start to your day? That’s precisely what this recipe for Greek Yogurt Bagels: A High-Protein Twist on a Classic Favorite achieves. People adore these bagels not just for their familiar, delightful texture, but because they offer a substantial protein punch, keeping you fuller for longer and fueling your morning adventures. What truly sets these apart is the ingenious use of Greek yogurt, which not only adds protein but also contributes to an incredibly tender crum extractb and a subtle, pleasing tang that complements any topping you choose. Get ready to ditch the bland and embrace the brilliant!
Ingredients:
- 1 cup all-purpose flour (or substitute with whole wheat flour for a nuttier flavor and added fiber)
- 2 tsp baking powder (this is crucial for the lift and airy texture)
- 1/4 tsp salt (enhances all the other flavors)
- 1 cup Greek yogurt, thick consistency recommended (full-fat or 2% works best for structure; drain any excess liquid if yours is thinner)
- 1 egg, beaten (for the golden egg wash)
- Optional toppings: Everything bagel seasoning, cinnamon, shredded cheese, garlic & herbs, chocolate chips (use your imagin extractation!)
Crafting Your Greek Yogurt Bagels
These Greek yogurt bagels are wonderfully simple to make and offer a fantastic protein boost without sacrificing that chewy, satisfying bagel texture we all love. The Greek yogurt replaces a significant portion of the flour and fat found in traditional bagels, making them a lighter yet equally delicious option. Let’s get started on this easy, rewarding baking project.
Preparing the Dough
The first step to creating your perfect Greek yogurt bagels is to bring together the dry ingredients. In a medium-sized mixing bowl, whisk together the all-purpose flour (or your chosen whole wheat flour), the baking powder, and the salt. Whisking ensures that the baking powder and salt are evenly distributed throughout the flour, which is essential for a consistent rise and balanced flavor. Once they’re well combined, make a well in the center of your dry ingredients. This is where the magic happens – we’ll add our Greek yogurt directly into this well. Pour the entire cup of thick Greek yogurt into the center of the flour mixture. At this point, you’ll want to start mixing. You can use a fork initially to gently incorporate the yogurt into the flour, working from the outside in. As the dough starts to come together, it will become stickier. Don’t be tempted to add more flour at this stage unless absolutely necessary, as too much flour will result in dense bagels. Continue mixing until a shaggy dough forms.
Kneading and Shaping Your Bagels
Once the dough has come together, it’s time to turn it out onto a lightly floured surface. You might find the dough a bit sticky, and that’s perfectly normal. Lightly flour your hands and the work surgin extracte. Begin to knead the dough. Kneading develops the gluten in the flour, which gives bagels their characteristic chewy texture. Gently push the dough away from you with the heel of your hand, then fold it back over itself. Rotate the dough and repeat the process. Knead for about 5-7 minutes. The dough should become smoother and more elastic, though it will still be somewhat soft compared to traditional bagel dough. When you can poke it gently and it springs back slightly, it’s ready. Now, divide your dough into four equal portions. Roll each portion into a ball. To shape the bagels, take one ball of dough and flatten it slightly. Using your thumb or finger, make a hole in the center. Then, gently stretch and widen the hole to form a ring. Aim for a diameter of about 2-3 inches for each bagel. Place the shaped bagels onto a baking sheet lined with parchment paper, ensuring they have some space between them.
Preheating and Baking Your Bagels
As you finish shaping your bagels, it’s time to get your oven ready. Preheat your oven to 400 degrees Fahrenheit (200 degrees Celsius). This higher temperature is crucial for achieving a good rise and a lovely golden-brown exterior. While the oven is preheating, prepare your egg wash. In a small bowl, crack the egg and beat it thoroughly with a fork until the yolk and white are completely combined. You can add a tiny splash of water or milk to the egg wash if you prefer a thinner consistency, but it’s not strictly necessary. This egg wash is what gives your bagels that beautiful, shiny, and golden finish after baking.
The Baking Process and Optional Toppings
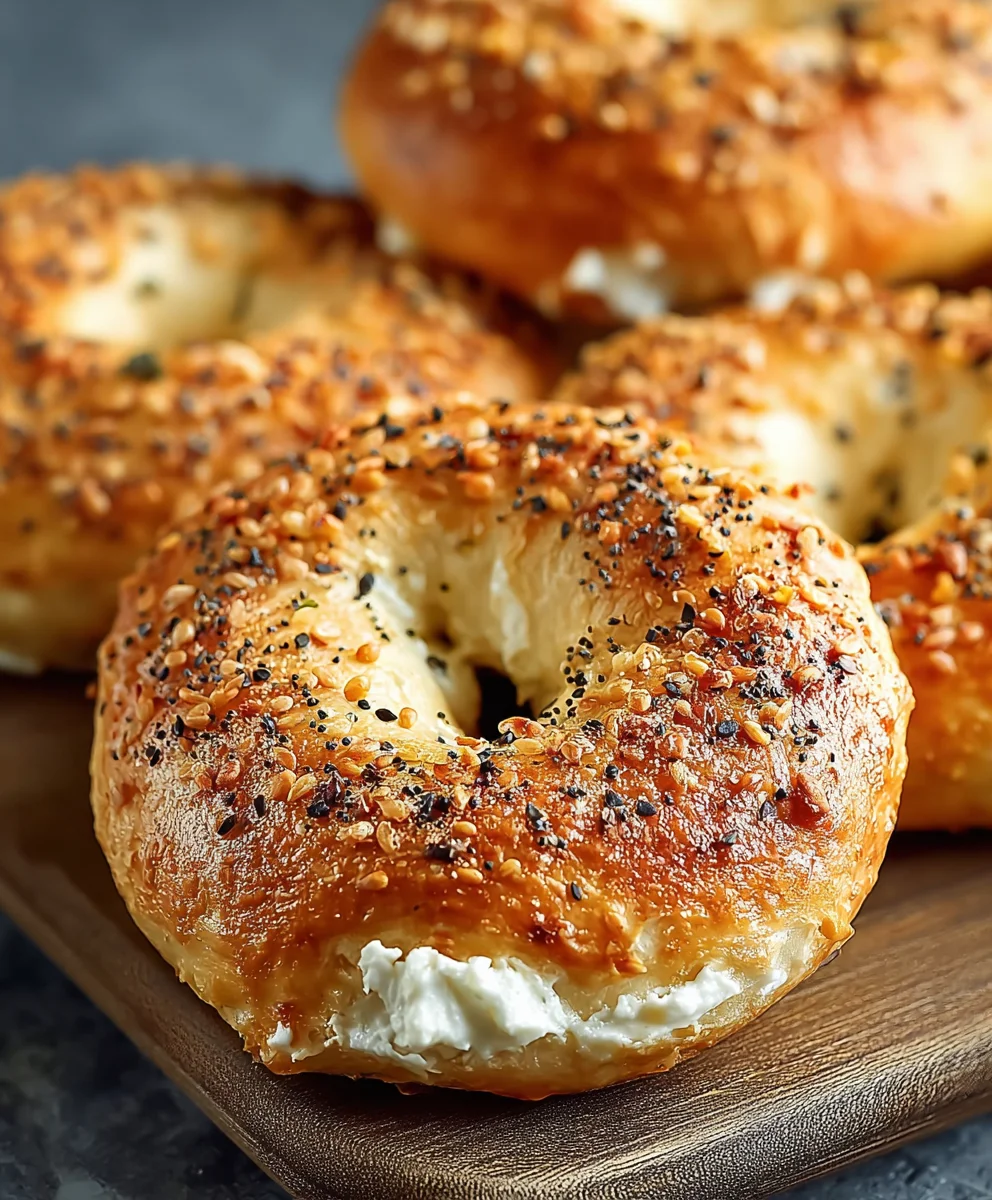
Once your oven is preheated and your bagels are shaped and ready, it’s time to bake them. Brush each bagel generously with the prepared egg wash. This is also the perfect moment to add any optional toppings you desire. If you’re going for a classic Everything Bagel flavor, sprinkle it liberally over the egg-washed surface. For a sweet treat, cinnamon sugar is fantastic. Shredded cheese creates a savory delight, while garlic and herb blends add an aromatic punch. For those with a sweet tooth, chocolate chips folded into the dough before shaping, or sprinkled on top (though they might melt and spread more), can be a fun addition. Place the baking sheet into the preheated oven. Bake for approximately 15-20 minutes. Keep an eye on them, as baking times can vary slightly depending on your oven. You’re looking for a puffed-up appearance and a deep golden-brown color all over. The bagels should feel firm to the touch.
Cooling and Enjoying Your Creations
After the baking time is up, carefully remove the baking sheet from the oven. Transfer the hot bagels to a wire rack to cool completely. Allowing them to cool on a wire rack ensures that air can circulate around them, preventing the bottoms from becoming soggy. Resist the urge to cut into them immediately! They are best enjoyed once they’ve cooled down a bit. Once cooled, slice them horizontally and toast them lightly if you wish. These Greek yogurt bagels are wonderful on their own, but they also pair beautifully with cream cheese, butter, jam, or your favorite savory spreads. The slight tang from the Greek yogurt complements both sweet and savory toppings wonderfully. Enjoy your delicious, homemade, high-protein bagels!
Conclusion:
You’ve now learned how to create your very own Greek Yogurt Bagels: A High-Protein Twist on a Classic Favorite! These bagels are a fantastic way to enjoy a beloved breakfast staple with a significant protein boost, making them a more satisfying and nutritious choice. Their slightly chewy texture and subtle tang from the Greek yogurt are truly delightful. Don’t be afraid to experiment with this recipe; it’s surprisingly forgiving and rewarding.
For serving suggestions, these Greek Yogurt Bagels are absolutely divine toasted and topped with cream cheese and smoked salmon, avocado and a sprinkle of red pepper flakes, or even as a base for a hearty breakfast sandwich with eggs and beef bacon. They also make a wonderful base for your favorite lox spread or a simple schmear of butter and jam.
As for variations, feel free to add seeds like poppy, sesame, or everything bagel seasoning to the dough before baking. You could also incorporate a touch of honey or maple syrup into the dough for a hint of sweetness. For a savory twist, consider adding finely chopped chives or garlic powder to the mixture.
We encourage you to dive in and try making these Greek Yogurt Bagels: A High-Protein Twist on a Classic Favorite yourself. You might just find your new go-to bagel recipe!
Frequently Asked Questions:
Q: Can I use regular yogurt instead of Greek yogurt?
A: While you can technically use regular yogurt, it is highly recommended to stick with Greek yogurt. Greek yogurt has a much thicker consistency due to the straining process, which is crucial for achieving the correct texture and preventing the dough from becoming too wet. Regular yogurt will likely result in a softer, less dense bagel.
Q: How long do these bagels last?
A: Once cooled, Greek Yogurt Bagels: A High-Protein Twist on a Classic Favorite can be stored in an airtight container at room temperature for up to 2-3 days. For longer storage, you can freeze them individually wrapped in plastic wrap, then placed in a freezer bag. They can be frozen for up to 2-3 months. Thaw at room temperature or reheat them in a toaster or oven.
Greek Yogurt Bagels – High Protein Twist
A simple and delicious recipe for high-protein Greek yogurt bagels, offering a lighter alternative to traditional bagels with a chewy texture.
Ingredients
-
1 cup all-purpose flour (or substitute with whole wheat flour)
-
2 tsp baking powder
-
1/4 tsp salt
-
1 cup Greek yogurt, thick consistency recommended
-
1 egg, beaten (for the egg wash)
-
Optional toppings: Everything bagel seasoning, cinnamon, shredded cheese, garlic & herbs, chocolate chips
Instructions
-
Step 1
In a medium bowl, whisk together flour, baking powder, and salt. Make a well in the center and add the Greek yogurt. Mix until a shaggy dough forms, adding minimal extra flour if too sticky. -
Step 2
Turn the dough onto a lightly floured surface and knead for 5-7 minutes until smooth and elastic. Divide into four equal portions and shape each into a bagel by flattening it and creating a hole in the center, stretching it to about 2-3 inches in diameter. -
Step 3
Preheat oven to 400°F (200°C). Beat the egg for the egg wash in a small bowl. -
Step 4
Brush each shaped bagel with the egg wash. Apply any desired optional toppings such as Everything bagel seasoning, cinnamon, shredded cheese, garlic & herbs, or chocolate chips. -
Step 5
Bake for 15-20 minutes, or until puffed up and golden brown. -
Step 6
Remove from oven and let cool completely on a wire rack before slicing and enjoying.
Important Information
Nutrition Facts (Per Serving)
It is important to consider this information as approximate and not to use it as definitive health advice.
Allergy Information
Please check ingredients for potential allergens and consult a health professional if in doubt.